
How to build your first PrestaShop module | The beginner's tutorial
PrestaShop is an efficient and innovative e-commerce solution with all the features you need to create an online store and grow your business. But what if you want to build some custom modules to show something on your website? Well, here comes the use of this article because you will learn how to build your first PrestaShop module which will display an iframe video from YouTube on your homepage.
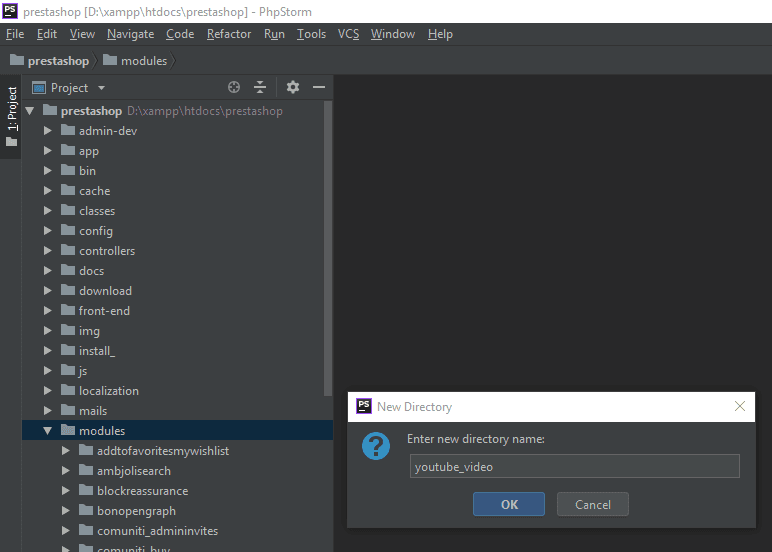
We need to create our module’s folder in the root of the folder called “modules”. This folder contains all the modules from the PrestaShop. Even the cart of the website and other basic modules can be found here.
Start by creating a new directory called “youtube_video”.
For this module, we will use PrestaShop v1.7.4.*
First, you have to make the first check to block the direct access to the php file and use the exit();
After that, you have to create your module’s class by giving the folder’s name with Camel Case. So, if your module’s folder name is youtube_video the class’s name will be Youbube_Video.
In your newly created class you have to create the __construct function (constructor) like in the below code. The constructor will have the basic info like the name of the module (will be just like your folder’s name), the version, author, version compliancy range, description, uninstall confirm message and display name for the PrestaShop’s BackOffice where you can install your new module. Sounds's good, right? we will get there soon.
<?php

if (!defined('_PS_VERSION_'))
    exit();

class Youtube_Video extends Module
{
    public function __construct()
    {
        $this->name = 'youtube_video';
        $this->tab = 'front_office_features';
        $this->version = '1.0.0';
        $this->author = 'Assist Software';
        $this->need_instance = 1;
        $this->ps_versions_compliancy = array('min' => '1.7.1.0', 'max' => _PS_VERSION_);
        $this->bootstrap = true;

        parent::__construct();

        $this->displayName = $this->l('YouTube Video', 'youtube_video');
        $this->description = $this->l('This module is developed to display an YouTube video.', 'youtube_video');

        $this->confirmUninstall = $this->l('Are you sure you want to uninstall?', 'youtube_video');
    }
- What is a Constructor in PHP?
Constructor was introduced in PHP5 and it is the right way to define your constructors (in PHP4 the name of the class was used for a constructor).
Now, it’s not required to define a constructor in your class, but if you wish to pass any parameters on object construction then you need one.
public function install()
{
    if (Shop::isFeatureActive())
        Shop::setContext(Shop::CONTEXT_ALL);

    return parent::install() &&
        $this->registerHook('displayHome') && Configuration::updateValue('youtube_video_url', 'wlsdMpnDBn8');
}

public function uninstall()
{
    if (!parent::uninstall() || !Configuration::deleteByName('youtube_video_url'))
        return false;
    return true;
}
- What is a Hook in PrestaShop?
- action<Something> (triggered by specific events that take place in PrestaShop)
- display<Something> (result in something being displayed, either in the front-end or the back-end)
public function hookDisplayHome($params)
{
    // < assign variables to template >
    $this->context->smarty->assign(
        array('youtube_url' => Configuration::get('youtube_video_url'))
    );
    return $this->display(__FILE__, 'youtube_video.tpl');
}
Remember the $this->registerHook('displayHome')? Now is time to use it in our module.
We registered ‘displayHome’ but to be able to use it we have to declare the function in the next format: if we have ‘displayHome’ the function’s name will be ‘hookDisplayHome’ (be careful with the text cases).
With this function, we can attach a template file called youtube_video.tpl and send variables to it using Smarty.
- What is Smarty?
Smarty is a template engine for PHP. More specifically, it facilitates a manageable way to separate application logic and content from its presentation. This is best described in a situation where the application programmer and the template designer play different roles, or in most cases are not the same people.
For example, we will send the variable called ‘youtube_url’ to our .tpl file. The variable’s value will be set using Configuration::get and the configuration name we used in the install function.
To create the template file, you will have to use the next structure in your module’s folder like in the screenshot we have below:
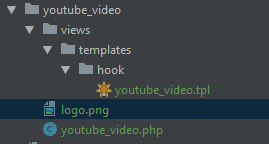
In the newly created youtube_video.tpl file you will use the YouTube’s iframe integration but using ‘youtube_url’ variable that was declared it the hookDisplayHome function. With Smarty, you can use the variable by writing it down like this {$youtube_url} in the .tpl file. After you do that, the module will display the iframe on the homepage with the given YouTube URL.
<div id="custom-text">
    <iframe width="560" height="315" src="https://www.youtube.com/embed/{$youtube_url}?rel=0" frameborder="0" allow="autoplay; encrypted-media" allowfullscreen></iframe>
</div>
So far so good, but if you want to be able to change the youtube URL from the module’s configuration page you have to write down some more code.
For generating the configuration form use the ‘displayForm’ function in the module.
public function displayForm()
{
    // < init fields for form array >
    $fields_form[0]['form'] = array(
        'legend' => array(
            'title' => $this->l('YouTube Module'),
        ),
        'input' => array(
            array(
                'type' => 'text',
                'label' => $this->l('URL of the YouTube video'),
                'name' => 'youtube_video_url',
                'lang' => true,
                'size' => 20,
                'required' => true
            ),
        ),
        'submit' => array(
            'title' => $this->l('Save'),
            'class' => 'btn btn-default pull-right'
        )
    );

    // < load helperForm >
    $helper = new HelperForm();

    // < module, token and currentIndex >
    $helper->module = $this;
    $helper->name_controller = $this->name;
    $helper->token = Tools::getAdminTokenLite('AdminModules');
    $helper->currentIndex = AdminController::$currentIndex.'&configure='.$this->name;

    // < title and toolbar >
    $helper->title = $this->displayName;
    $helper->show_toolbar = true;        // false -> remove toolbar
    $helper->toolbar_scroll = true;      // yes - > Toolbar is always visible on the top of the screen.
    $helper->submit_action = 'submit'.$this->name;
    $helper->toolbar_btn = array(
        'save' =>
            array(
                'desc' => $this->l('Save'),
                'href' => AdminController::$currentIndex.'&configure='.$this->name.'&save'.$this->name.
                    '&token='.Tools::getAdminTokenLite('AdminModules'),
            ),
        'back' => array(
            'href' => AdminController::$currentIndex.'&token='.Tools::getAdminTokenLite('AdminModules'),
            'desc' => $this->l('Back to list')
        )
    );

    // < load current value >
    $helper->fields_value['youtube_video_url'] = Configuration::get('youtube_video_url');

    return $helper->generateForm($fields_form);
}
From the above function, you have to understand the code because this is the code where the input you needed is created.
The form’s array contains the legend with the title, another array where you can create multiple inputs with a different type like text, password, email etc. For this module, you have to create just one field for the URL you need to edit. The name of the field is important so, declare it just as in the Configuration.
// < init fields for form array >
    $fields_form[0]['form'] = array(
        'legend' => array(
            'title' => $this->l('YouTube Module'),
        ),
        'input' => array(
            array(
                'type' => 'text',
                'label' => $this->l('URL of the YouTube video'),
                'name' => 'youtube_video_url',
                'size' => 20,
                'required' => true
            ),
        ),
        'submit' => array(
            'title' => $this->l('Save'),
            'class' => 'btn btn-default pull-right'
        )
    );
In the same mentioned function from above, at the end of it, you have this part of code. This one will be used to display the current value of the URL input and this way to know what was the previous value:
- $helper->fields_value['youtube_video_url'] will have the same name as the input name from above;
- we assign the value using the Configutation::get to get the current value of the youtube URL;
// < load current value >
$helper->fields_value['youtube_video_url'] = Configuration::get('youtube_video_url');
Now that you have the form in the module’s configuration page you need to save it somehow and getContent function will make it possible. This function will get the value of the input from the form generated with displayForm function. Using Tools::getValue(‘youtube_video_url), you will be able to get the value of the input from the submitted form.
Next, store it in the configuration variable with Configuration::updateValue.
public function getContent()
{
    $output = null;


    // < here we check if the form is submited for this module >
    if (Tools::isSubmit('submit'.$this->name)) {
        $youtube_url = strval(Tools::getValue('youtube_video_url'));

        // < make some validation, check if we have something in the input >
        if (!isset($youtube_url))
            $output .= $this->displayError($this->l('Please insert something in this field.'));
        else
        {
            // < this will update the value of the Configuration variable >
            Configuration::updateValue('youtube_video_url', $youtube_url);


            // < this will display the confirmation message >
            $output .= $this->displayConfirmation($this->l('Video URL updated!'));
        }
    }
    return $output.$this->displayForm();
}
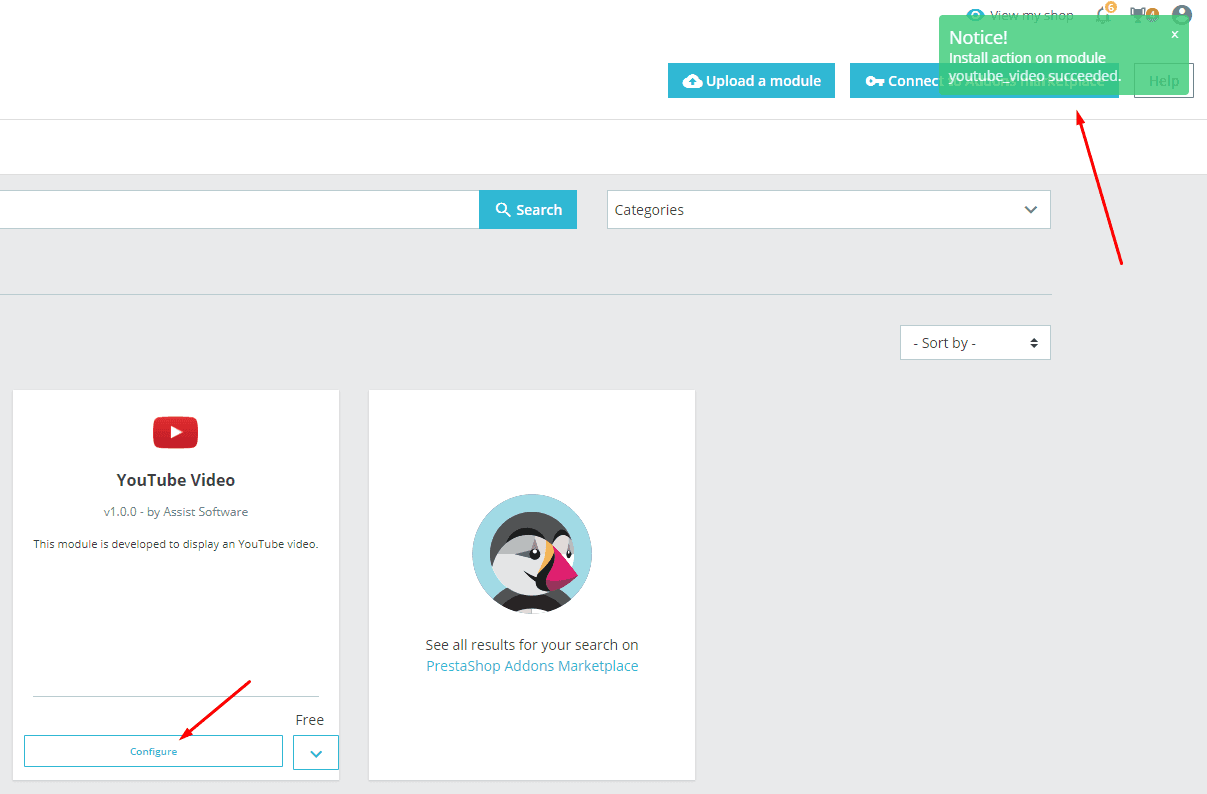
The code is done, but we need to install the module and configure it. First, we have to get into the BackOffice of the PrestaShop and access the module list. Now search for ‘youtube video’ module. When you find it, click on the install button and the module will be installed in the PrestaShop.

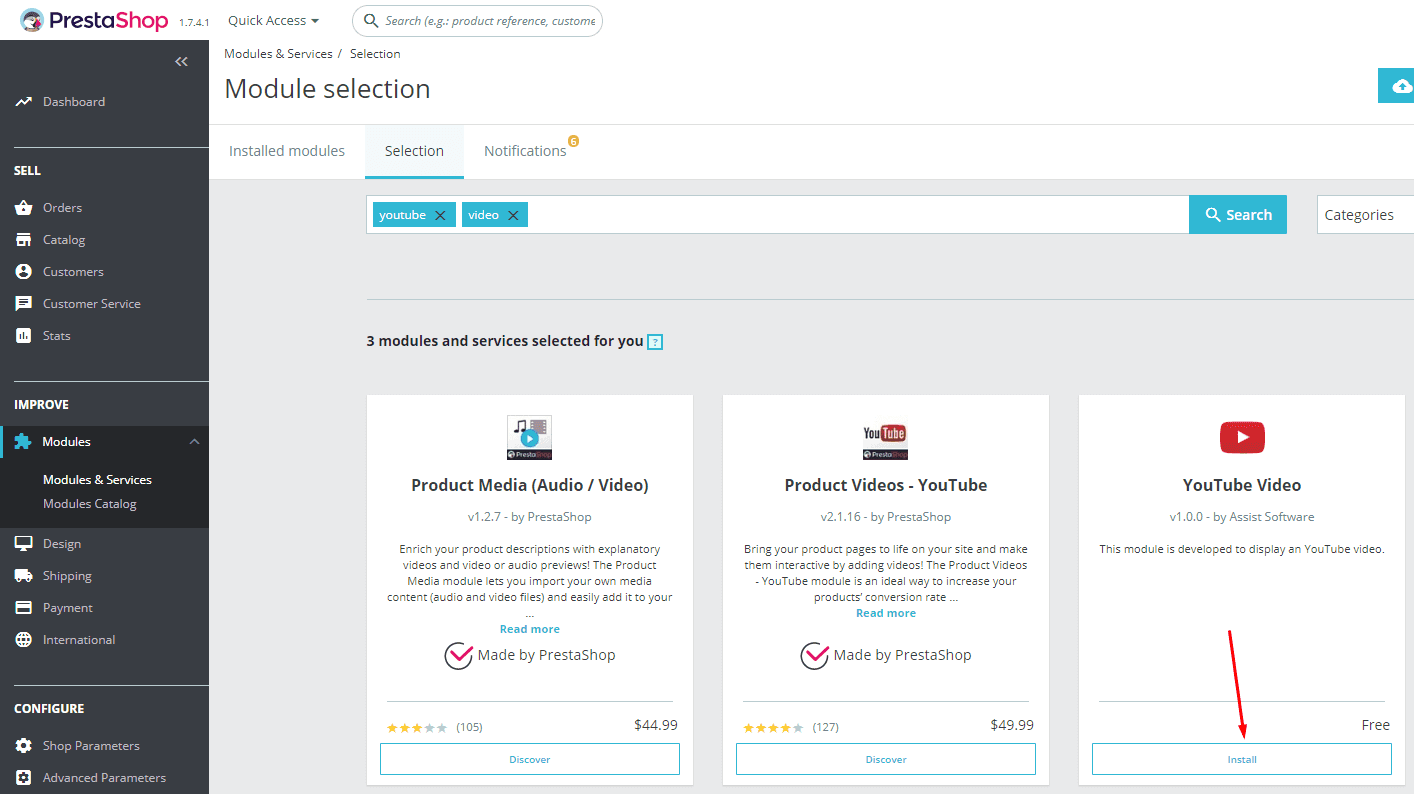
After you click the install button the confirmation alert will show up and you will have to click the Configure button.
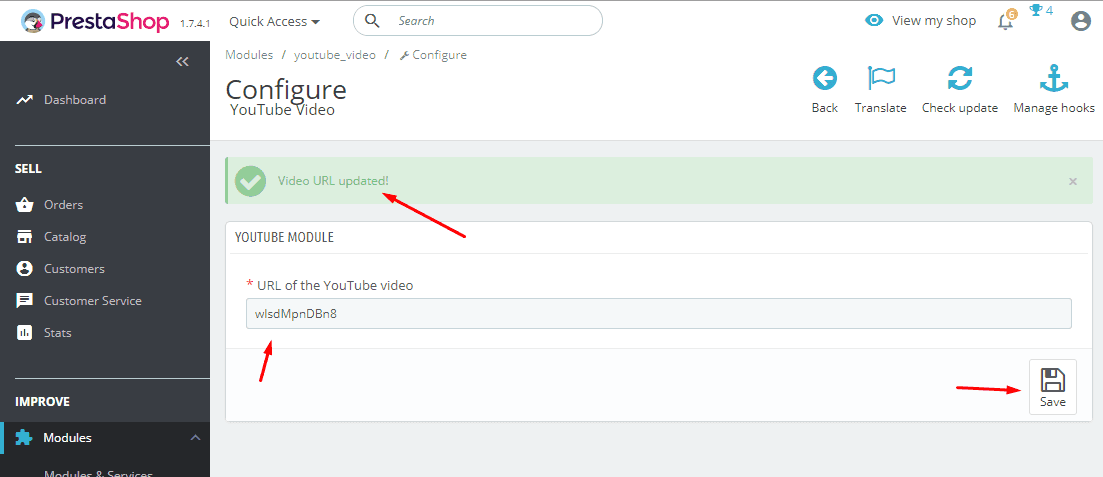
Now you can edit your Youtube video URL by changing the value of the input and clicking the ‘Save’ button.
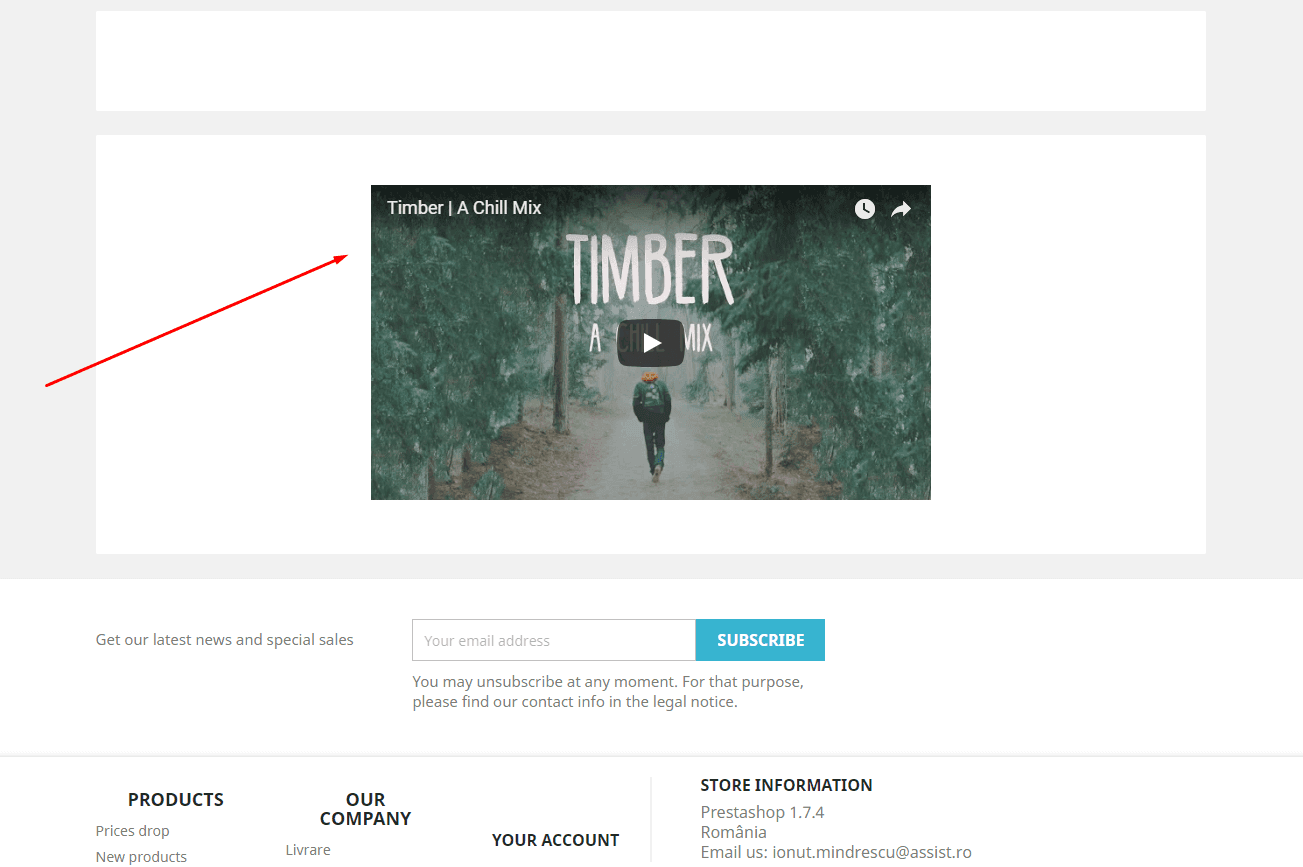
This is the final result of your newly created module. The current position is now at the end of the homepage but you can simply change the position with the drag&drop option in the BackOffice of the PrestaShop so you can show it in the first place.
8. Conclusion
The conclusions for the beginner's tutorial on "How to build your first PrestaShop module" article are that the developing modules in PrestaShop are easy if you understand the structure and how the Hooks works. After the experience from the chapter I, you have to understand the importance of using the right name for the module’s folder and the same for the name of the class. Using hooks will let you display your custom templates wherever you want and you can change the position on the page too.
- What if I want to display something in a place where the PrestaShop’s hooks cant?


