
Modern developer tool belt
In today's web development ecosystem where a lot of programing and scripting languages rise from the necessity to simplify, extending or augmenting the consecrated languages. Where every day you can find a new framework. Where day by day the standards are adapted to fulfill the modern web applications needs. How do you stay up to date? How do you stay productive?
The tools made by developers for developers come in handy and take off your tasks and make your developer life easier. From automating tasks, enforcing coding style, managing dependencies to building, deploying and continuous integration, we will explore a list of essential tools for a modern developer. If you want to use your time efficiently bare with me. Here's the list of modern web development tools we use.
Everything begins with the command line. Learn how to use it efficiently and you'll have all the power at the tips of your fingers.
- Ctrl+R Search your command history for something specific.
- Tab Auto complete.
- Ctrl+Left / Ctrl+Right Jumps a whole word in your command.
- Ctrl+Shift+Left / Ctrl+Shift+Right Selects a whole word in your command.
- Shift+Home / Shift+End Selects from the cursor to start or end of the command.
- Ctrl+U Deletes the command from start to the cursor position.
- Ctrl+K Deletes from the cursor to the end of the line.
- Ctrl+W Deletes from the cursor to the start of the world.
- Ctrl+A or Home Jumps to the start of the line.
- Ctrl+E or End Jumps to the end of the line.
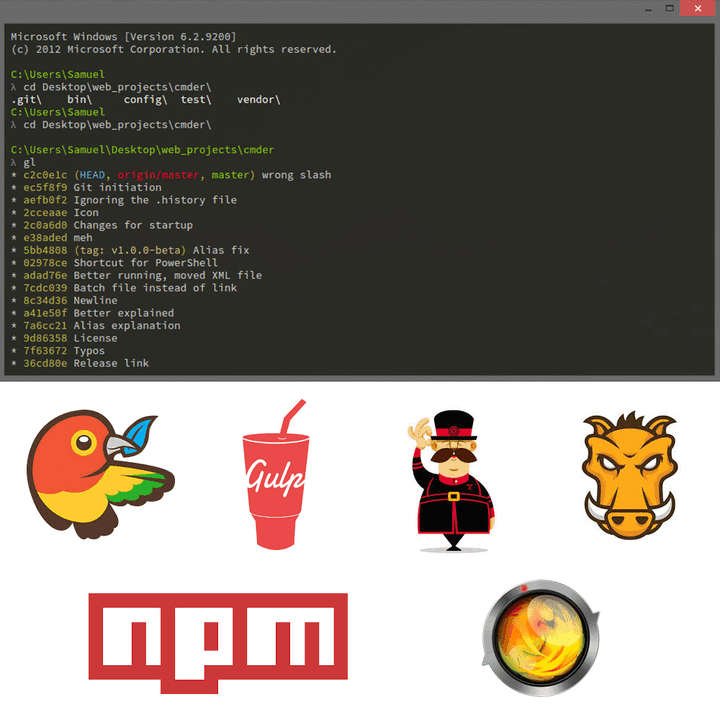
- replace your boring windows cmd, with this amazing nice looking console emulator, that is totally portable and comes with a lot of Unix commands like git or cat ready in PATH.
- The successor iTerm comes with great features like autocomplete, paste history, replay command history, mouseless copy. You will find iTerm features very helpful .
-
Guake is a top-down terminal for Gnome, since is for linux and all commands are supported out of the box, this console supports customizations from appearance point of view
- the configuration framework for Zsh. It extends the command line interface environment with autocomplete, aliases, and supports themes.
Master this tool and you will save a lot of time:
- debugging
- testing
- emulating devices and networks
- remote Debugging with Screencast

If you are not using automation tools you are working too hard.
- is a tool that monitors changes in the file system and refreshes the page in the browser when you save a file.
- it can help you save your F5 key, and a lot of time, of course.
Npm comes bundled with nodeJS and at the origins is a packet manager for JavaScript, but it can be used as task runner or build tool. The feature that allows us to use npm in multiple ways is npm run script.
To initiate a npm configuration file we can use the npm init command, which will create for us the package.json file.
Let's see an example of npm scripts that will help us automate some of the front end processes:
Of course, to make scripts work we would need the following dependencies:
"devDependencies": {

  "browserify": "latest",

  "stylus": "latest",

  "jade": "latest",

  "watch": "latest"

}
To install dependencies we use npm install command. After installing dependencies just run the npm run-script watch, and start developing your app, npm will take care of building everything for you. You can even extend npm scripts to also run the tests, check code style and do a lot of other tasks that we will explore further.
NPM is a complex tool that can saves you a lot of time. We started with npm because all the tools we will explore next are managed using npm. (or lets call them npm helpers).
Lets explore some helpfull npm packages:
jshint is a tool that detects errors and potential problems in JavaScript code. To use it you have to install the package:
npm install -save-dev jshint - the -save-dev flag is telling npm to add this package to devDependecies object in package.json.
After installing just add the next script to npm scripts:
"jshint": "jshint yourapp/**/*.js test/**/*.js"
Now run the script using npm run-script jshint command and start fixing your JS errors.
eslint is modern web development tool, similar to jshint, the difference is that in case of eslint you can define your own rules, this makes the tool more flexible. Of course it comes with lots of predefined rules which you can configure to fulfill your needs.
Install the package just like jshint and add the following script to npm:
"eslint": "./node_modules/.bin/eslint *.js yourapp/**/*.js test/**/*.js"
Both code checking tools are useful and can be configured using dot files. Here's an example on how you can configure eslint.
Create a file named .eslintrc in the root of your app. This file looks something like this:
{

  "ecmaFeatures": {

  "generators": true

  },

  "env": {

  "browser": false,

  "node": true

  },

  "globals": {

  "config": true

  },

  "rules": {

  "no-trailing-spaces": 0,

  "no-mixed-spaces-and-tabs": 2,

  "quotes": [1, "single"],

  "eqeqeq": 2

}
Let's explain the configuration file. The ecmaFeatures refers to ES6 features, if you write plain javascript(ES5) then you can ignore this option. The env option defines in which environments your app will run, this helps the plugin to detect specific global variables like window for browser or require for node. In addition to environment globals you can inform the plugin of your own global variables using global option. The most important option is rules. Here you can configure the default or your own rules, there are 3 levels of configuration: 0 - rule is disabled 1 - rule is treated as warning 2 - rule is treated as error
Of course the rules can have complex objects as configuration, take for example quotes , the config object is passed to your configuration rule and helps you fine tune the rule.
In most cases you will need to ignore some files that are still work in progress or for other reasons. Create a new file called .eslintignore, this file will tell the plugin which files to ignore and works similar to gitignore.
  lint/**/*.js // your custom eslint rules reside here

  Gruntfile.js

  out/**/*js
jshint can be configured using .jshintrc and .jshintignore files, similar to eslint . Here comes the best part of this. Once configured you can integrate them with your editor (`Sublime Text and Webstorm tested) and check your code for mistakes in real time.
Another usefull npm package is precomit. This tool is attaching a pre-commit hook to git and lets you run npm scripts whenever you make a git commit, the good part is that the commit will fail if the scripts you are running are failing with error code 1.
Imagine you can run code checking scripts before each commit and enforce a valid coding style. In most cases you will also want to run the tests at this point and fail the commit if there are tests that are not passed. You're writing test for your code, aren't you?
Lets see an example. Install the plugin: npm install pre-commit.
It is very important to install this plugin after the git repo is initialised since it will need a git repo to hook the pre-commit.
Now add the following object to package.json:
  "pre-commit": [

  "eslint",

  "test"

  ]
This will tell the plugin which scripts to run before each commit, in our case we will check our code style and run the tests. If you try to make a commit at this point and one of the scripts will exit with code 1, which will happen if the code style checker will report errors or if the test will fail, the commit will be aborted in this case, and you will need to fix the errors before committing.
Some times you will need to commit bad code anyway, worry not, you can force a commit with -no-verify or -n flag.
Since we mentioned testing we will also mention some helpful tools in this area.
mocha - the simple test framework
- npm install mocha , we will not get into details here since it is a complex topic.
istanbul - the JS code coverage tool.
- npm install istanbul , generates really nice reports regarding the code coverage.

We will use both tools in one script since both are related to testing:
"test": "node_modules/istanbul/lib/cli.js cover node_modules/.bin/_mocha test/**/*.js"
- npm install -g grunt grunt-cli - you have to install grunt and grunt-cli globally which will add the grunt command to your system path.
Grunt works using plugins so before configuring it, lets install some plugins:
- npm install grunt-contrib-watch grunt-contrib-jshint - will install two simple plugins that will accomplish the same job as the npm plugins used by now.
Configuration files again. Create a file named Gruntfile.js in your project root. This file will look like this:
module.exports = function(grunt) {

  grunt.initConfig({

  jshint: {

  files: ['Gruntfile.js', 'yourapp/scripts/*.js', 'test/**/*.js'],

  options: {

  globals: {

  config: true

  }

  }

  },

  watch: {

  files: ['<%= jshint.files %>'],

  tasks: ['jshint']

  }

  });

  grunt.loadNpmTasks('grunt-contrib-jshint');

  grunt.loadNpmTasks('grunt-contrib-watch');

};
Now running the command grunt watch grunt will watch over our app files and will run jshint task whenever we save a file.
- npm install -g gulp install gulp globally.
- npm install gulp-jshint - just like grunt gulp is using plugins to accomplish different tasks.
Create the configuration file named gulpfile.js. The file will look like this:
  var gulp = require("gulp");

  var jshint = require("gulp-jshint");

  gulp.task("jshint", function() {

  gulp.src("yourapp/scripts/*.js")

  .pipe(jshint())

  .pipe(jshint.reporter('default'));

  });
Now running gulp jshint will produce the same effect as expected from previous experience with npm and grunt.
The grunt and gulp tools are quite complex too and can accomplish a large variety of tasks using plugins. Even though the tools, from a developer's perspective, are doing the same job, they are quite different at the bottom.
Grunt is based on files with configuration over code paradigm at origins.
Gulp is based on streams with code over configuration paradigm at origins, which makes gulp a little faster that grunt at building tasks since it doesn't need to write temporary files to disk.
Bower is a great tool for managing javascript dependencies that are running in browser. Bower depends on Node and npm and in some cases on git when bower packages are fetched directly from git.
- npm install -g bower - bower is very simple to use and commands like bower install <package-name> --save or bower uninstall <package-name> should be familiar to you by now.
In many cases you will need to specify a different folder for your browser dependencies. This and many other configuration can be defined in .bowerrc file:
{

  "directory": "public/bower_components"

}
Just like npm , bower will create a bower.json file. Here will be saved all the dependencies of your project in the same manner as in npm case.
With yeoman your project will be up and running in no time. Well not really, but it is a good starting point that depends on the generator you're using. For example using a yeoman generator you can get all the tools we talked about in this post configured automatically and much more. You'll spend only a little more time to fine tune them and you have the building blocks of your project ready in a couple of minutes.
Lets prove this theory:
- npm install -g yo - since we already installed grunt, bower and gulp globally, we only need to instal yoeman at this point.
- npm install -g generator-angular-fullstack - is one of the most popular yeoman generators.
As we want to demonstrate how easy it is to start an app from scratch, we will create another application, leaving behind our work until now.
Change the path to a new folder and run the following command:
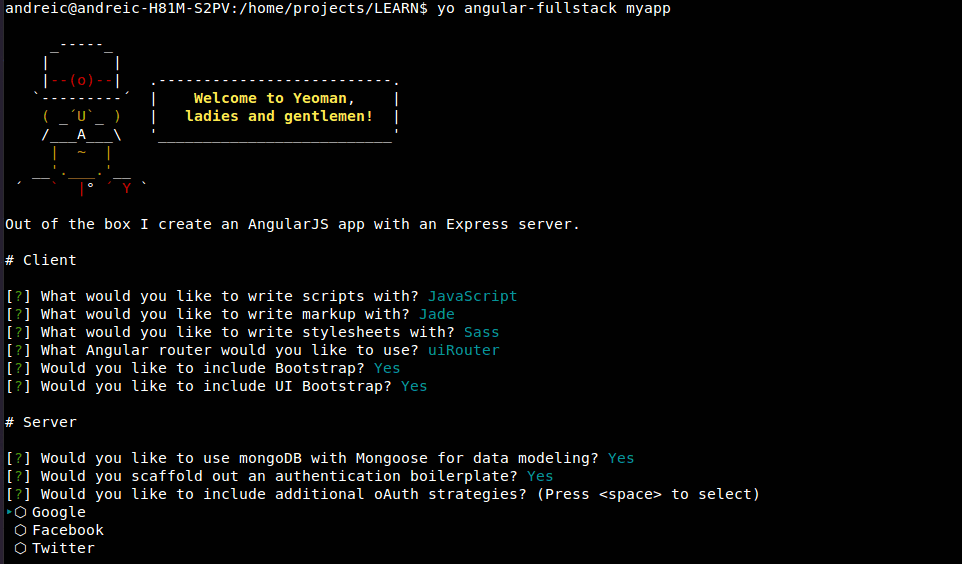
yo angular-fullstack
At this point the generator will ask you about the development stack you prefer to use in your app. For example you can choose between javascript and coffescript, between css, sass etc.
You will end with a screen like this one:
Let the generator do its magic and you have a new application with a lot of tools like npm, grunt, bower,.gitignore configured out of the box, as well as some frameworks like Express, Mongoose, Angular configured and working as a starting point for your project.
Of course the generator we are using is more powerful and you can use it to generate other components like endpoints, routes, services, directives for the project, but you get the point.
Google's Web Starter Kit is another great tool that helps you get going with your project with a lot of features like:
- Multi-device responsive boilerplate
- Cross-device Synchronization
- Built in HTTP Server
- Performance optimization
There is even a yeoman generator for Google's Web Starter Kit:
npm install -g yo generator-web-starter-kit - requires Node, Gulp, Ruby and Sass
We will not get into details with this one because of the lack of experience of the writer with this tool, also because it would become a little repetitive.
At the writing time the last stable version of node is told to be 0.12, but a lot of tools reviewed in this article will fail with this version. I recommend that you to install node version 0.10, and use nvm to mange your node versions.
This was a quick review of some great tools that come in handy to a modern web developer. It was intended to make the tools and their applicability known to you and to get you a quick start. There's a lot of other tools or plugins related to the ones reviewed in this post that are waiting to be discovered.
Congratulations if you made it trough here, and you're willing to spend a little more time to master the tools presented above, then you are a less busy developer.


