
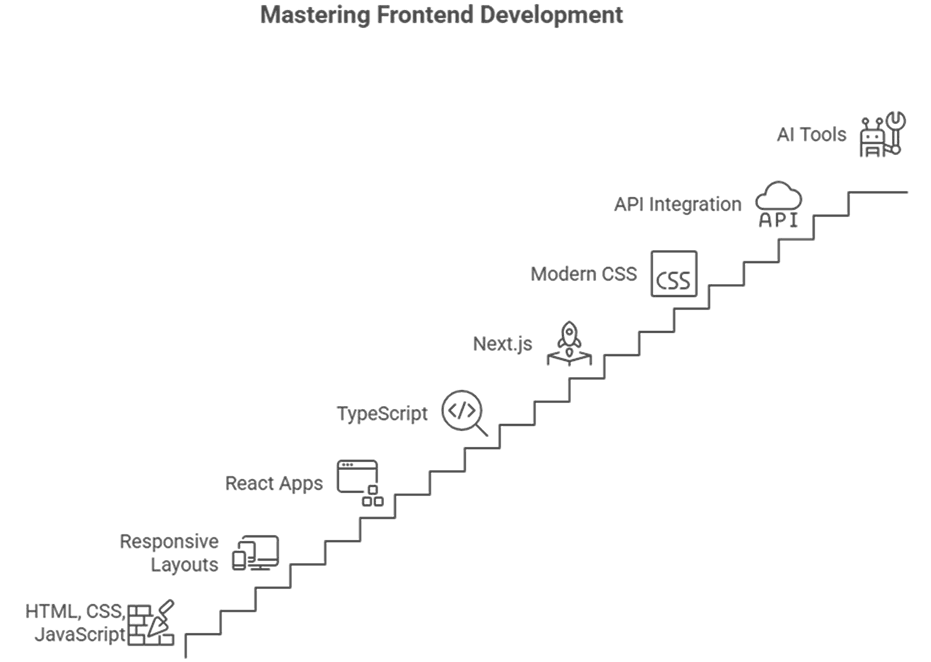
Frontend Developer Roadmap 2026: Learn React, Next.js & TypeScript
Introduction
What You Will Learn in This Frontend Development Guide
Frontend Developer Roadmap 2026: How to Learn Frontend Development
Types of Resources
Step 1 - Follow in Order - Install Visual Studio Code
Step 2 - Follow in Order - Install Copilot
Step 2.1 - Explore Gradually – Other AI Editors
Step 3 - Follow in Order - Learn Git, GitHub, and Version Control
Step 4 - Explore Gradually - Understand How the Internet Works
Step 5 - Follow in Order - Learn HTML for Frontend Development from a video
Step 5.1 - Explore Gradually - Learn HTML from Text
Step 5.2 - Explore Gradually - Learn Accessibility
Step 5.3 - Explore Gradually - Learn Images
Step 6 - Follow in Order - Learn CSS and Responsive Web Design from a video
Step 6.1 - Explore Gradually - Learn CSS from Text
Step 6.2 - Explore Gradually - Learn Tailwind
Step 7 - Alternative - HTML & CSS
Step 8 - Follow in Order - Responsive Design
Step 8.1 - Explore Gradually - Learn Responsive Design from Text
Step 9 - Follow in Order - Choose Your App and Build the Design
Step 10 - Follow in Order - Learn JavaScript for Frontend Development from a video
Step 10.1 - Explore Gradually - Learn JavaScript from Text
Step 11 - Follow in Order - Rebuild with HTML, CSS, and JS
Step 12 - Follow in Order - Rebuild Your Project with React
Step 12.1 - Explore Gradually - Learn More About React
Step 13 - Follow in Order - Rebuild Your App in React
Step 13.1 - Explore Gradually – Rebuild Your App with Better Tools
Step 14 - Follow in Order - Learn TypeScript
Step 15 - Follow in Order - Learn Next.js
Step 16 - Follow in Order - Rebuild Your App with Next.js
Step 16.1 - Explore Gradually – Explore More Libraries
Step 17 -Follow in Order- Learn a Backend Programming Language
Conclusion
Author
Introduction
If you want to learn frontend development in 2026, the path looks very different than it did just a few years ago. The rise of AI tools, cost-cutting across tech companies, and leaner development teams have reshaped what it means to become a frontend developer.
Frontend development is not disappearing, but expectations are higher. Companies rely on React, Next.js, TypeScript, responsive web design, and modern CSS, while using AI tools to speed up development. AI can help experienced developers move faster, but it still cannot replace solid frontend fundamentals, architectural thinking, or long-term maintenance.
For beginners and students, this means competition is tougher, but not impossible. Teams still need frontend developers who understand HTML, CSS, JavaScript, can build real interfaces, and know how modern frontend stacks work in production. The code AI generates today will still need humans tomorrow to maintain, refactor, and improve it.
This guide shows how to learn frontend development step by step, using real tools, real workflows, and realistic expectations. It is not a shortcut or a motivational post. It is a practical learning path focused on building skills that companies actually hire for.
The roadmap is ideal for:
- Students with time before graduation
- Beginners learning frontend development from scratch
- Career switchers entering web development
- Junior developers who want a structured path
What You Will Learn in This Frontend Development Guide
By following this learning path, you will learn how to:
- Build websites using HTML, CSS, and JavaScript
- Create responsive layouts for all screen sizes
- Build modern frontend apps with React
- Use TypeScript to write safer, more maintainable code
- Build production-ready apps with Next.js
- Style interfaces using modern CSS and Tailwind CSS
- Understand how APIs connect to frontend applications
- Use AI tools responsibly to improve productivity
Frontend Developer Roadmap 2026: How to Learn Frontend Development
Most people wait for the “right time” to start learning frontend development. That moment rarely comes. Between classes, exams, work, and personal life, perfect study blocks are rare.
What actually works is consistency. It is the best way to learn frontend development. Even 30–45 focused minutes per day compounds over time. On weekends, you can spend longer sessions building or refactoring projects. Progress comes from frequency, not intensity.
Avoid passive learning. Watching tutorials feels productive, but real learning happens when you:
- Take notes
- Pause videos
- Rebuild examples from scratch
- Break things and fix them
A good rule: for every hour you watch, spend at least three hours building.
Types of Resources
The roadmap uses two types of resources to guide your learning pace and priorities.
- follow in order - complete these step by step; they form your main learning path.
- explore gradually - read or watch when you have spare time; they add depth and context.
The goal is to mix structured progress with flexibility so you can keep learning even on your busiest days.

Step 1 - Follow in Order - Install Visual Studio Code
Resource: https://code.visualstudio.com
Before writing any code, set up your development environment. Visual Studio Code is the standard choice for frontend developers. It is free, fast, and customizable. Install it and start using it daily.
Avoid browser-based or gamified platforms that make coding feel like a video game. Real work involves problem solving and frustration at times, and getting used to that early will help you later on.
Step 2 - Follow in Order - Install Copilot
Resources:
Copilot can be a great companion but only after you build a solid base. In your first months, write everything manually. Look at Copilot’s suggestions for hints but avoid pressing Tab to auto complete.
Do not let AI generate large pieces of code for you yet. Focus on understanding what you are writing. Later, AI will help you move faster, but first you must learn to think like a developer.
Step 2.1 - Explore Gradually – Other AI Editors
Resources:
I use Cursor with a paid subscription in my daily work. If you're familiar with Cursor, it's a great Visual Studio Code alternative with a more AI-focused interface (it's actually based on VS Code). Google's Antigravity is another good editor with integrated AI options.
Step 3 - Follow in Order - Learn Git, GitHub, and Version Control
Resources:
- github.com
- Git
- Using Git with Visual Studio Code (Official Beginner Tutorial)
- Git & GitHub Crash Course 2025
- Git Guides - install git · GitHub
Version control is essential for every developer. Create a GitHub account and install Git locally. Learn how to add, commit, and push your code.
Your first commits might look messy, but that’s fine. Upload everything you build. Over time, your GitHub profile will become a record of your progress and consistency.
Step 4 - Explore Gradually - Understand How the Internet Works
Resources:
Take time to understand what happens when you type a URL into a browser. Learn how browsers, servers, and protocols communicate. Watch or read these when you have time; they will make many future topics easier to grasp.
Step 5 - Follow in Order - Learn HTML for Frontend Development from a video
Resources:
HTML defines the structure of every website. This video course gives you a solid foundation. Follow along and write each example yourself. The more you type, the faster you’ll build confidence with tags and structure.
AI excels at writing HTML, and once you grasp the fundamentals, you can confidently delegate this task to AI. However, it's worth taking the time to understand HTML yourself first. There's much more to learn beyond just <p> and <div> tags.
Step 5.1 - Explore Gradually - Learn HTML from Text
Resource: Learn HTML | web.dev
Use this reference to deepen your understanding. It goes further than most tutorials and covers topics like semantics and structure. Read a few lessons at a time and return to it whenever needed.
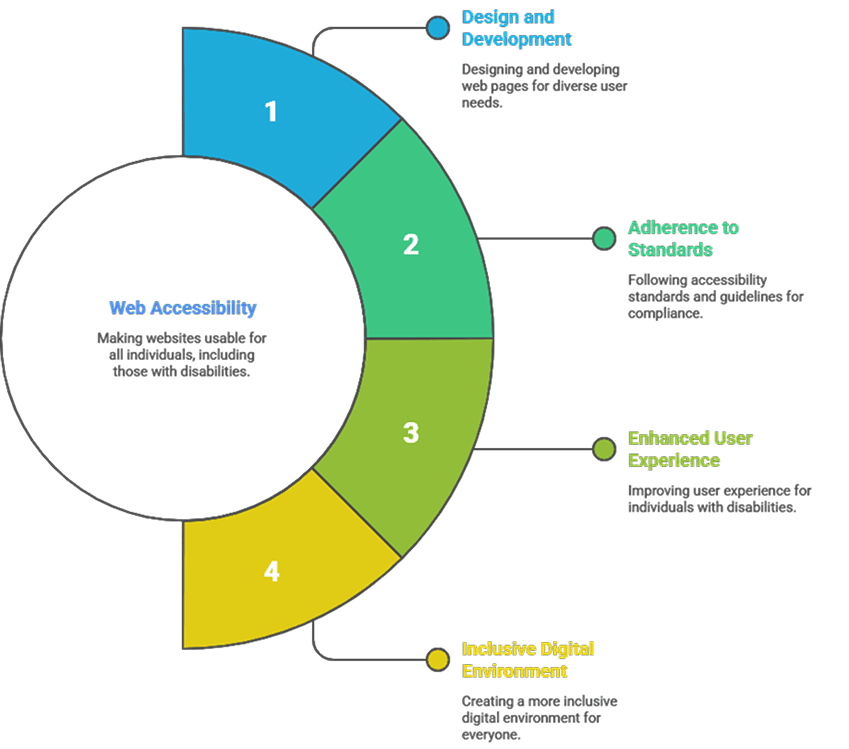
Step 5.2 - Explore Gradually - Learn Accessibility
Resource: Learn Accessibility | web.dev
Accessibility ensures everyone can use the web, including users with disabilities. It may not feel urgent now, but it’s part of every professional project. Read these lessons casually so the terminology becomes familiar.
Step 5.3 - Explore Gradually - Learn Images
Resource: Learn Images | web.dev
Images are a major factor in website performance. This guide explains how to optimize them through proper formats and lazy loading. A few of these principles will make your future projects faster and more efficient.
Step 6 - Follow in Order - Learn CSS and Responsive Web Design from a video
Resources:
- The Only CSS Course You Need to Master CSS | Learn By Building Apps
- BEM
- 20 NEW CSS Features You Need To Know In 2025
CSS defines how your pages look and behave visually. Follow the main course to learn structure and layout. The author uses the BEM naming convention, which helps you keep your CSS organized.
Step 6.1 - Explore Gradually - Learn CSS from Text
This set of lessons explains CSS fundamentals in a clear, logical order. It covers everything from the box model to grid layouts. Use it as a structured reference while working on your projects.
Step 6.2 - Explore Gradually - Learn Tailwind
Resources:
Most modern frontend tutorials now use Tailwind, and it has become extremely popular in recent years. I also use it in all my projects. The challenge for beginners is that Tailwind can hide important CSS concepts behind utility classes, which can make it feel like magic. I’m a big fan of Tailwind, but you shouldn’t focus on learning it too early.
Once you understand CSS well, Tailwind will make sense naturally. A few hours of practice will be enough to get comfortable with it. For now, reading through the official documentation is plenty, but I’m also including a short video to give you a quick idea of what working with Tailwind looks like.
Step 7 - Alternative - HTML & CSS

Resources:
If you prefer a single full course that covers both HTML and CSS from start to finish, this one is a great option. It moves at a slower pace and is ideal for learners who like to follow along.
Depending on your temperament, the pacing may seem too slow for you. However, if you're not in a rush, this long tutorial will help you learn many small concepts that you'd otherwise find scattered across different video clips all over YouTube.
Step 8 - Follow in Order - Responsive Design
Resources:
- Are you writing responsive CSS the wrong way?
- Learn Flexbox CSS in 8 minutes
- Learn CSS Grid - A 13 Minute Deep Dive
- Master Media Queries And Responsive CSS Web Design Like a Chameleon!
- Layout patterns | Patterns | web.dev
Websites need to work across all screen sizes. This step teaches how to design responsive layouts using flexible units and media queries. Follow the tutorial and apply the techniques directly to one of your existing projects.
While media queries are the main tool for responsive design, understanding how to use flexbox or grid alongside them is essential for creating truly responsive layouts. The most important thing to remember is that it's always easier to build from small to big. This means writing your CSS for small devices first, then adapting it for larger screens like laptops and desktops.
Step 8.1 - Explore Gradually - Learn Responsive Design from Text
Resource: Learn Responsive Design | web.dev
This collection of articles explains layout and design principles in more depth. Read a lesson or two when you have spare time. The ideas will start connecting once you build real responsive pages.
Step 9 - Follow in Order - Choose Your App and Build the Design
At this point, you've learned enough HTML and CSS to start your first serious project. The goal is to take all that knowledge and use it to replicate the interface of a real application you use often, it could be your favourite restaurant's website or a popular platform you frequently visit. Pick one serious application and stick with it until the end of the roadmap. It will become your personal test environment for future steps.
Choose something complex enough to challenge you but familiar enough to visualize. For example, since I'm used to Google products, if I were starting this challenge, I would choose something from Google:
Your task is to recreate the design only, without JavaScript. Hard-code everything: menus, lists, cards, buttons, even fake data. If you need a new screen, just create another .html file.
Do not worry about duplication or optimization. The goal here is to practice layout, spacing, typography, and structure at a larger scale. You’ll learn more by rewriting messy code than by keeping it perfect.
Spend up to one month on this phase. Redesign parts of it whenever you learn something new. By the end, you’ll feel much more confident using CSS for real-world layouts.
If you want to practice with multiple smaller projects before committing to a single larger project that you'll implement through the end of this roadmap, I suggest following the challenges from frontendmentor.io, specifically the HTML and CSS ones available here: Frontend Mentor CSS challenges.
The nice thing about this website is that you can find multiple solutions for each challenge by searching Google with this format: "Frontend Mentor [Challenge name] GitHub solution". For example, for this challenge QR code component challenge, you could search "Frontend mentor QR code component GitHub solution" and you'll find public repositories with solutions that you can analyse and even download locally.
It's worth noting that you don't need the pro version of the platform. For HTML and CSS practice, the design images provided in the free version are sufficient.
Treat all these practice projects as experiments. Don't overthink them, and don't consider them portfolio pieces to show potential employers, they're too simple to matter in an interview. They're just for practice, so have fun with them.
Step 10 - Follow in Order - Learn JavaScript for Frontend Development from a video
Resources:
JavaScript brings your pages to life. It lets you handle events, manipulate the DOM (Document Object Model), and build logic for interactivity. There are many resources available for learning JavaScript, but I recommend focusing on this full video course. It covers everything you need at this stage, so you won’t need to look elsewhere. Make sure to check the video description, as it includes GitHub links for each lesson and the complete source code you can explore while following along.
Step 10.1 - Explore Gradually - Learn JavaScript from Text
If you'd like to learn JavaScript from text-based resources, you can try the ones I've added below. There are multiple paid courses, resources, and platforms available, but I believe if you use one of these two consistently, you'll be well prepared.
When you reach a point where these text resources don't explain something clearly, you can search for a YouTube video that covers the concept you're struggling with. The point is that these resources are great for showing you almost everything there is in JavaScript, and then you can gradually work through each subject at your own pace.
Resources:
Step 11 - Follow in Order - Rebuild with HTML, CSS, and JS
Take your main project, which you hopefully chose at step 9, and add interactivity to it. Depending on what you chose to implement, you may have all kinds of UI elements that require user interaction: carousels, accordions, forms with selects and sliders. Using JavaScript, add functionality to your main app.
You’ll get stuck often, and that’s good. Each bug you fix teaches you more than another tutorial ever could.
Plan to stay on this step for a couple of weeks. If you can dedicate about an hour a day and a bit more on weekends, that’s enough to make steady progress. Adjust the pace to your schedule, but avoid long breaks, consistency matters more than marathon sessions.
Step 12 - Follow in Order - Rebuild Your Project with React

Resources:
- Quick Start - React
- React Tutorial Full Course - Beginner to Pro (React 19, 2025)
- GitHub - SuperSimpleDev/react-course
React helps you build reusable components and manage complex UIs efficiently. Start with the official documentation, then use the video for reinforcement. Once you understand props, state, and hooks, you’ll start thinking in components rather than individual pages.
Step 12.1 - Explore Gradually - Learn More About React
React is so popular that there are more than enough resources available on this library. Make sure to follow resources that are up to date with the latest version of React. I won't be providing specific resources for this step, but you can always search for videos on YouTube based on the official React documentation and topics you feel you don't quite understand. This is my main way of learning. Once I know the main concepts about something, I search for more resources based on what I encounter in my projects. This way, I learn exactly what I need for my current project, not what I wish I could use.
Since you're in a learning phase without a client project to work on, test yourself and identify what aspects of React you don't understand. If you're honest with yourself, you'll quickly spot areas where you can't clearly articulate a React concept. You can either lie to yourself and say, "I understand it even if I can't explain it," or you can be honest and search for additional resources to truly understand the concept and then be able to explain it to someone else."
Step 13 - Follow in Order - Rebuild Your App in React
Rebuild your main project using React. Split the interface into components and move your JavaScript logic into them. Focus on readability and structure. This step marks your transition from a beginner to someone who can build real apps.
Step 13.1 - Explore Gradually – Rebuild Your App with Better Tools
At any point when rewriting your app, consider starting the project from scratch. I'm assuming here that you can search for additional resources on any subject, and by this point, you've probably Googled 'How to start a React app from scratch.' Maybe you found the result from the official docs at Build a react app from scratch, and it made you think that recreating your main project from scratch using better tools might be worthwhile. You discover Vite, read the main docs (which you find at Vite Guide through Google), and realize some things aren't quite clear. So, you search for additional tutorials on YouTube, and so on.
I know I'm making a lot of assumptions, but by this point, you should have realized that you're constantly supposed to search for resources, no matter how complete something (a tutorial or guide) seems at first. That's a lot of what a software developer does: constantly searching for better resources.
Step 14 - Follow in Order - Learn TypeScript
Resources:
- TypeScript Crash Course - YouTube
- TypeScript in React - COMPLETE Tutorial (Crash Course)
- TypeScript Documentation
TypeScript adds type safety and prevents many runtime bugs. Begin with the playlist to understand the basics, then explore the official documentation. Once you’re ready, introduce TypeScript into your React project and refactor the entire project to use TypeScript.
Step 15 - Follow in Order - Learn Next.js
Resources:
At the time of writing this, Next.js 16 had just been released, and I couldn't find a solid free tutorial for that version. This perfectly illustrates how quickly things change as you move higher in the abstraction layer. You might find tutorials on Next.js 16 that assume you have prior knowledge of Next.js and only teach the new features in version 16. I've added a YouTube playlist that focuses on Next.js 15, but keep in mind there are some small differences between versions.
That's why when working with frameworks and libraries, it's best to rely on their official documentation and look for short, focused tutorials instead of full courses, which can become outdated quickly if not maintained. Hopefully by this point, you've already grown comfortable learning from text-based resources.
Step 16 - Follow in Order - Rebuild Your App with Next.js
Start your project again, this time using Next.js, React, TypeScript, and Tailwind together. Learn how to organize pages, components, and layouts. By the end, you’ll have a professional-level setup like real production projects.
Step 16.1 - Explore Gradually – Explore More Libraries
We have so many libraries on the frontend that it's almost impossible to list them all without overwhelming you with too much information. I've learned a lot of libraries during my work years, so now I know so many that it feels overwhelming. However, I don't think it's fair for a complete beginner to worry about specific libraries. What's more important is understanding how things work in software development at a deeper level, as libraries may come and go depending on your project needs. Blindly learning libraries just doesn't make sense. It's more important to learn programming languages and paradigms, which is why the next step encourages you to learn Python.
Still, the most notable libraries I would recommend getting familiar with are listed below. As usual, use your skills to first read the official docs, then search for video tutorials on YouTube as needed.
Explore these libraries to get a sense of what they're about. By no means do you have to memorize the syntax or know by heart how to use them exactly. That's why they have documentation. You just need to understand why you would use them and when to use them.
Step 17 -Follow in Order- Learn a Backend Programming Language
Nowadays, the term 'full stack developer' is thrown around a lot. While it's quite difficult to know multiple programming languages at an expert level for both frontend and backend, it's absolutely doable to have one or two programming languages you're expert in and then have additional programming languages you can handle, though maybe not as well as your main ones. With the rise of AI tools, employers are looking for flexible engineers who can switch between backend and frontend when the situation requires it.
It may not be fun, but that's the current economic situation around the world. You'd better get accustomed to at least one backend programming language, and I would start with Python because in many ways it's similar to JavaScript. I also wouldn't stop at Python but would study an extra programming language like .NET, for example.
Important note here: you're going for the frontend route, so you don't have to know Python or .NET as well as your core frontend skills. However, it will help you greatly to understand how these languages work, what their principles are, and how the mindset differs from the frontend area.
I'm not going deep in this area as I'll write another roadmap specifically for existing frontend developers who need to deepen their knowledge about other programming languages related to backend development.
Resources:
Conclusion
By completing this roadmap, you will be able to:
- Build and style modern layouts.
- Add interactivity with JavaScript.
- Create component-based apps using React.
- Use TypeScript, Tailwind, and Next.js for production-level projects.
- Understand how APIs connect to your frontend.
- Use AI tools responsibly to speed up your workflow.
This roadmap is not a race. Treat it like a long-term plan. Consistency, curiosity, and persistence will get you further than any quick course. Keep coding every day, and you’ll eventually look back and realize how far you’ve come.

Author
Victor Jeman, Front-End Architect at ASSIST Software, is a result-driven developer specializing in React, Next.js, and modern web technologies. With more than 10 years of hands-on experience turning ideas into scalable software, he always strives to find the best ways of improving the front-end development workflow. His approach pairs technical depth with business objectives alignment, designing architectures that endure beyond quick fixes. More recently, he has become a mentor and trainer for peer developers.


