
Game Character Production - Applying Industry Standards across Production Pipeline

As the title suggests, the scope of the US Paratrooper Soldier 3D project was to create a game-ready, high-quality, complex 3D character, to be deployed and animated in a wide range of game engines and, more specifically, in the context of physical and military simulations.
Thus, my goal was to cover the whole modeling and texturing side of the Industry Standard Pipeline to eventually produce a character that is both highly robust and, most importantly, on a level with current day requirements in terms of visual quality. As you are probably well aware, said quality is no less than astounding nowadays so, with that in mind, I set out to fully exploit the challenge.
I settled on a Special Forces Airborne Unit member, equipped for both air deployment and on-land operations, the reason being the overall complexity of the character, highlighted most visibly in the great number of intricate pieces of equipment. Therefore, this choice would provide ample opportunity for modeling and texturing both detailed organic shapes, as well as challenging hard-surface assets.
First things first: inspiration must be summoned through extensive research and reference gathering. I did make ample use of anatomy reference, once again being humbled and delighted by the endless amount of fascinating knowledge pertaining to our profession.
That said, I made a reference board using PureRef, which is what I typically do before starting a project.
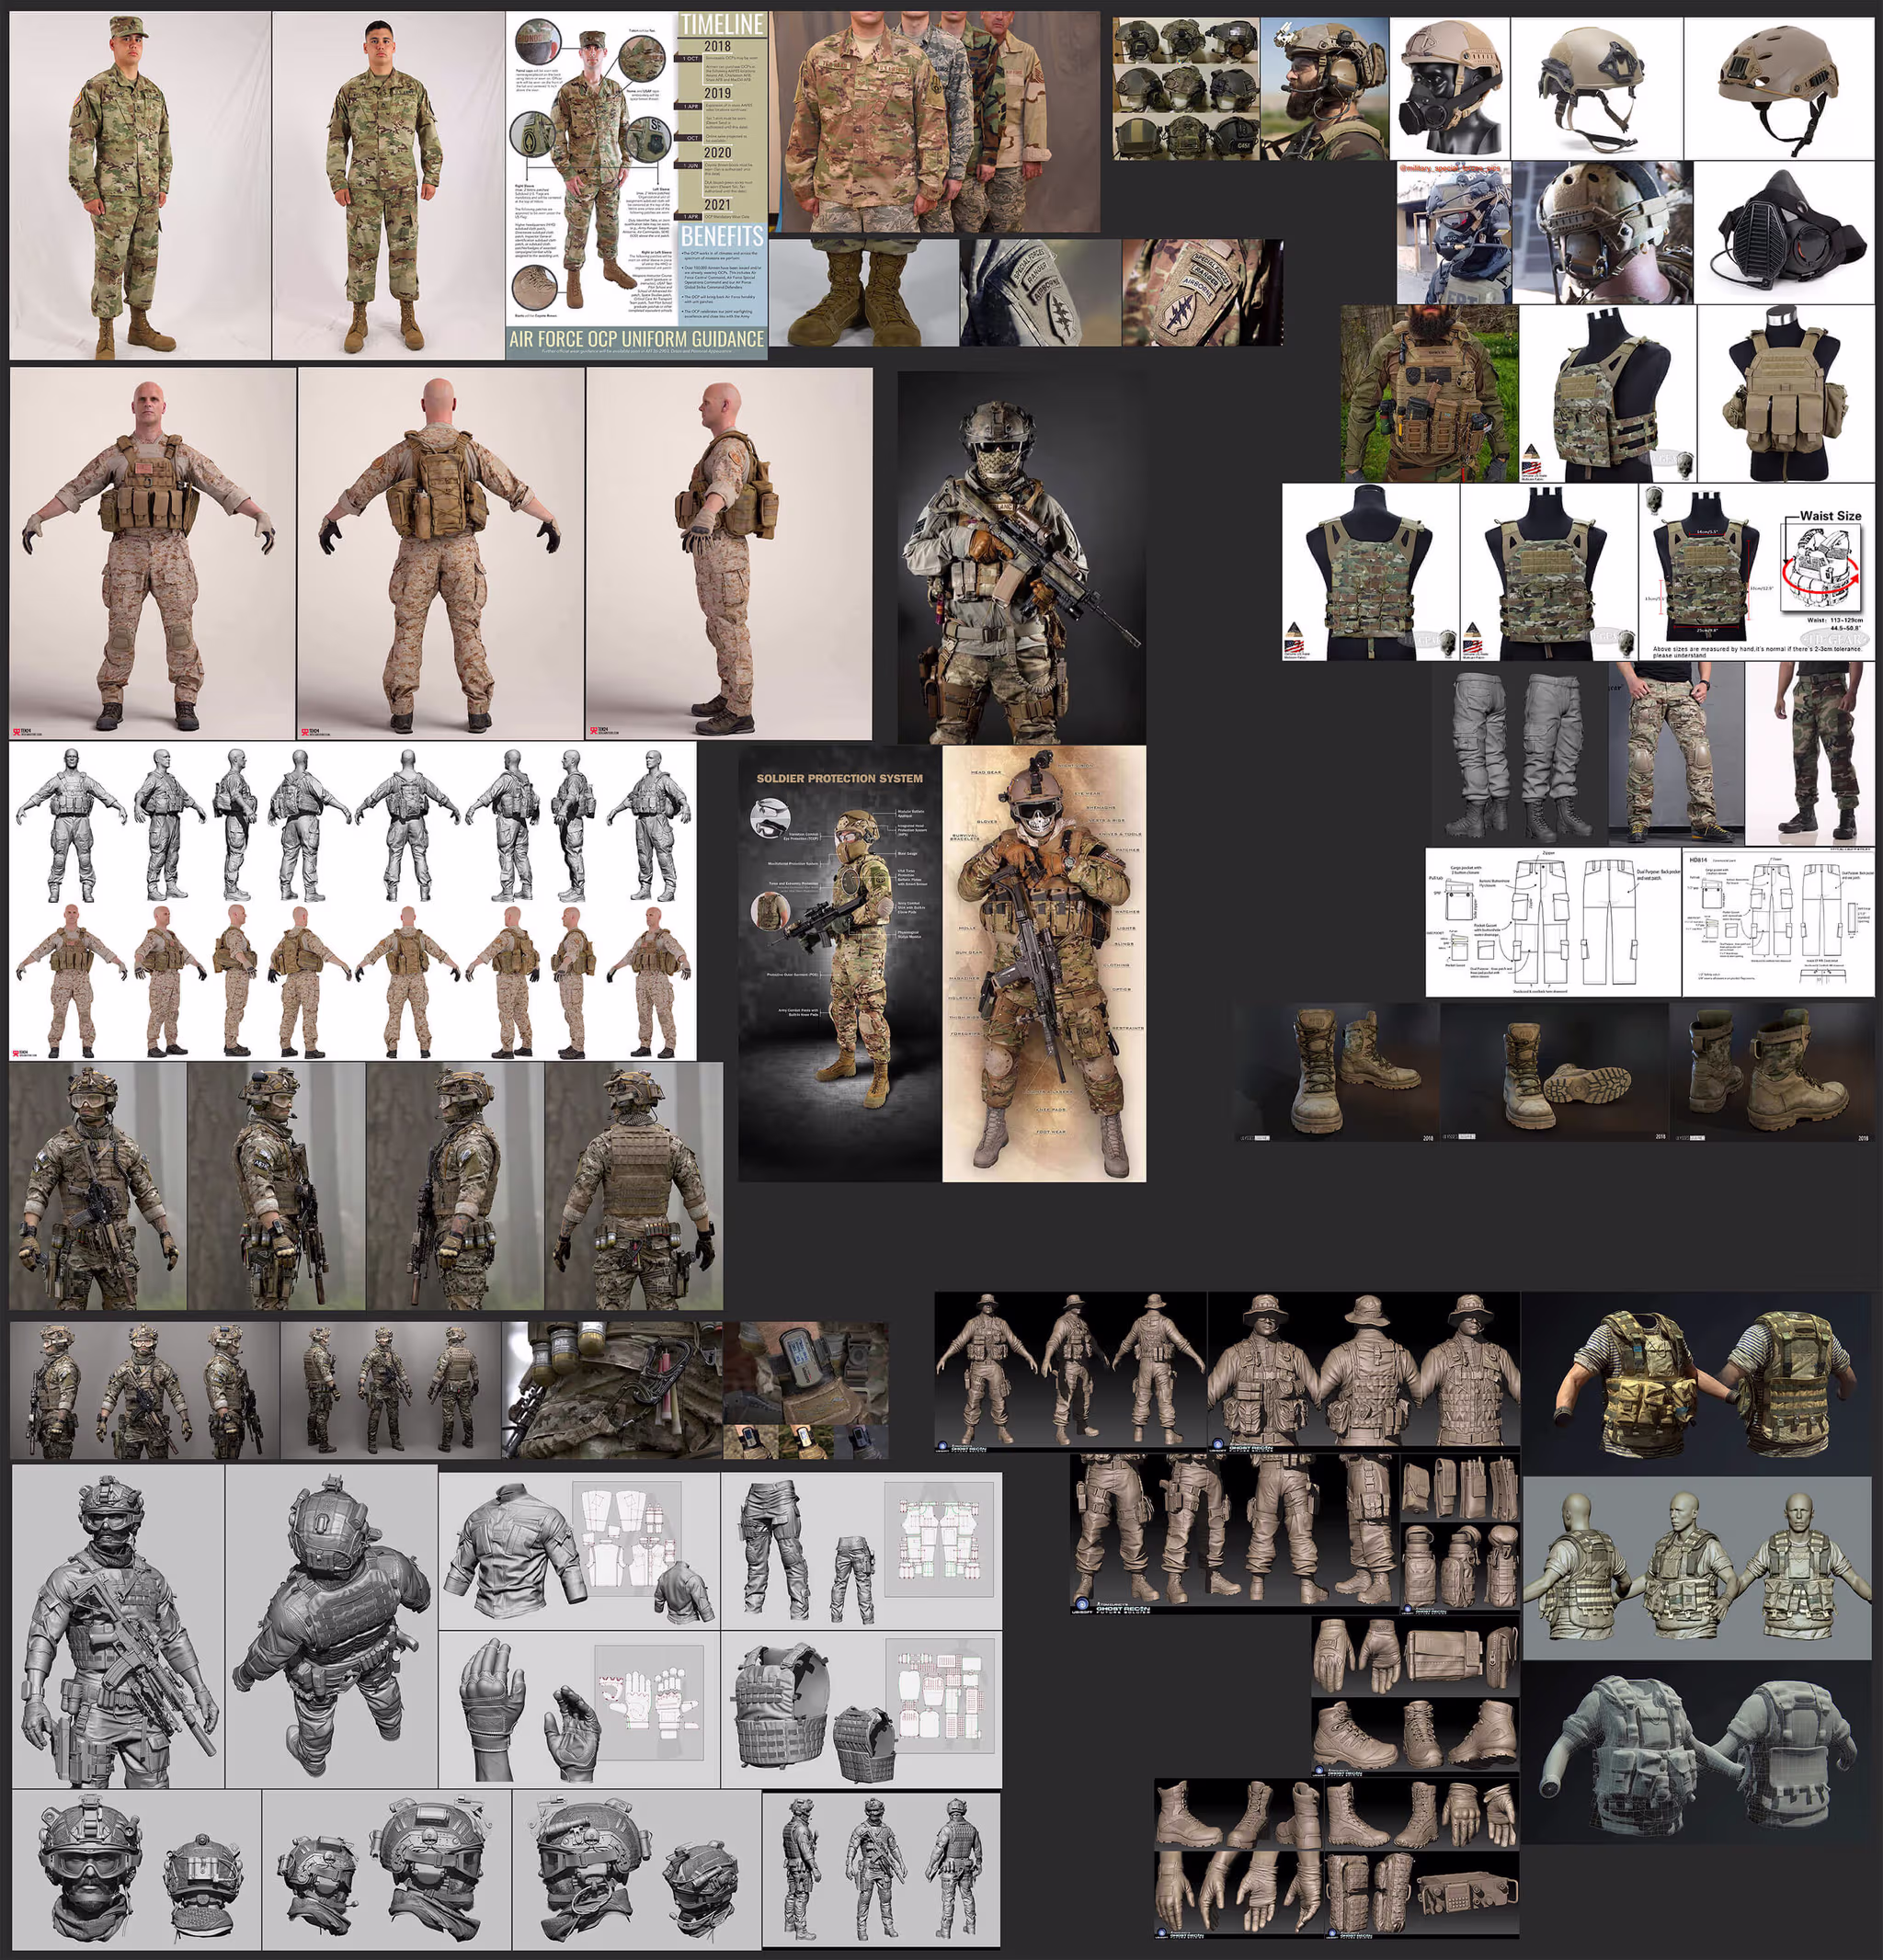
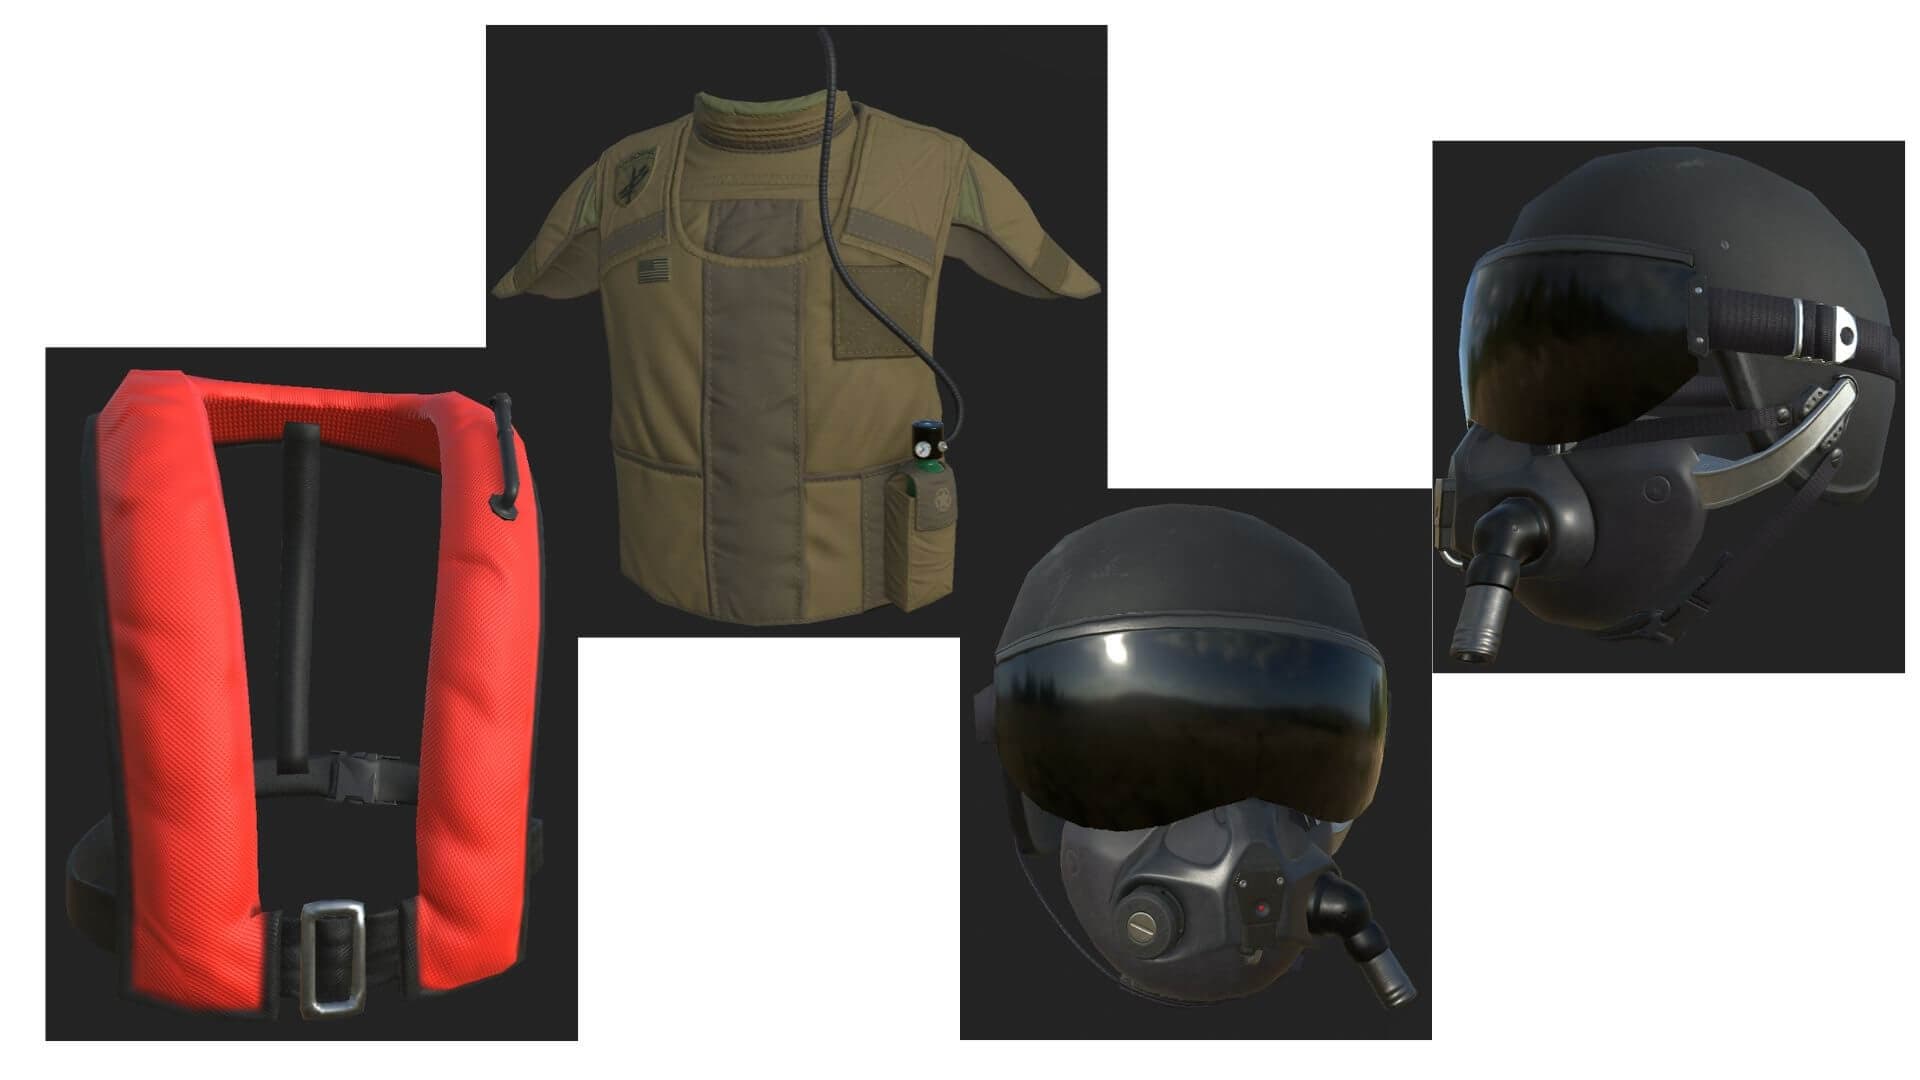
Reference board exported from PureRef. It features images covering the whole spectrum of military clothing and tactical gear I used as a reference for the US soldier's uniform. I assembled another board with reference to military sky diving suits, high-pressure helmets, oxygen masks & lifejackets for the additional set of equipment I 'equipped' him with.
Now, onward to the actual sculpting. For my organic sculpting (and quite a lot of hard-surface pieces as well), I used Pixologic's proprietary software ZBrush, the industry standard when it comes to all things modeling, really.
In my experience, it is the indispensable 'hammer of Thor' when it comes to producing high-quality, high-level 3D organic models and assets, due to its unsurmountable versatility, an endless array of powerful modeling tools and the list goes on and on.
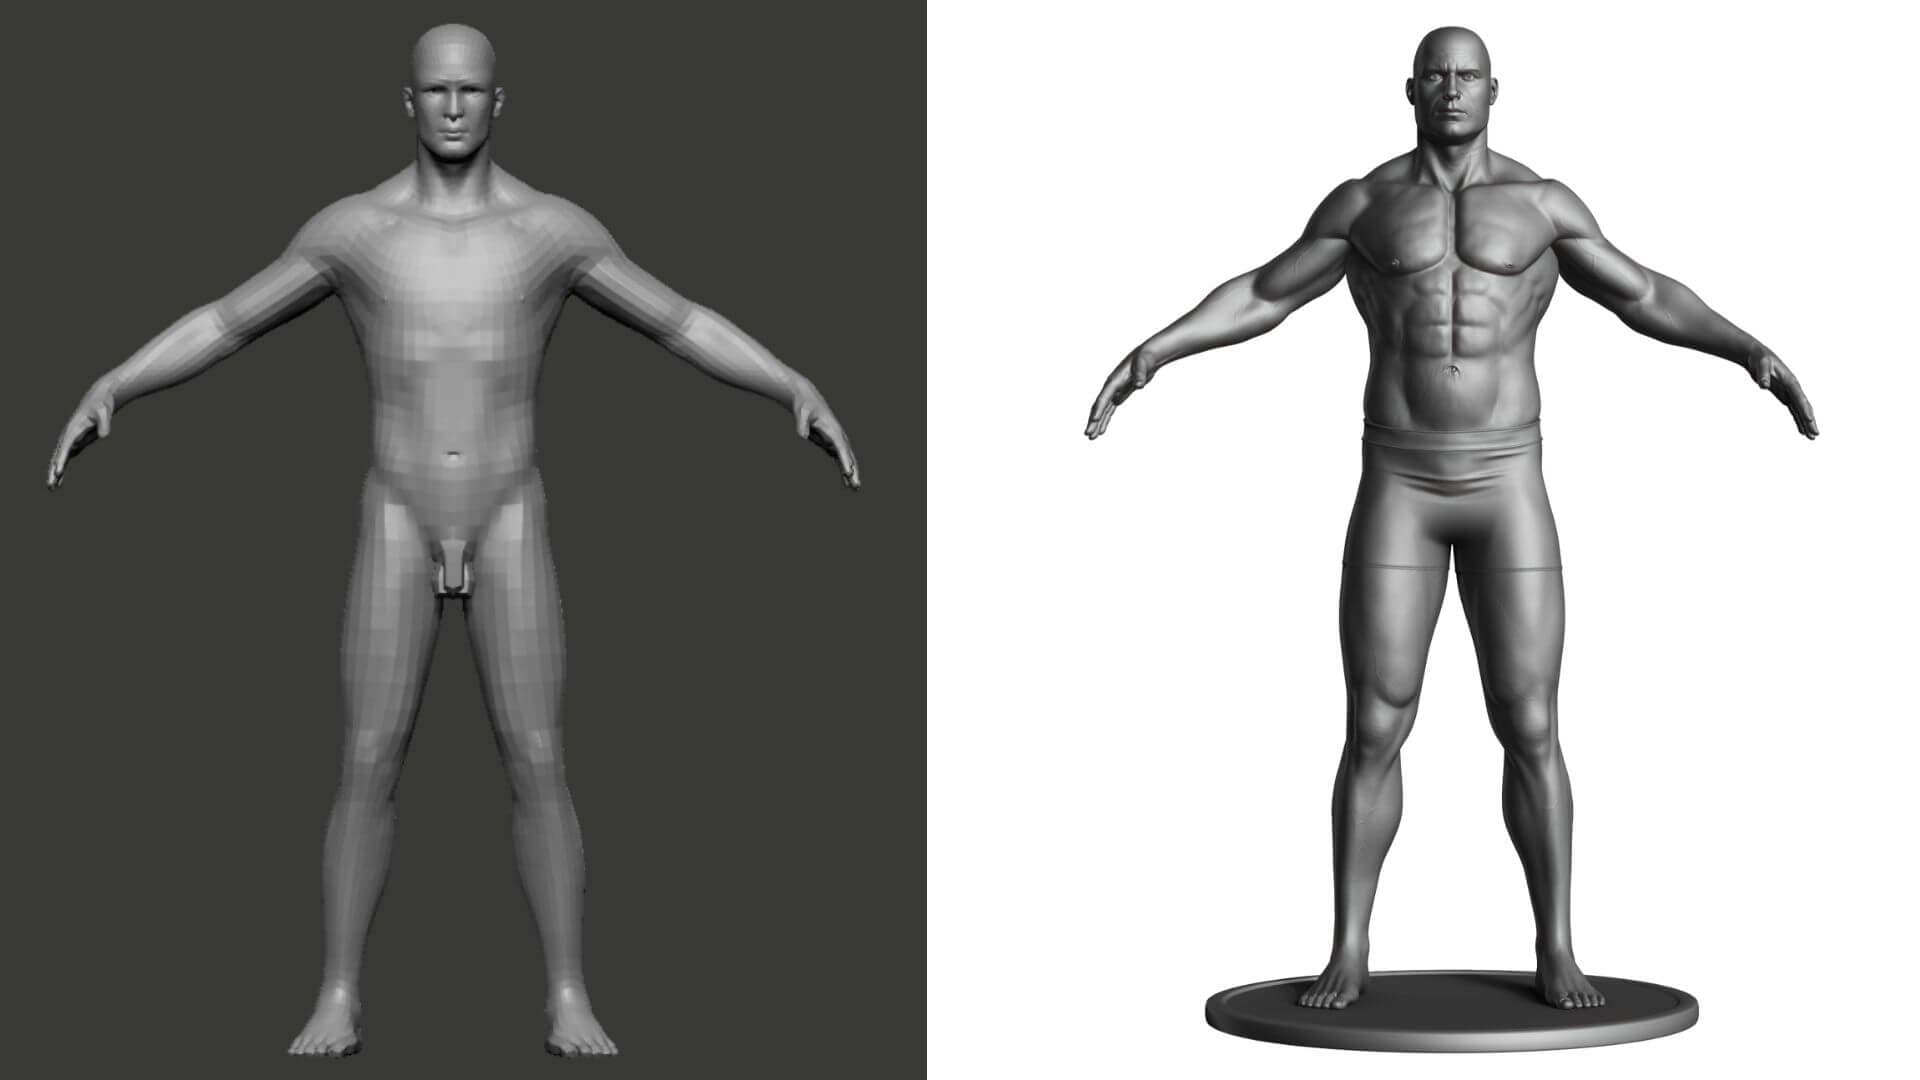
For a base mesh to start sculpting on, I initially used one of the many tools ZBrush comes with, namely 'Nickz_humanMaleAverage', which I systematically reshaped, adjusted and obviously sculpted on to produce the US soldier's final proportions, build and appearance.
Now, although at this point (and framed like this), the whole process might seem like witchcraft, it's actually very methodical and systematic. I will thus attempt to break it down, purposefully diving into specifics for the sake of kindred spirits and pixel (or should I say 'pixol'?) nerds alike.
As a primary brush for building volume, I use the ClayBuildup Brush and, as a general rule for many of the brushes I most commonly use, I activate the Backface feature, as that will prevent unwanted inward protrusions or thin portions of the mesh collapsing onto each other.
Additionally, I sometimes use the Clay and Standard brushes as a complementary measure to build volume. For pushing and pulling the digital clay around, I use the Move and Move Topological brushes, often with the same Backface feature turned on, as that will allow me to 'extrude' some volume and adjust thickness whilst keeping the edges of the mesh in place.
The Snake Hook brush is also great for moving stuff around, once you get the hang of it. If the topology of the initial base mesh gets skewed along the way due to cumulative distortions, adjustments, and volume-building, etc., the magic wand is summoned and Dynamesh activated henceforth. Thus, the topology will no longer be a problem until further stages of the process.
However, the best practice in a production pipeline is to have a handy base mesh ready, with previously laid out animation-ready and correct topology, which will be subsequently subdivided and seamlessly sculpted upon. In my case, I used the above mentioned ZBrush standard one, subdividing it for further and further refinements after having established the primary volumes and proportions (you may notice some emblematic bits missing… for our purposes, they just didn't make 'topological' sense…).
Assigning shortcuts to your most commonly used brushes is an absolute must and so is building a custom menu if speeding up your workflow is a priority (and it definitely should be during production), so I highly recommend it.
What follows is an arduous process of refinement and detailing as you move through progressive levels of subdivisions, whilst always keeping a critical eye on the overall silhouette, shape, and proportions of the model and constantly referencing anatomy (a physical écorché would be extremely useful as well throughout the whole sculpting process, alas I'm yet to possess one ... for now).
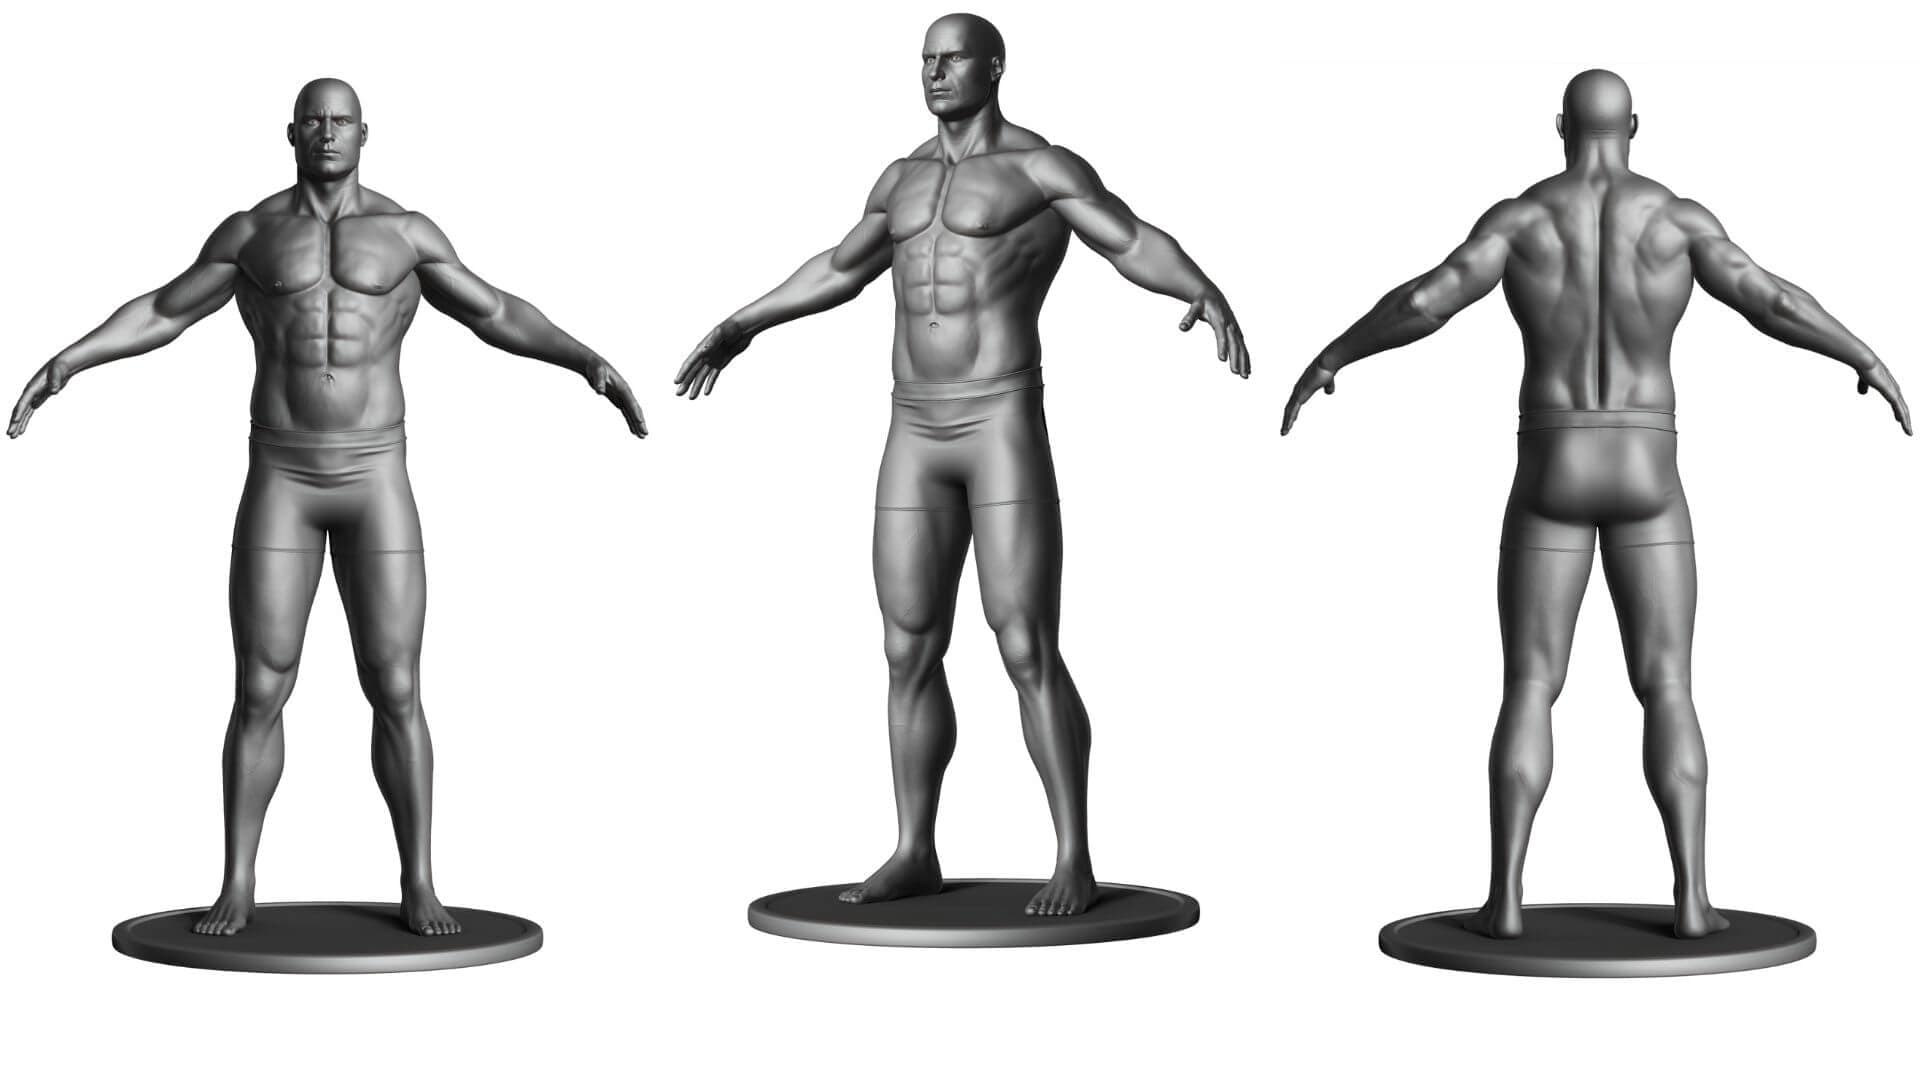
The final ZBrush look of the character at the highest subdivision level (which was just high enough to sustain the details, keeping in mind the distance the character would generally be viewed from).
Finally, at the higher levels of subdivision, when the polygons are plenty to properly sustain the details, we start adding pores, wrinkles, skin defects, moles, veins, you name it, to make the model look as realistic as possible if that's the direction we're heading in.
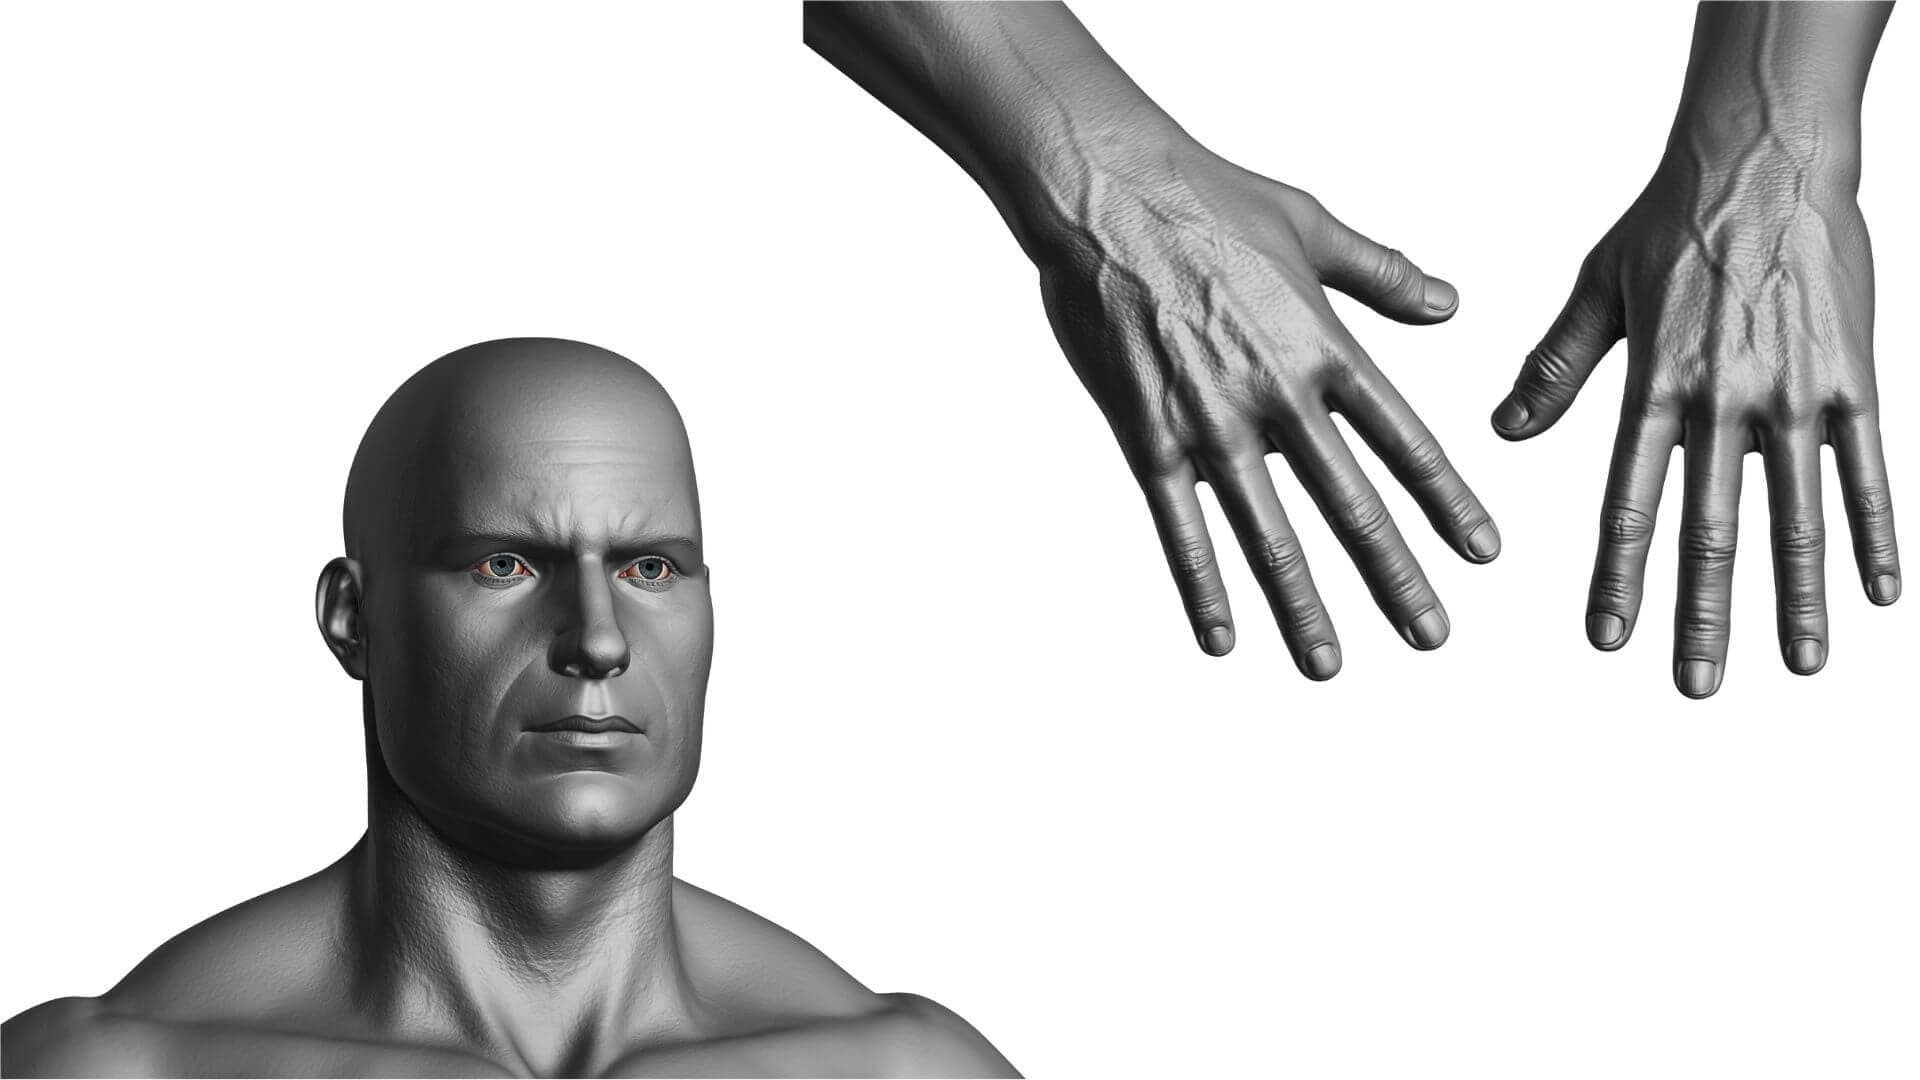
I did spend quite some time on the hands as they are rather hard to get right… But with the proper amount of patience, they turned out all right… all veiny and manly… after all, he wouldn't be playing the cello…
This was achieved through manually applying a wide range of skin, pores, and wrinkle alphas specific to the various parts of the body with an emphasis on skin direction, pore density, wrinkle direction and distribution and all the free jazz that accompanies the endless complexities and diversity of human anatomy.
Although we as artists ‘can get no satisfaction when it comes to accepting our work as completed or pixel perfect, I had to move on, generally pleased with the quality of the high-res sculpt. Now, a low-res mesh was required with proper topology and significantly lower polycount, in order to ensure seamless animation in Unity or Unreal Engine and effortless transference of high-res details. For this purpose, I generally use Topogun, using as reference a decimated version of the high-res ZBrush sculpt (even though in the case of not too sophisticated assets, the ZBrush method of retopology will do just fine, so I tend to stick with it).
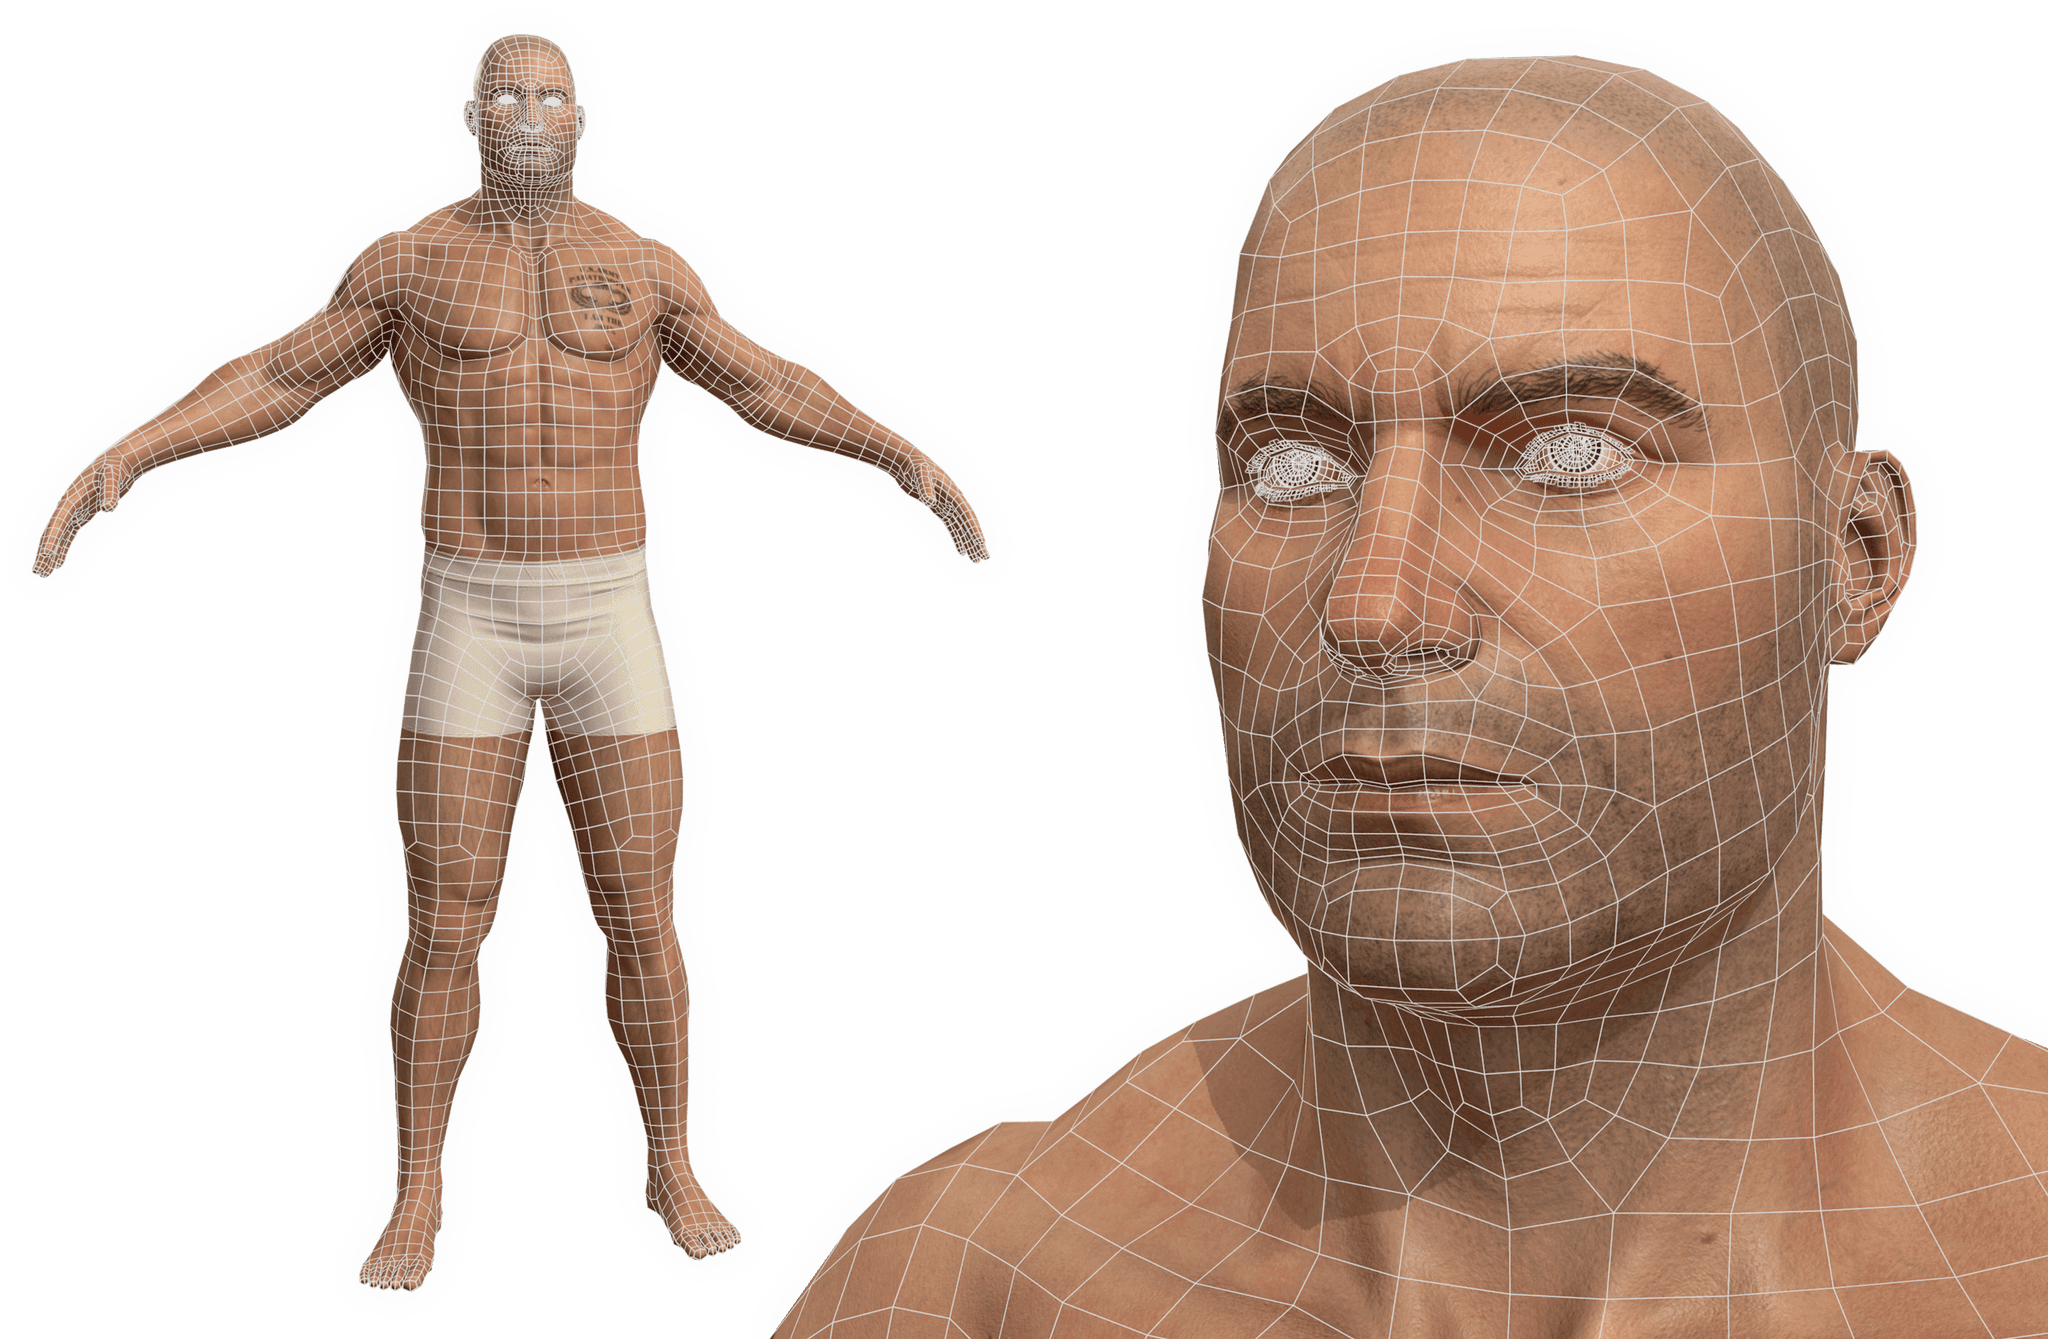
Textured game-res mesh with superimposed wireframe view. Topology optimized for animation…I will cover the texturing process next.
In terms of texturing, the ”weapon of choice” is in most cases Substance Painter and this was no exception. It is extremely powerful and versatile and therefore, deservingly, the industry standard when it comes to texturing game assets.
Before applying any color information, however, the UVs (the surface of the 3D asset converted into two-dimensional flat pelts) need to be laid out with utmost care so that the texture maps won’t stretch or present unwanted artifacts down the line.
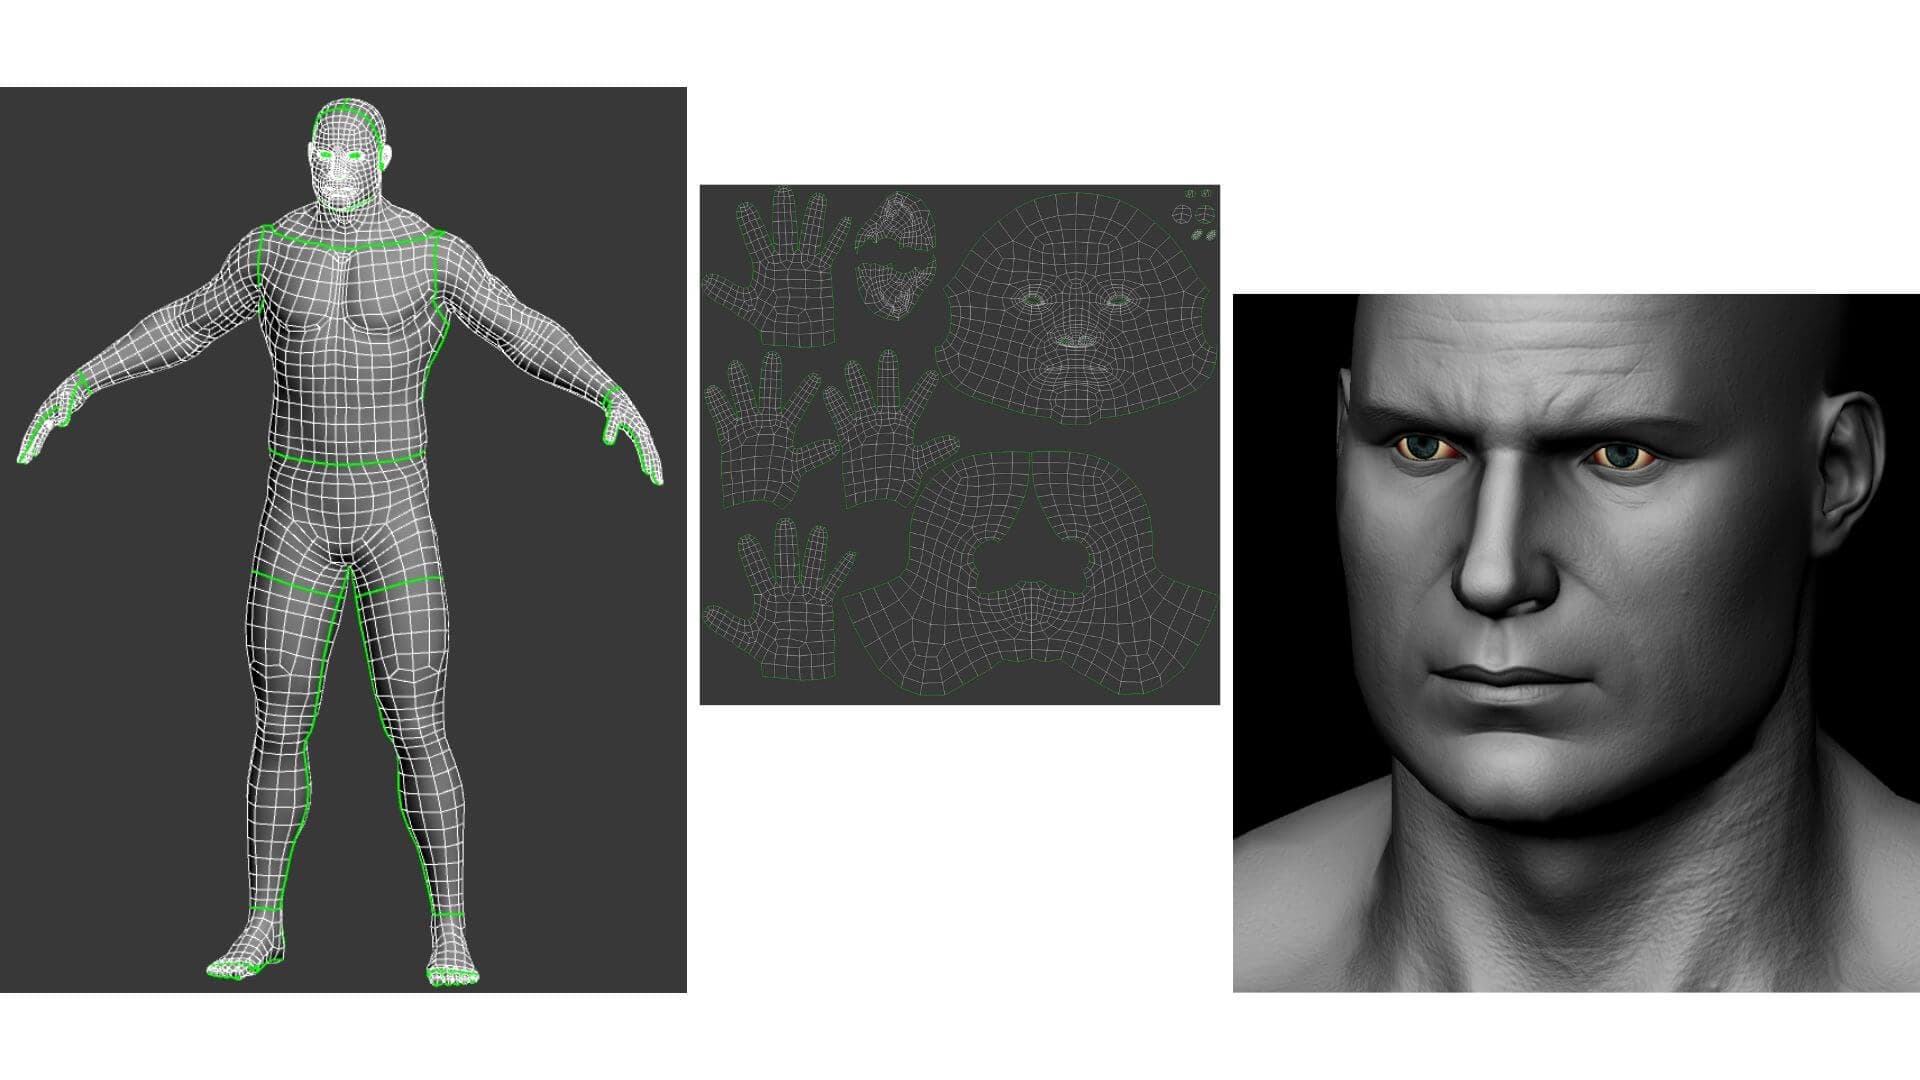
3D Mesh US soldier with highlighted UV cuts and corresponding UV layout for the head and hands. Two other maps were exported for the upper & lower body at 4K each, textured separately as different materials in the same Substance Painter session.
Notice the subtle transference of skin details from the high-res model onto the low-res one, if you can manage not losing yourself in those hangover eyes…
So, in a nutshell, what follows is the low-res mesh is imported in Substance Painter and all the surface details from the high-res mesh (in this case, pores, veins, wrinkles, and such) are captured and projected onto it (based on an adjustable ‘cage’) and a whole set of maps are generated (normal map, ambient occlusion, curvature, position, etc.).
The end result will be the low-res mesh looking, as much as possible, like the high-res one.
Since texturing in Substance Painter works by stacking layers of color information on top of each other (akin to Photoshop, with an abundance of blending modes), the whole process is fun and straightforward and the possibilities endless.
However, when texturing the human figure, a healthy dose of realism is required, so I used a standard Skin Material as base fill and subsequently “airbrushed” layers of reds, blues, yellows, and various other hues, on corresponding areas of the body (reds where the skin is more translucent and vascularized, yellow where the skin is thinner and bone protrusions more prominent, and blue where capillaries and veins are more prevalent, etc.).
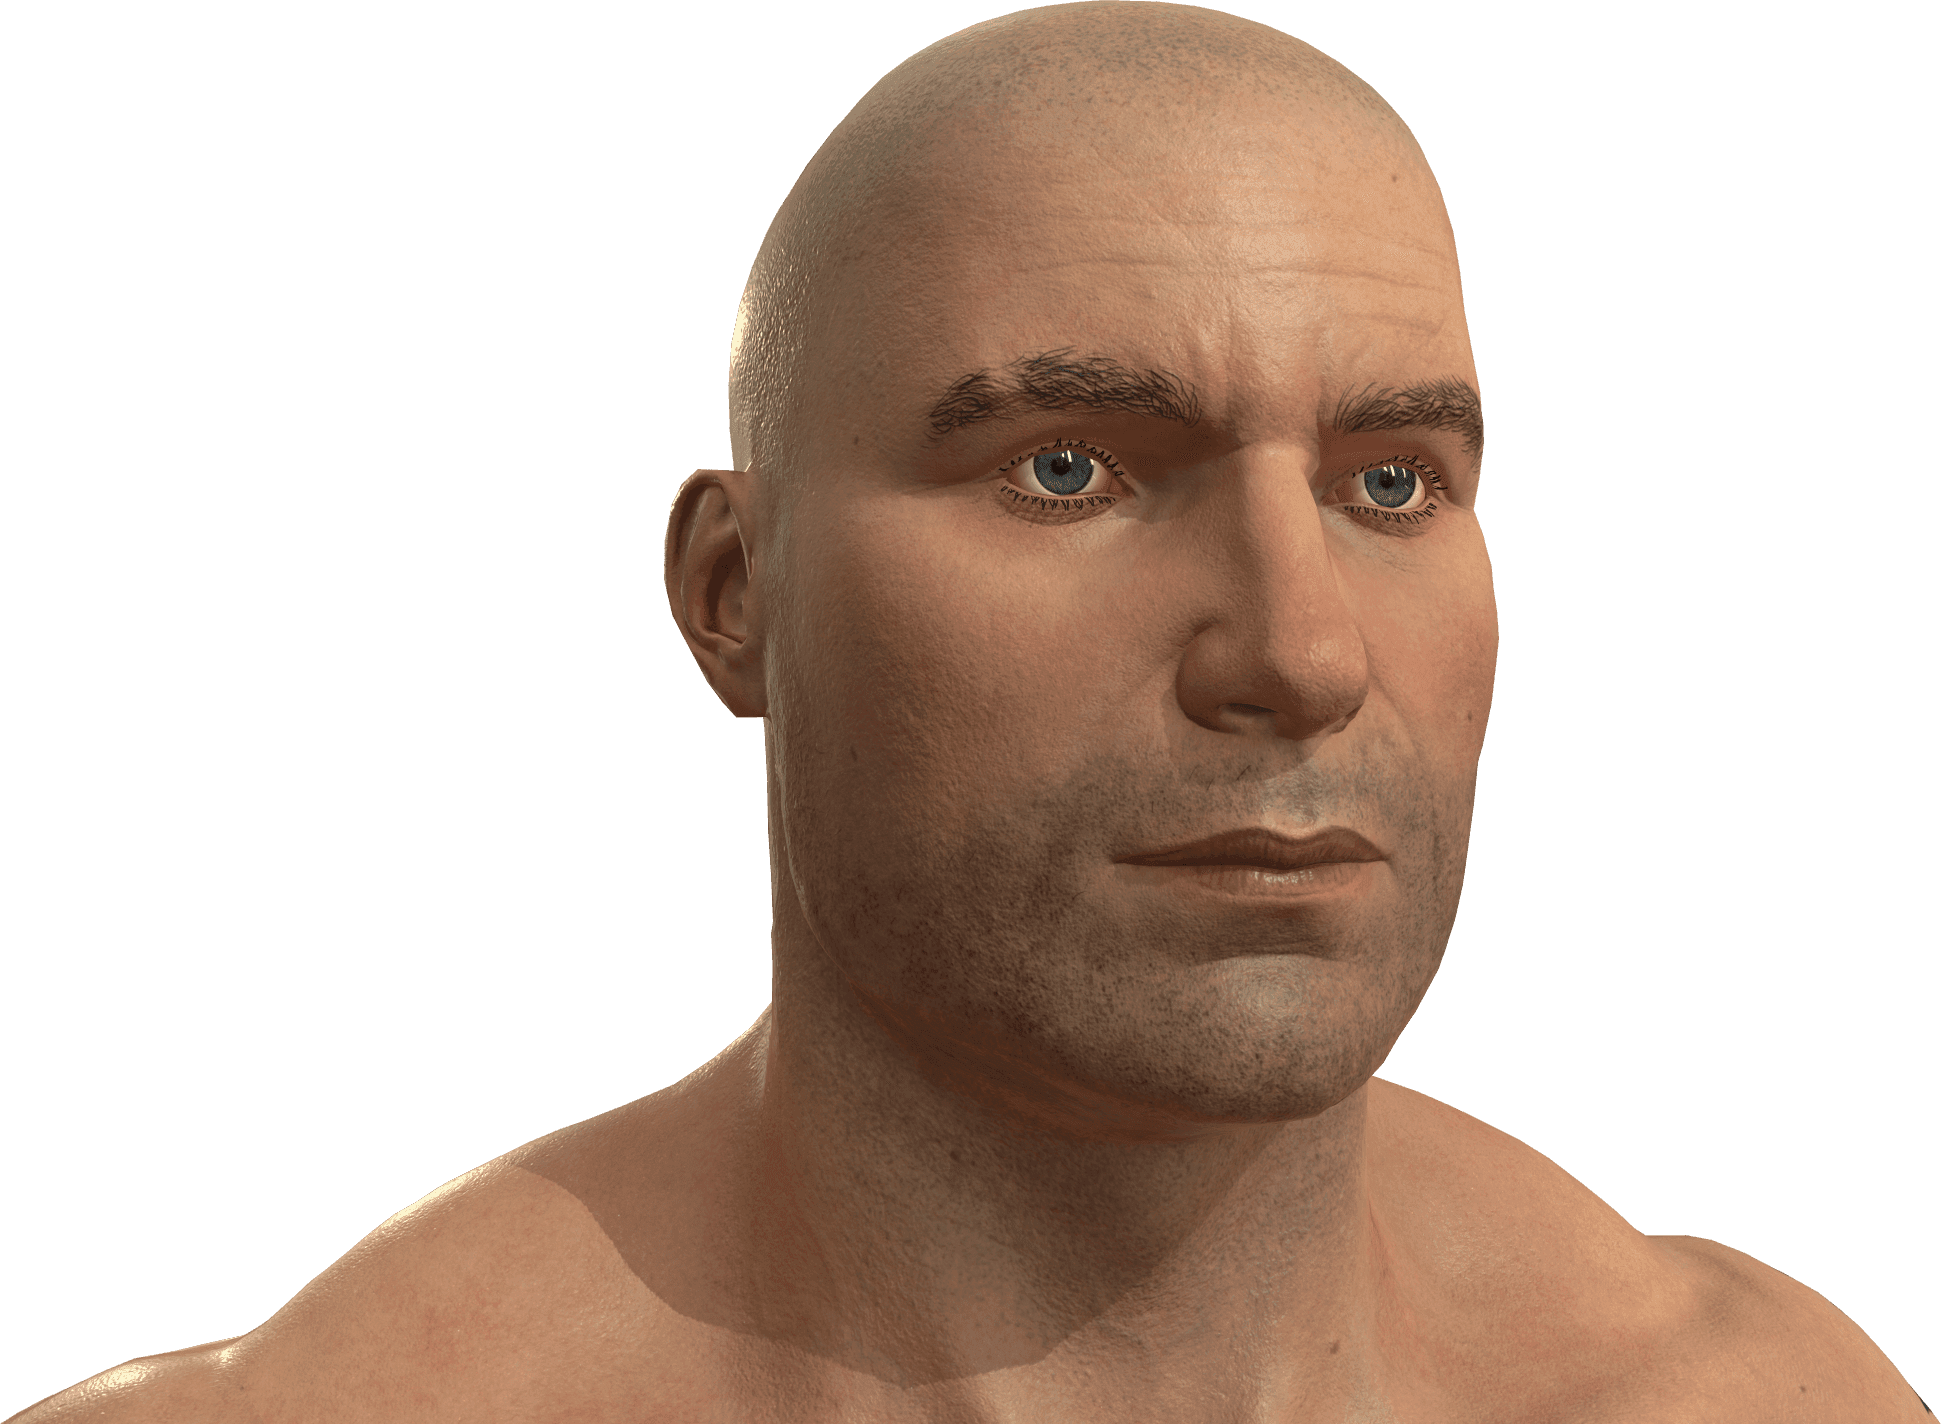
I also sprayed various alphas of whiteish color to unify and temper the whole skin tone. Added hair, moles, scars, veins until my baby US soldier looked fully human…and rugged. Behold!
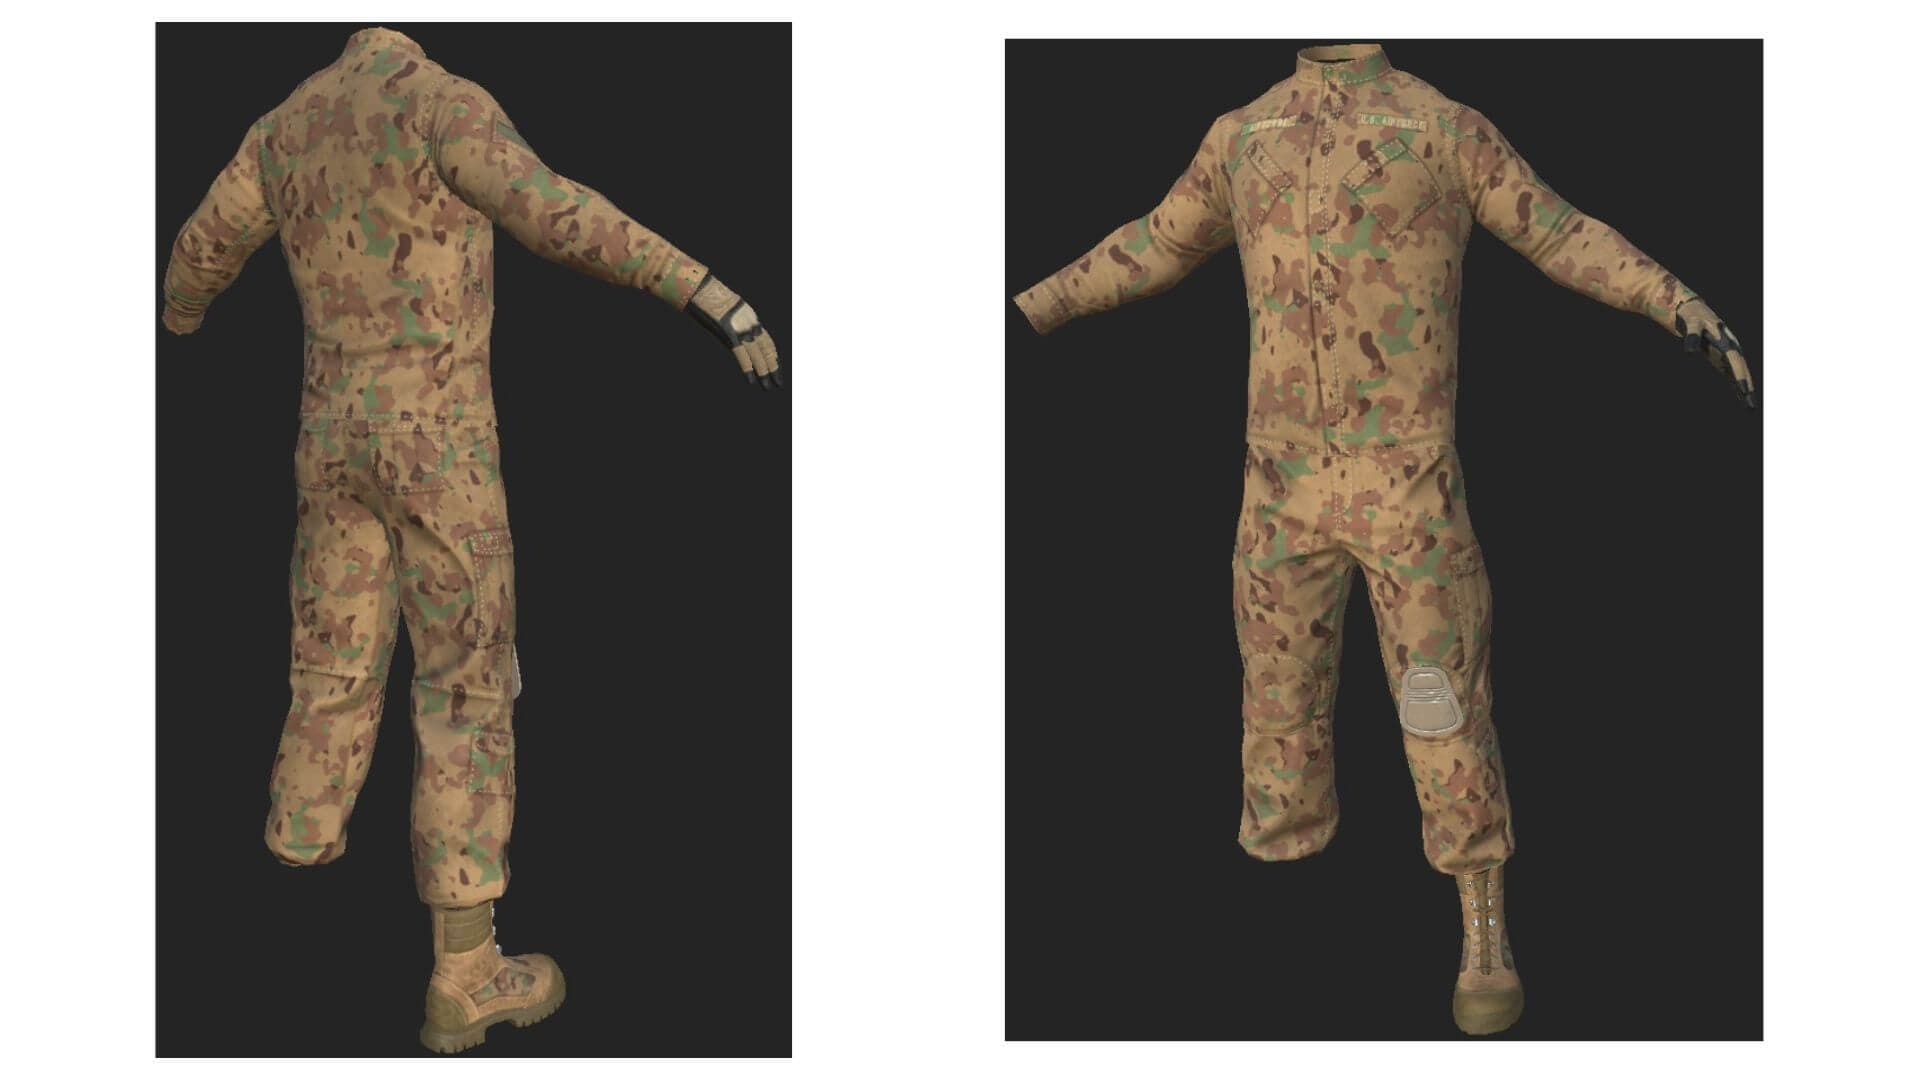
Quick renders of the textured soldier exported from Marmoset Toolbag, another piece of software indispensable throughout the game-res production pipeline…
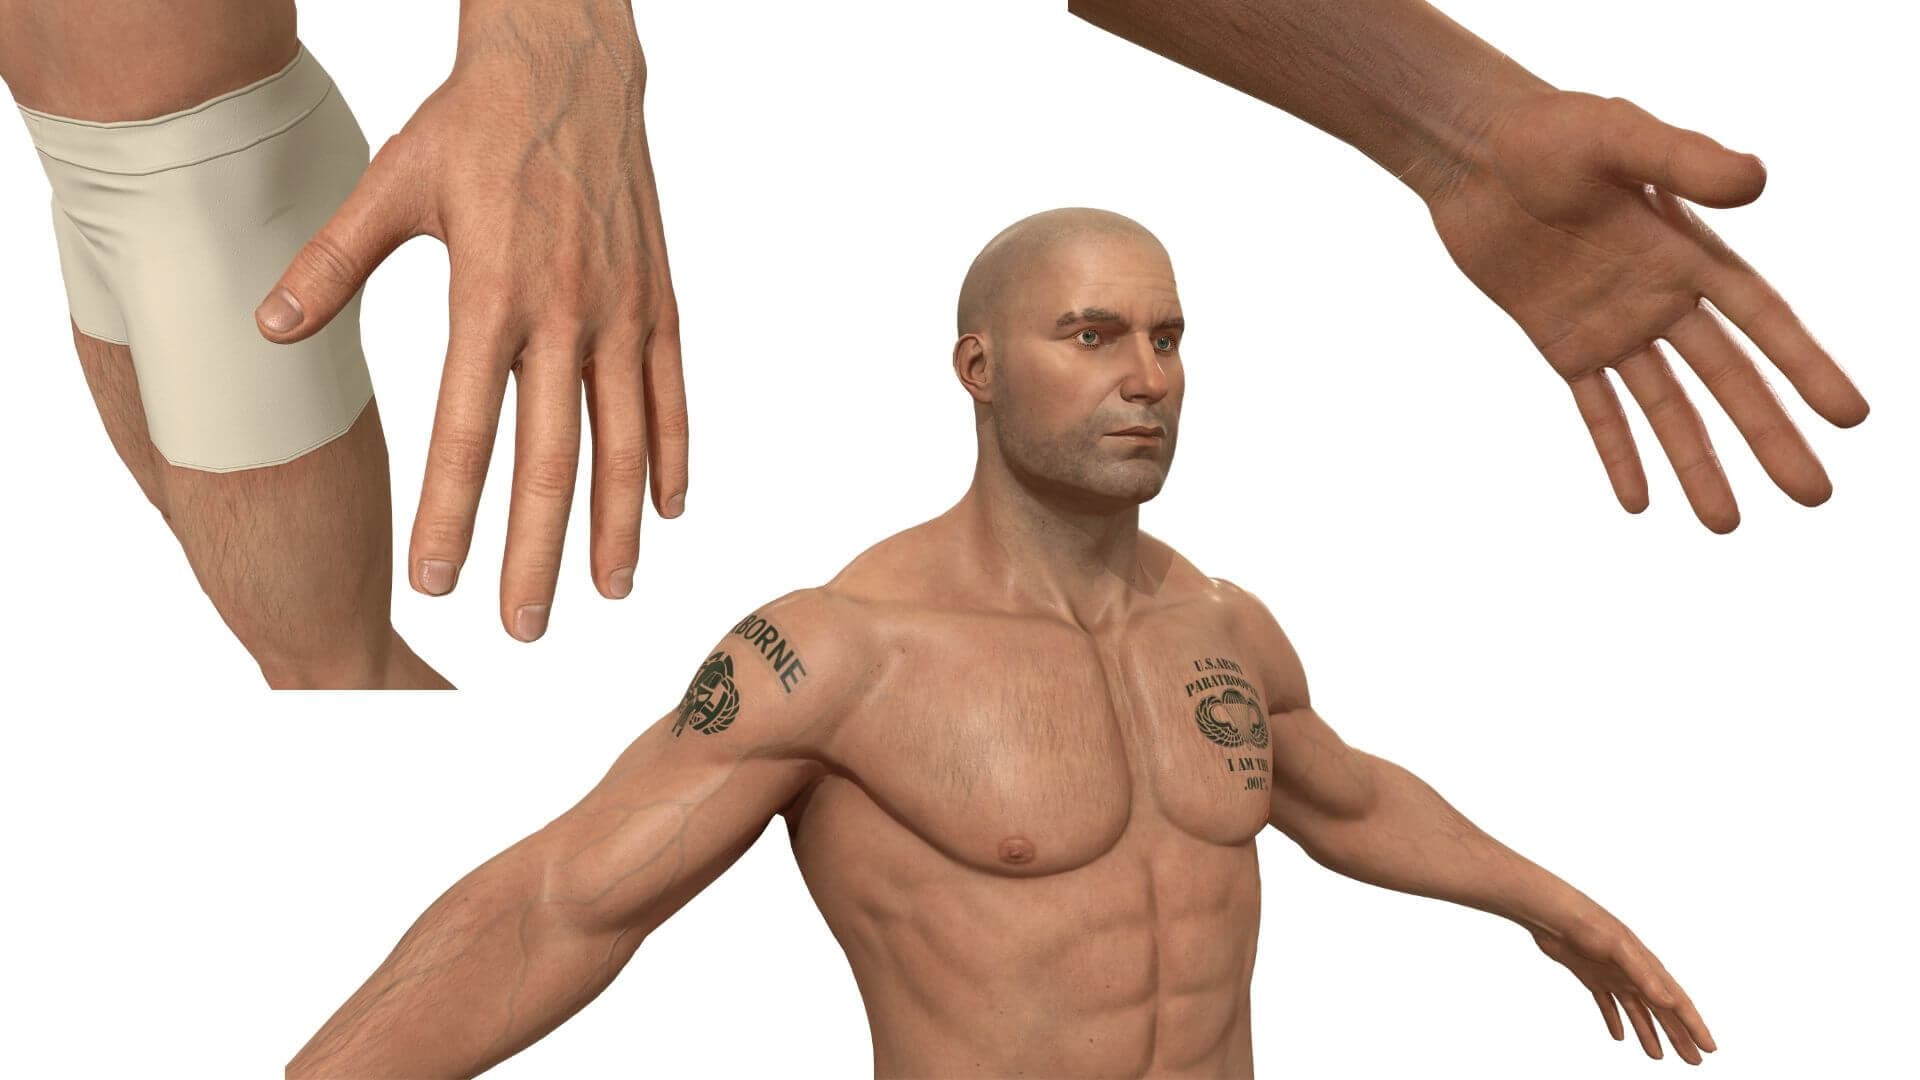
No army man is complete without some army tats…

This concludes the brief description of the texturing process of the body…the next phase is modeling and texturing the uniform and all the equipment pieces…and then some!
Next, I shall be discussing the process of asset creation and texturing, so onward with our US soldier’s equipment, tactical gadgets, and gizmos! First of all, let’s put some clothes on the guy…
For this purpose, I used the same ol’ faithful software - ZBrush, 3dsMax & Substance Painter (for texturing) and, an additional one that has become in and of itself the industry standard when it comes to producing realistic garments and physically-based simulations of said garments, namely Marvelous Designer.
Basically, you “assemble” the clothes in two dimensions in the 2D view, back & front, with all the various pockets and accessories. You then sew the back with the front, as accurately as possible, additional bits included, then arrange them accordingly in the 3D view, making sure the sewing doesn’t overlap. Now run the simulation on your 3D model.
You can pause the simulation at any time, adjust a whole array of parameters concerning the make, nature and various other characteristics of the fabric, increase the polygon density for more accurate folds and run it over and over again until the clothes fit on the model, looking natural and believable.

A look at the 2D Viewport in Marvelous Designer. The silhouette of the 3D model US soldier is very useful as a placement guide for your garments. The lines connecting various elements indicate the active symmetry between them.
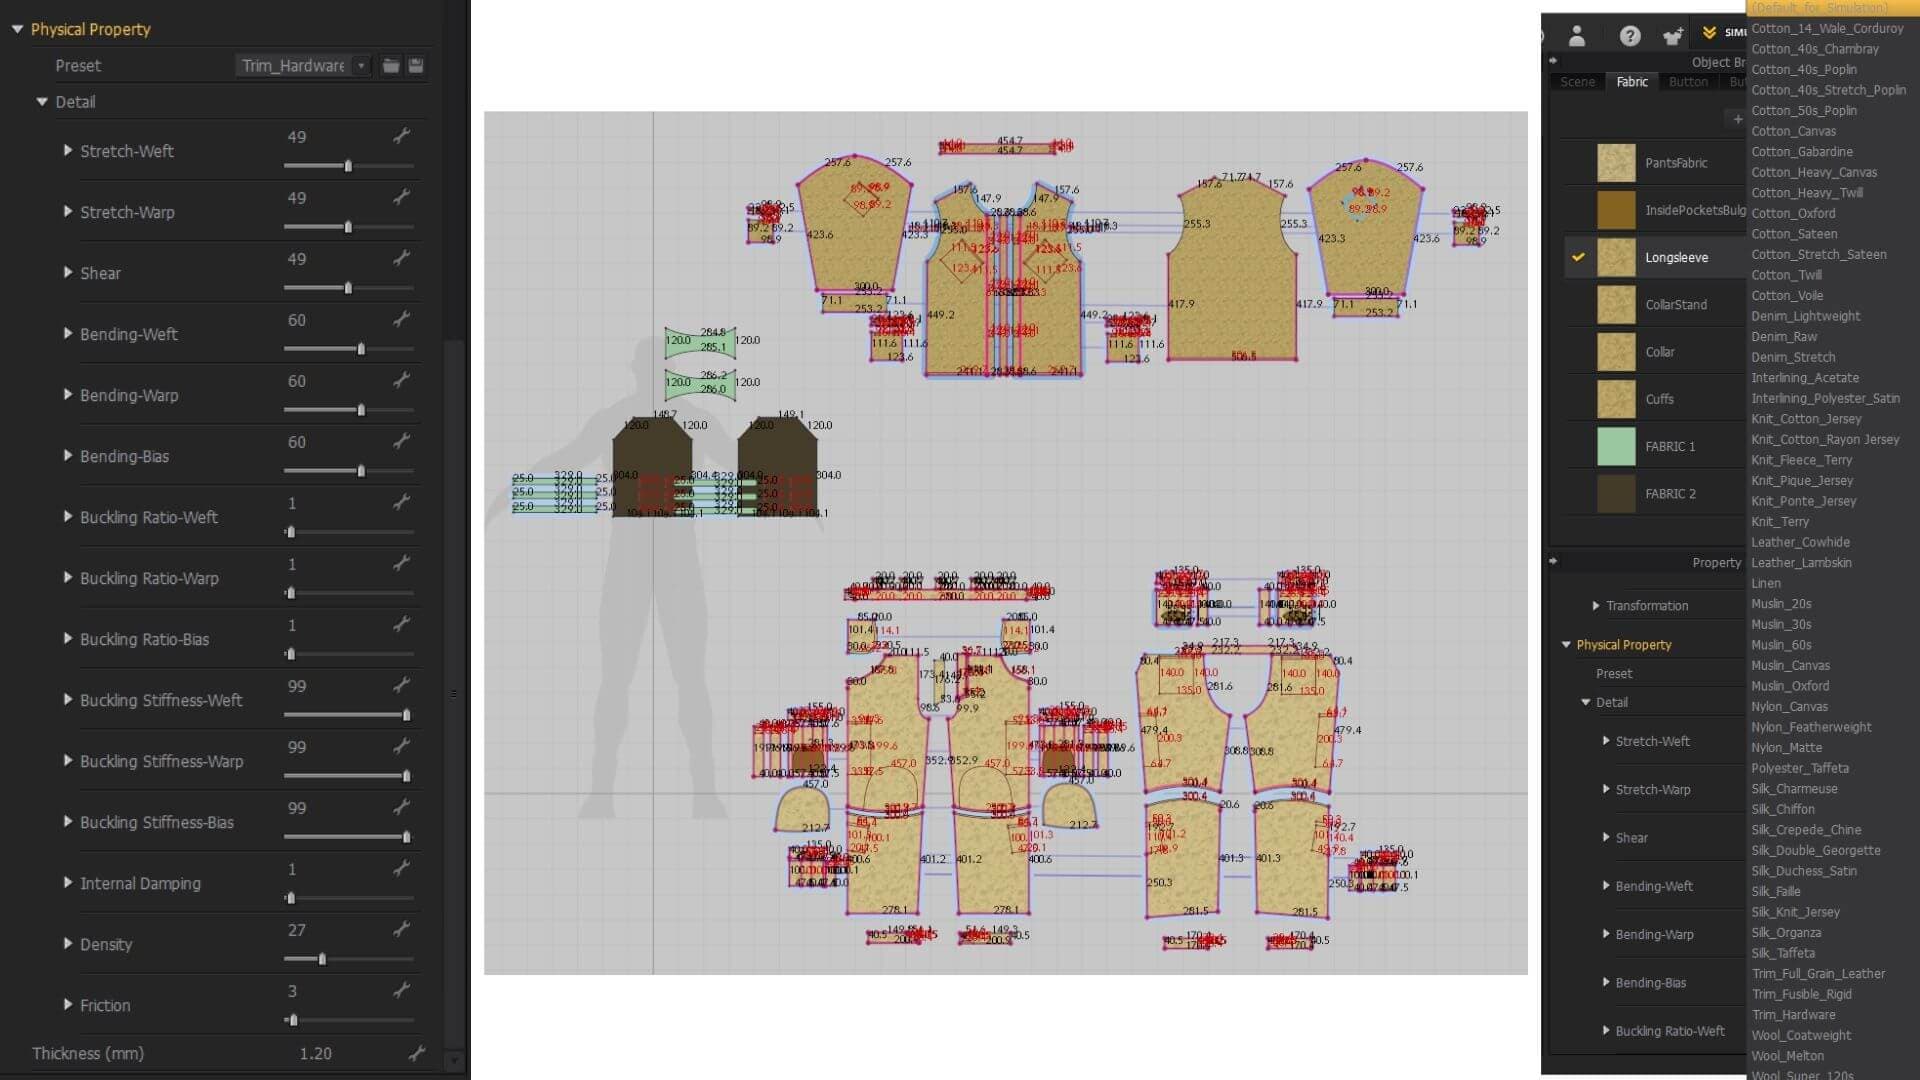
In addition, you can manually tinker with a whole bunch of the materials’ parameters, noticing how altering their various properties affect their behavior during the simulations, thus achieving different looks for your garments.
And, as previously mentioned, you can choose from a wide range of physically accurate material presets, given that each will behave differently during the simulation, as in real life.
Another very useful option is to view the actual lengths of the segments (default: mm), thus making sure they are (symmetrically) the same.
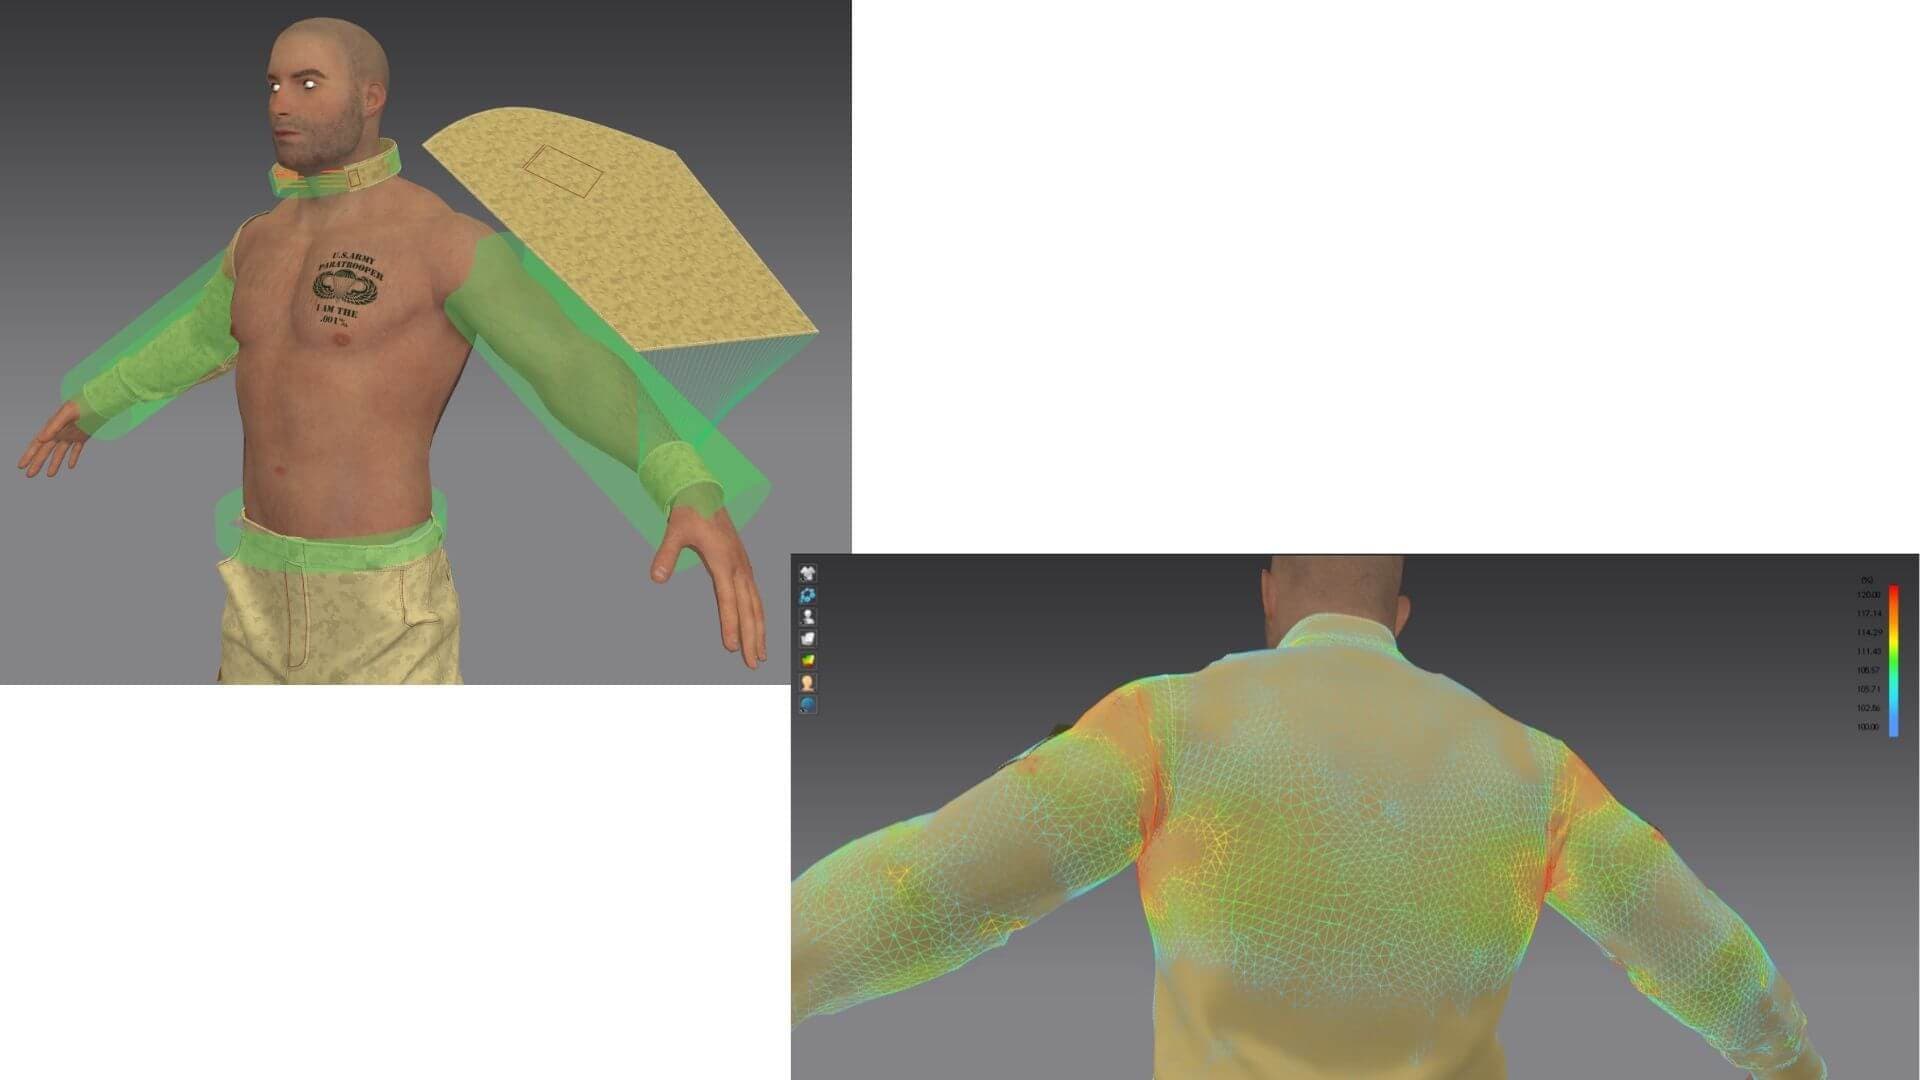
In the 3D viewport, you can visualize the strain map of your garments and make adjustments accordingly, either by pulling directly on the cloth or enlarging the various parts that are highlighted in red (where there should obviously be less strain).
You can add a whole array of button types and stitches with lots of options and parameters of their own…
You can assign or create (as was my case) bounding volumes that will assure the proper wrapping of the garments in areas such as the waist, neck or arms.
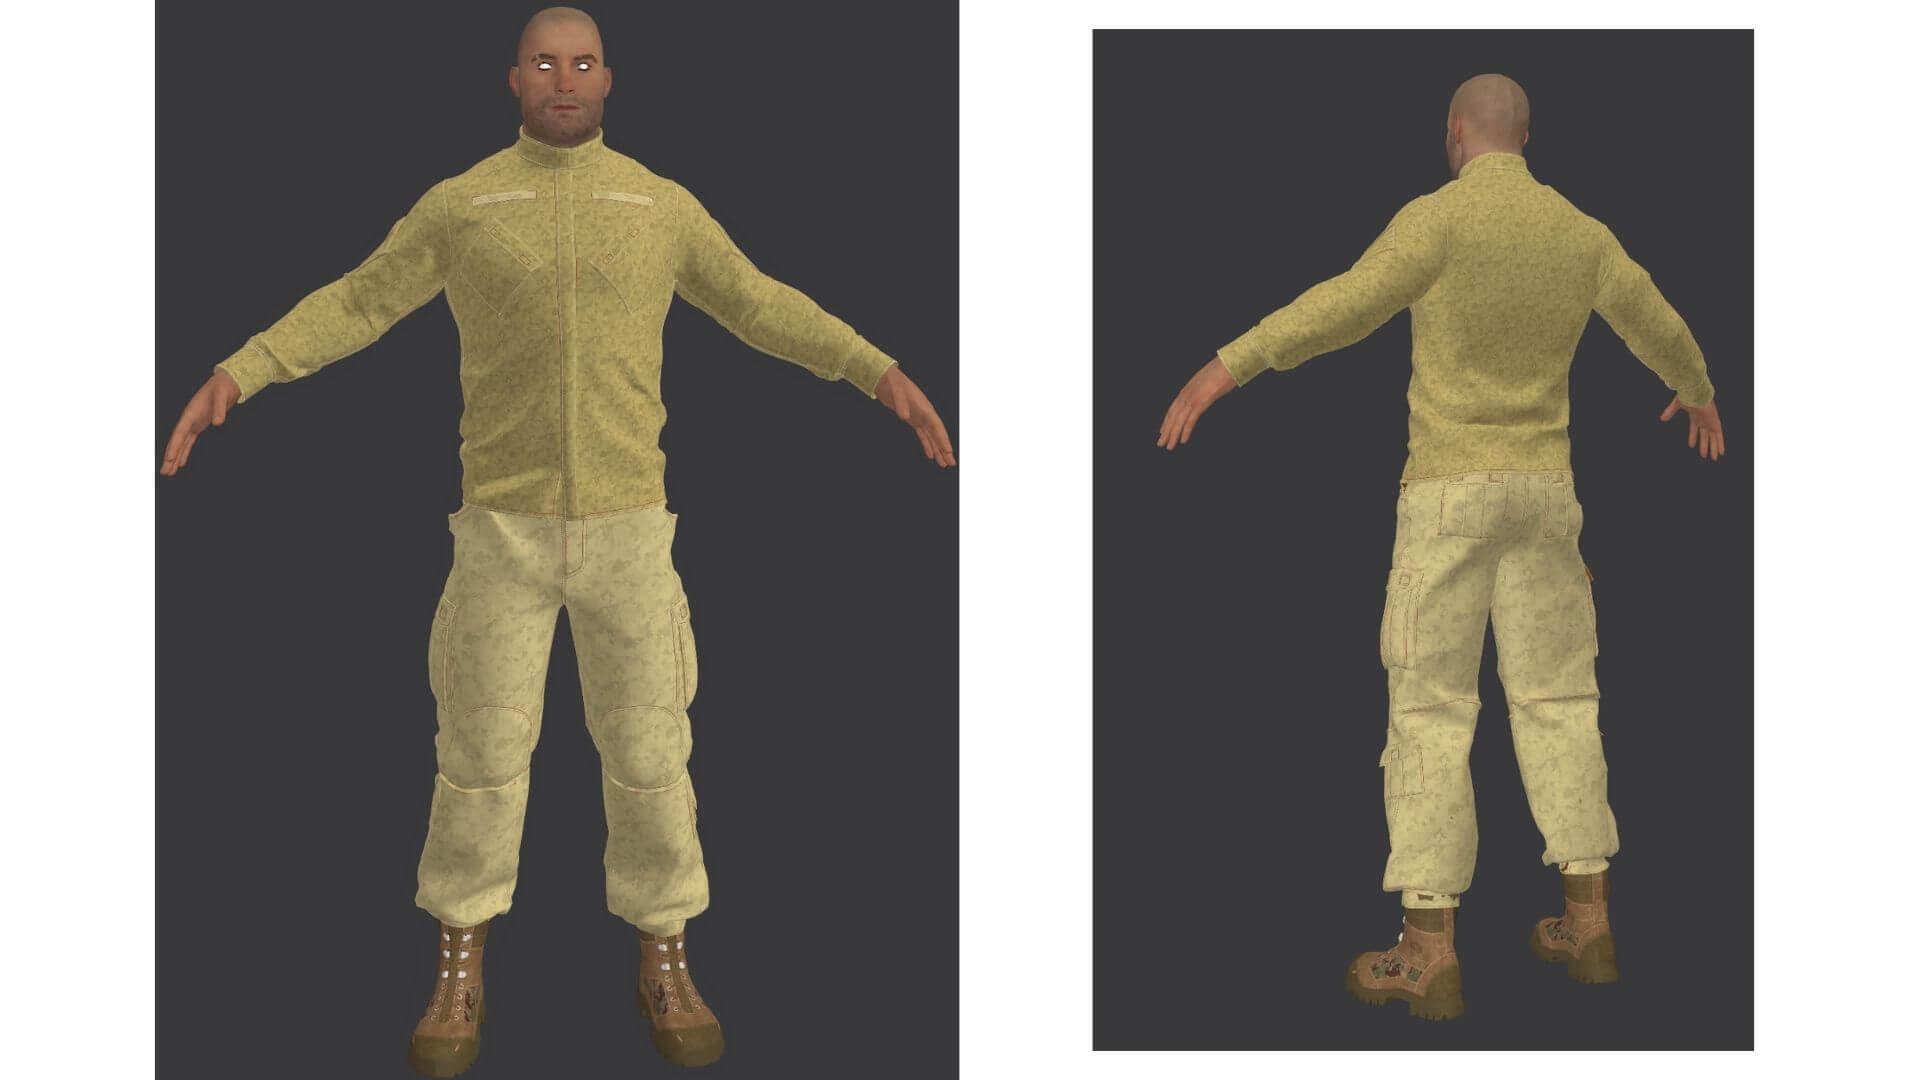
Snapshot of the 3D Viewport in MD showcasing the end result of the garment simulation before refining it further in ZBrush. The boots were on the 3D model US soldier so that the pants would simulate and fold accurately.
After I was satisfied with the result, I exported the garment meshes in ZBrush for further clean-up and polishing.
Firstly, retopology is usually required for producing a clean, quad version of the cloth mesh, onto which the simulated mesh will be projected. In other words, the same folds and cloth details from Marvelous, but on a clean, quad, animatable mesh.
And with subsequent subdivisions and further refinements of the folds, with the added advantage that you can go back and forth between subdivision levels and make larger adjustments in a non-destructive fashion.
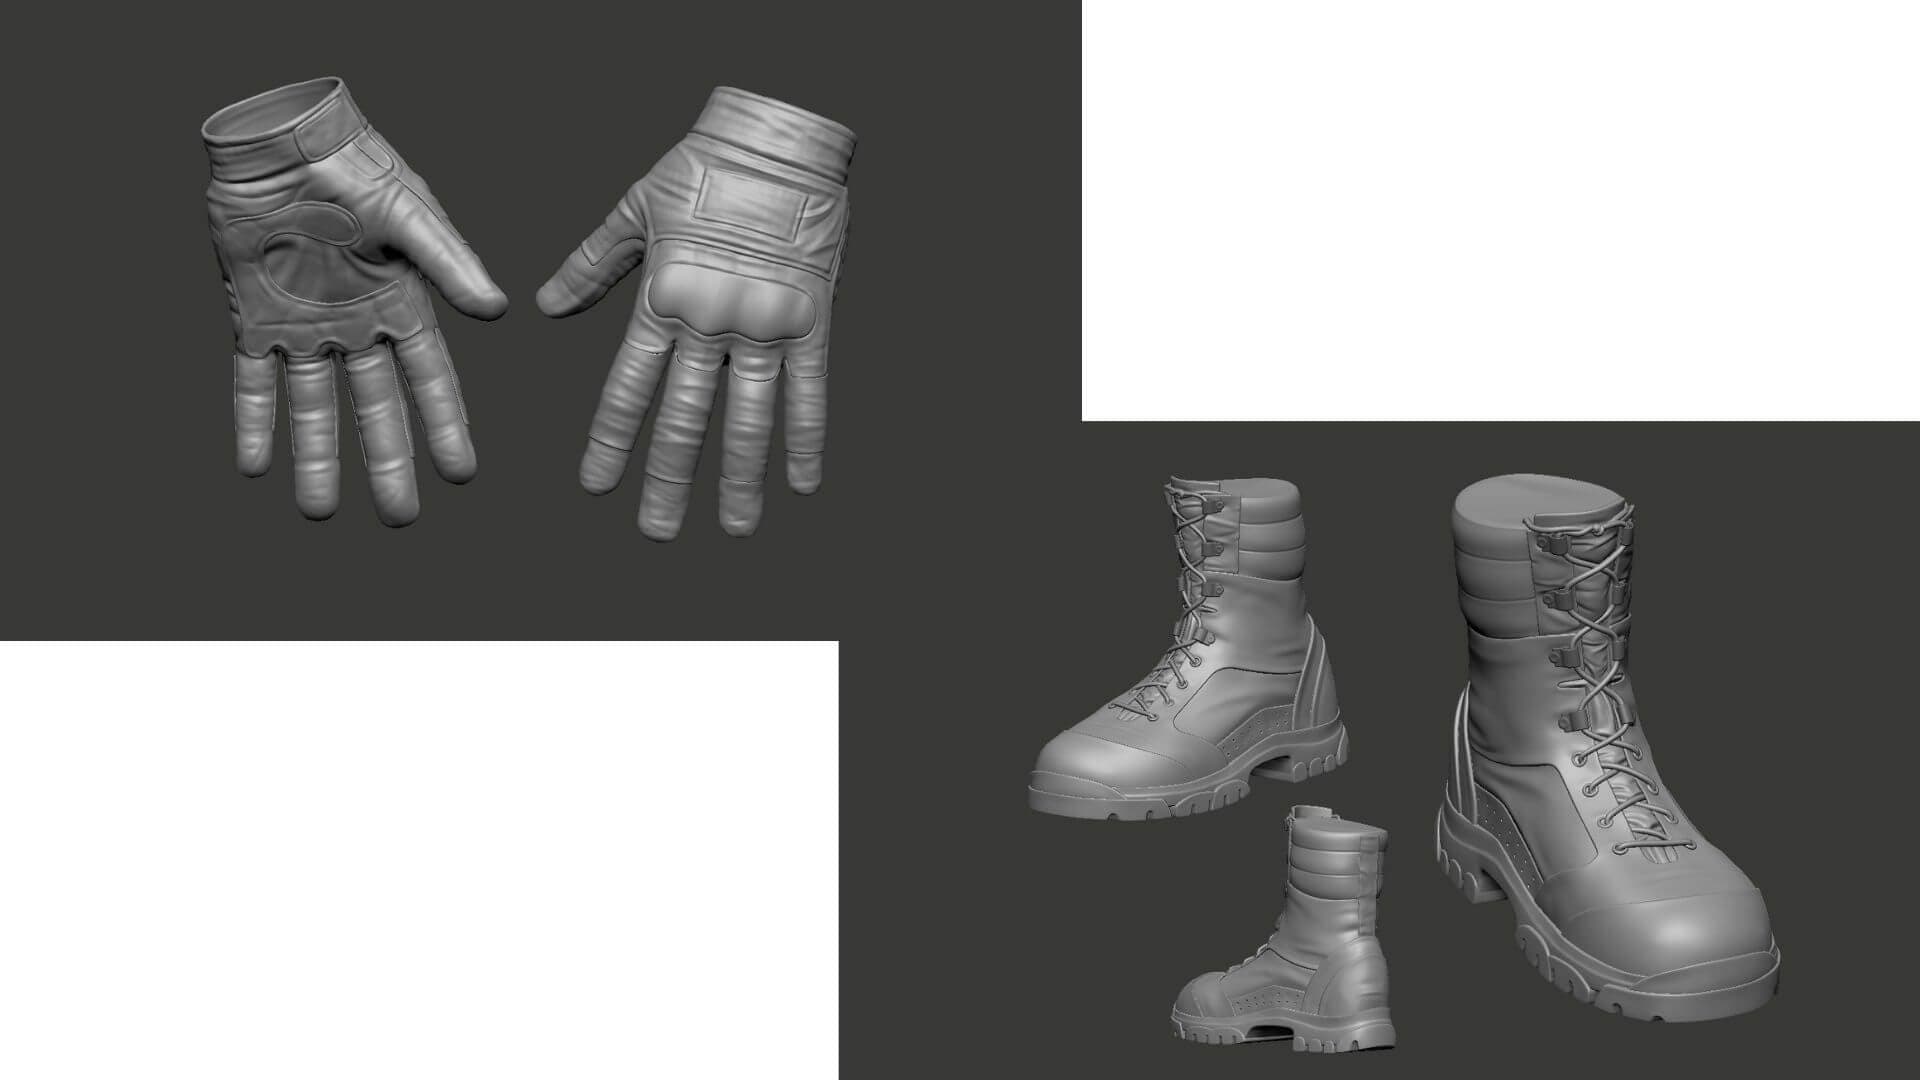
A quick look at the gloves and boots, modeled entirely in ZBrush.
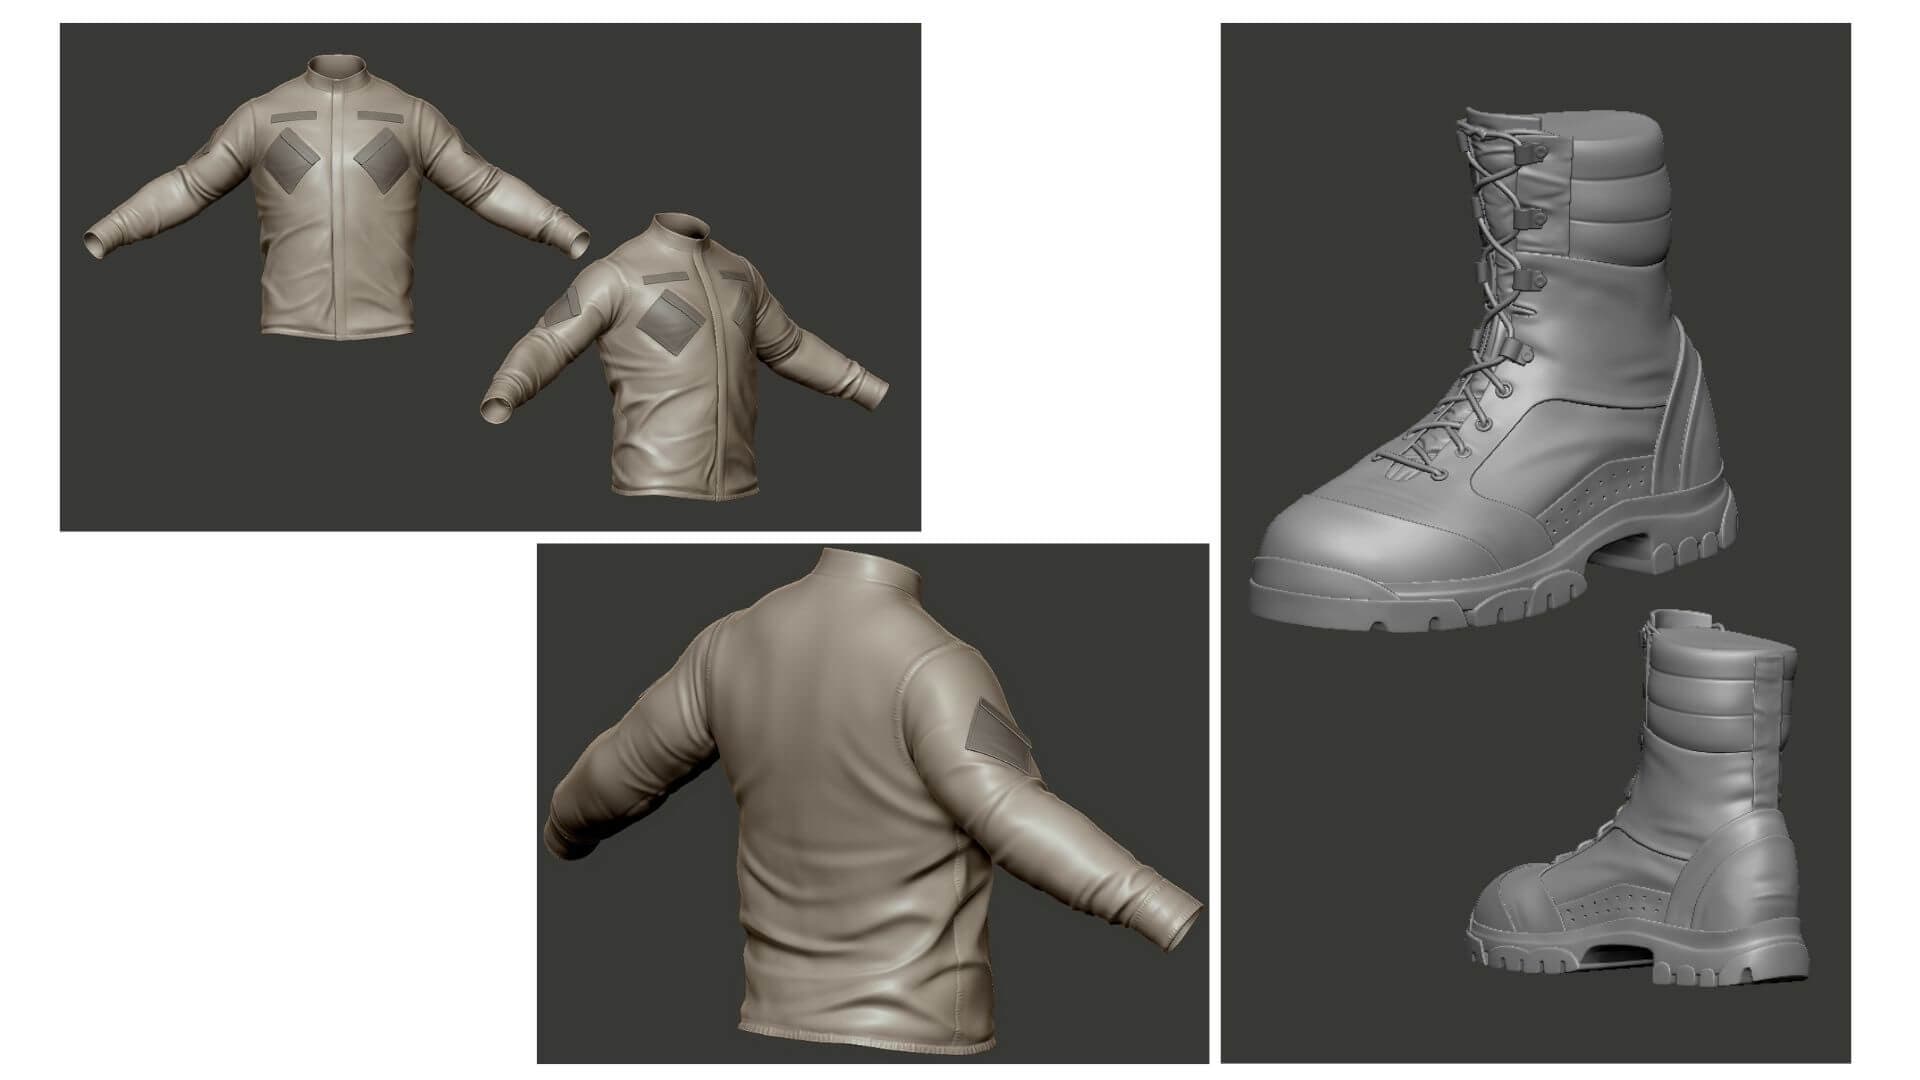
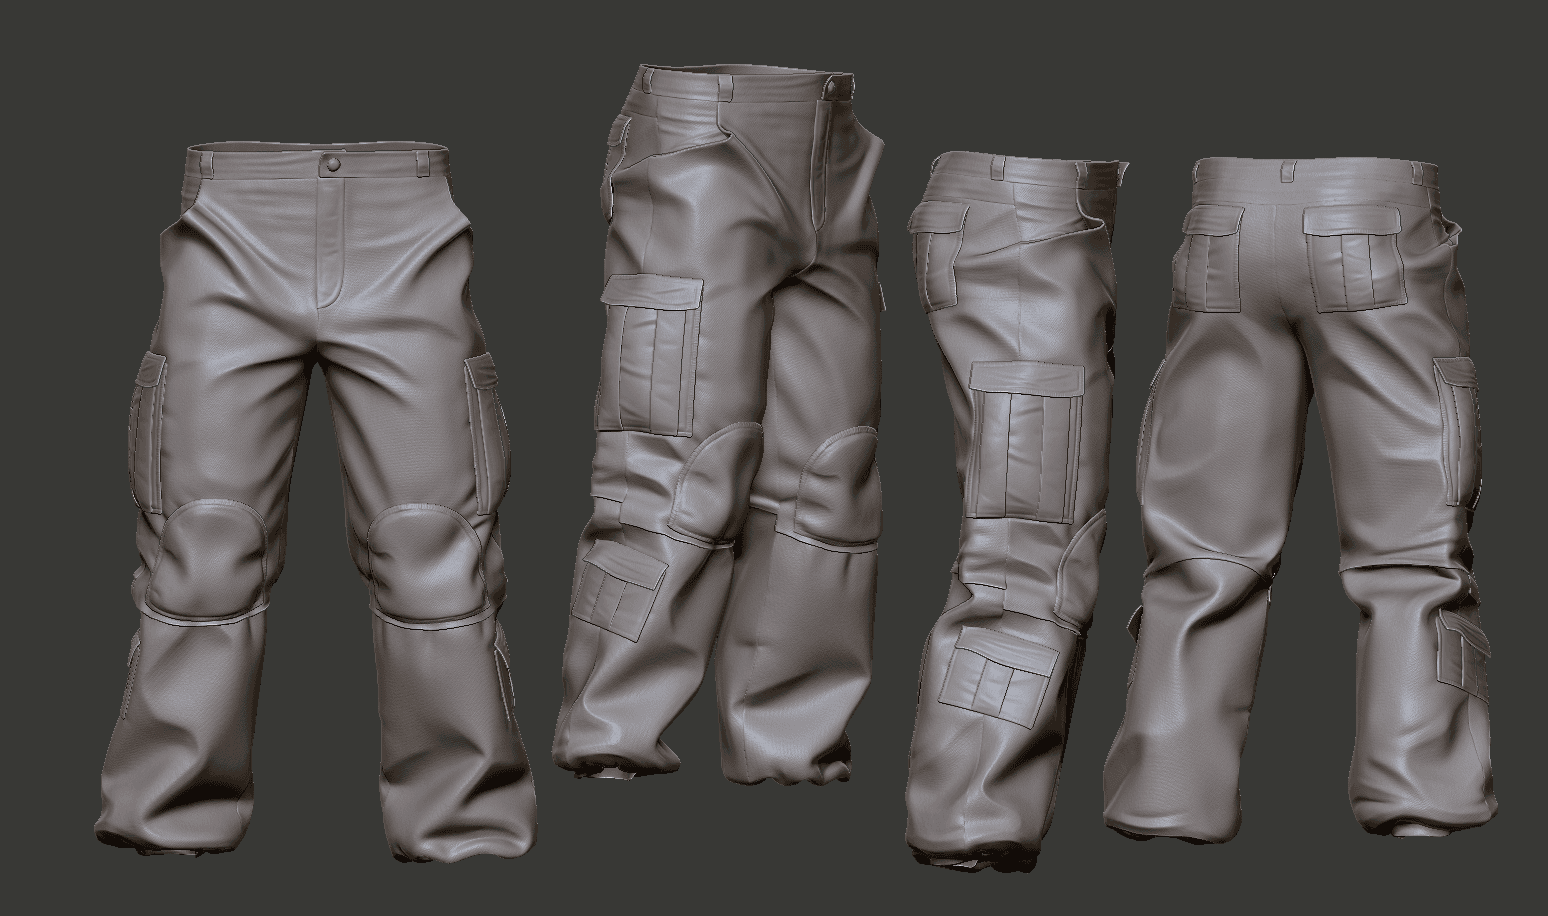
A high-poly version of the boots, jacket and pants in ZBrush with proper topology, adjustments and fold refinements (albeit somewhat stylized here and there, for the purpose of extracting a compelling normal map).
Same with the tactical vest…
When I’m done or thereabouts, I usually temporarily add some cloth texture noise as well, as it will give me an idea of how the final fabric might turn out.
After completing the high-poly versions of the garments, I subsequently decimated them (for more manageable polycount) and created their corresponding low-poly versions using Topogun.

At this point, the high-poly details are ready to be transferred onto the low-poly meshes through the baking process.
This could be done directly in Substance Painter or another specialized application such as Marmoset Toolbag. I chose the former in this case, so I could immediately start texturing.
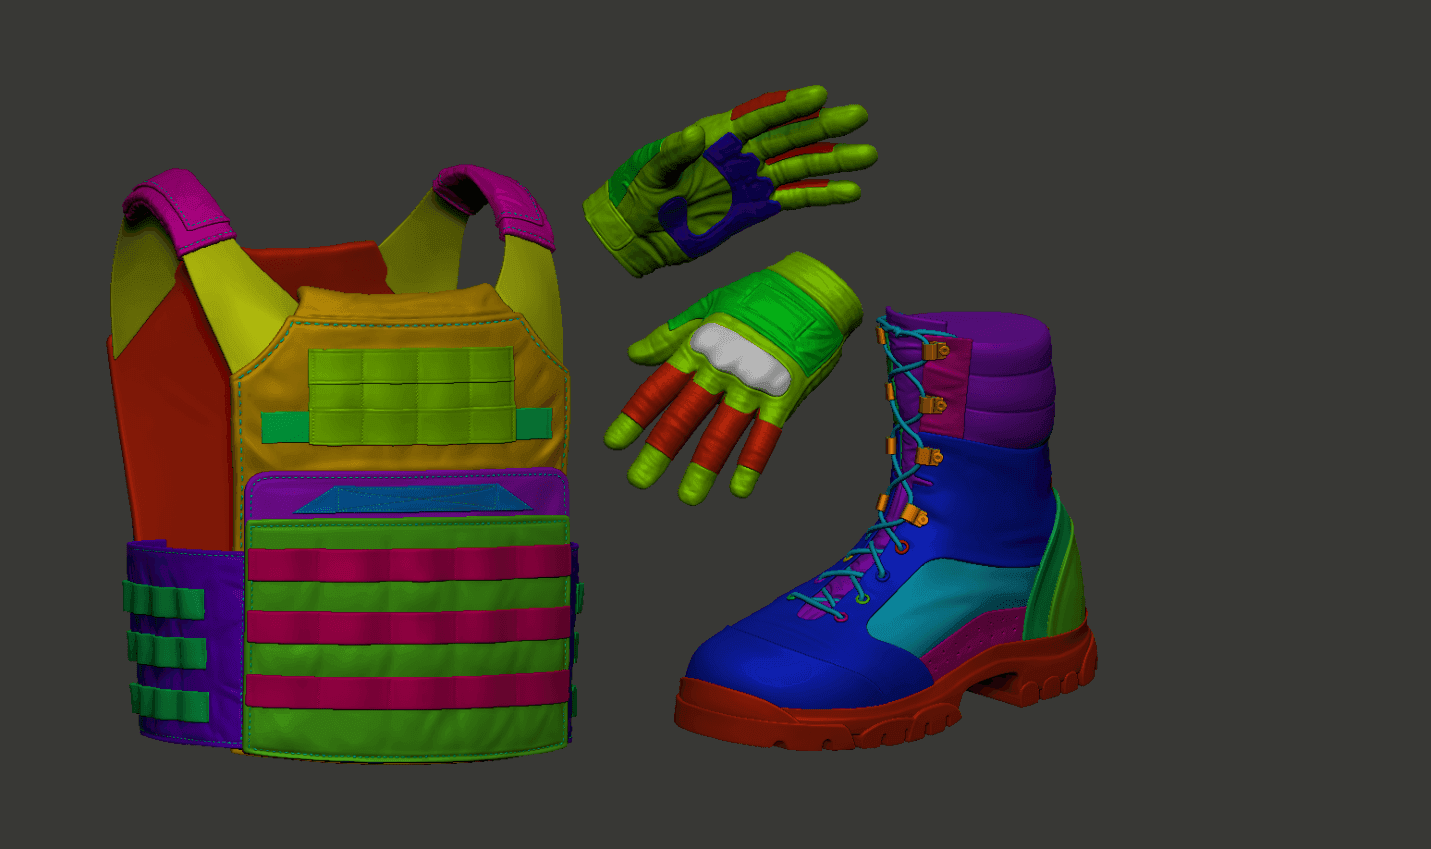
By assigning different, contrasting colors in ZBrush to the garments’ various elements, I generated an ID map so I could easily isolate them and apply different materials in Substance Painter, later on.
As previously mentioned, the texturing process is rather straightforward in that you add layers of materials, color, alpha details and all sorts of wear effects until the garments look believable. The gloves, knee pads, and boots are symmetrical, so both items in each pair are using the same texture map.

The baked normal and ambient occlusion maps
(Top right)
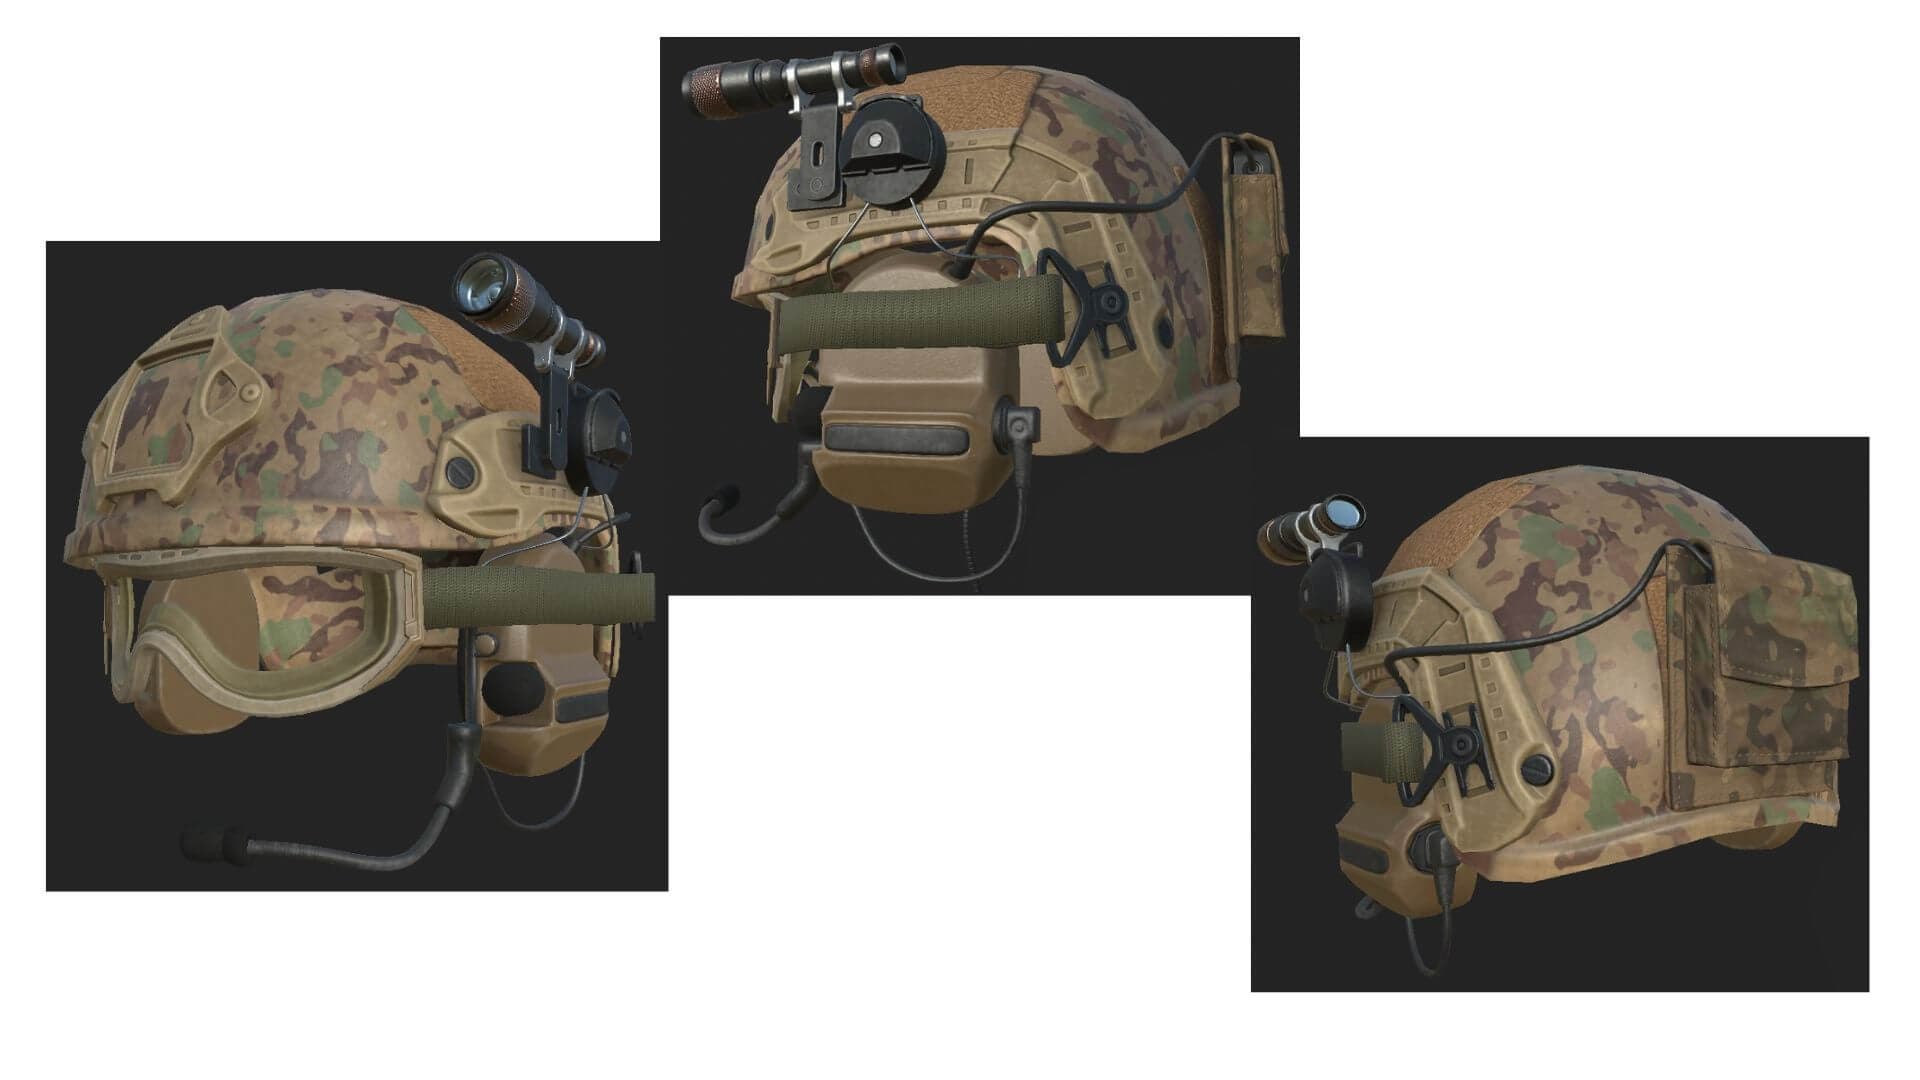
As previously stated, the process is pretty much the same for all the remaining assets: the creation of a high-poly model for each (or most) of the elements (primarily with ZBrush), subsequent retopology and UV layout, transference of high-frequency details through map baking, texturing in Substance Painter and exporting the results specifically for the Unity engine via the Standard Metallic map configuration (meaning only Albedo/Transparency, Metallic/Smoothness and Normal maps are required).
The same process was employed in creating all the remaining assets, from the parachute jumping vest to the rifle and all the tactical gear…
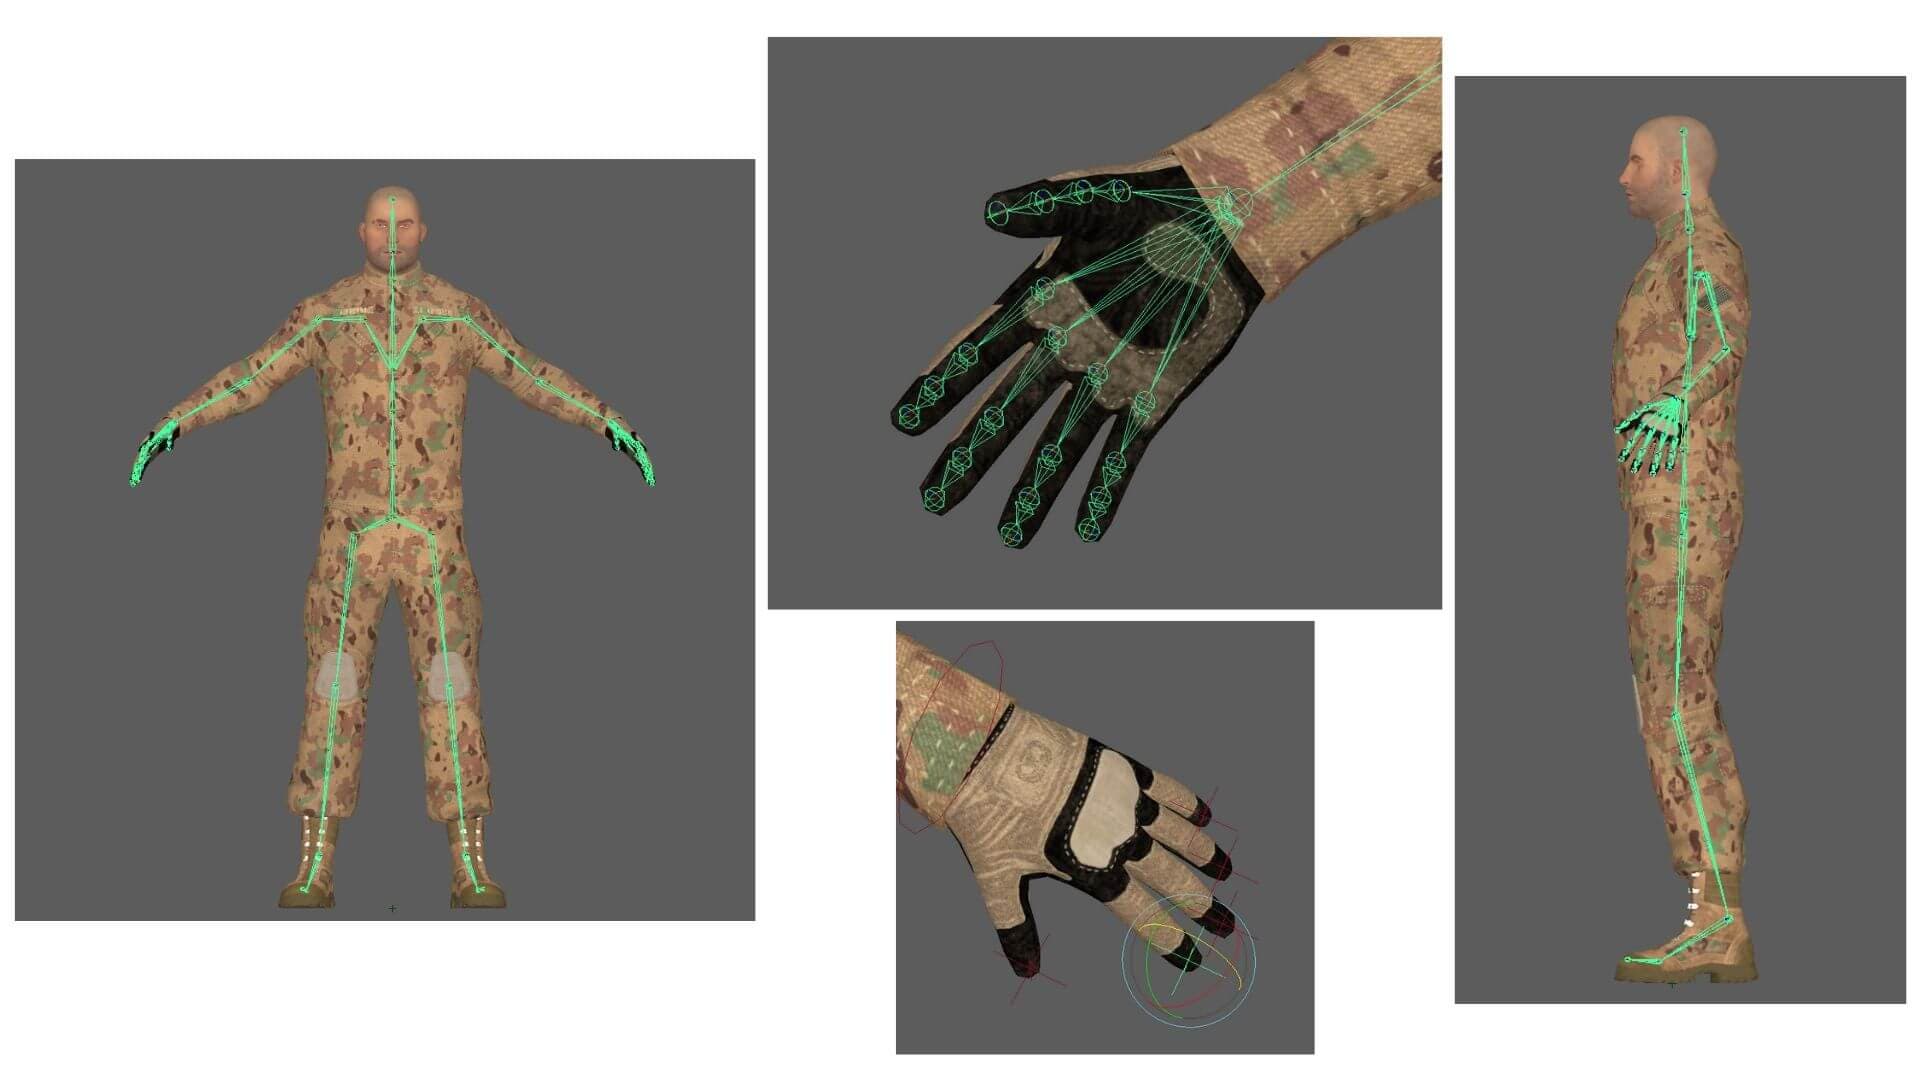
In order to become game-ready, three more steps are required, namely: skinning, rigging and animating the character. An A or T pose is ideal in this regard, as it would facilitate both the skinning and the rigging processes (in our case, an A-pose).
The symmetric feature also played a great deal in facilitating the creation of the rig. A standard Maya skeleton rig was used and adapted to our character’s features.
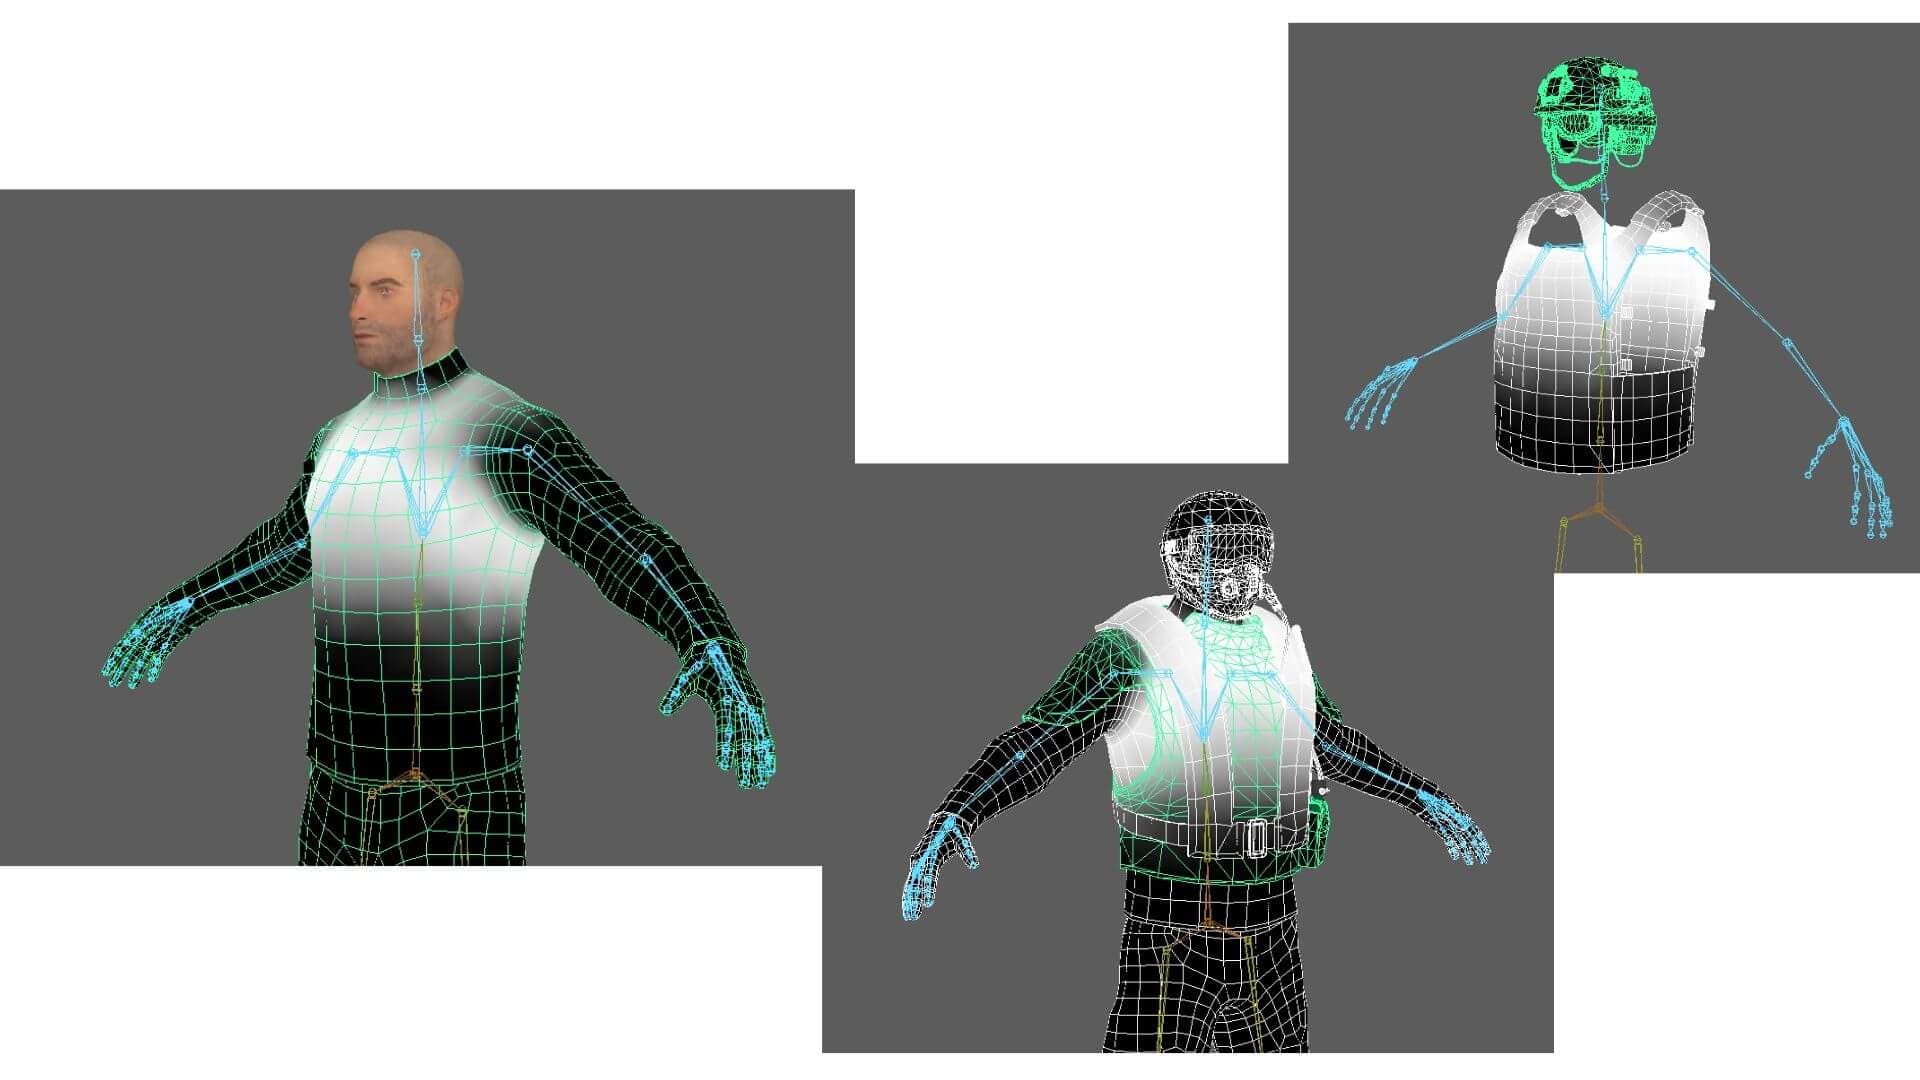
Basically, the skinning process involves painting skin weights in Maya, establishing how much influence each bone has on the character’s mesh, as well as on that of his uniform and gear.
Once the skinning and rigging phases are complete, the skeleton is converted to Human IK so as to take advantage of the inverse kinematics animation mode and achieve a more precise retargeting of motion capture animation data.
At this point, our character is ready to be animated.
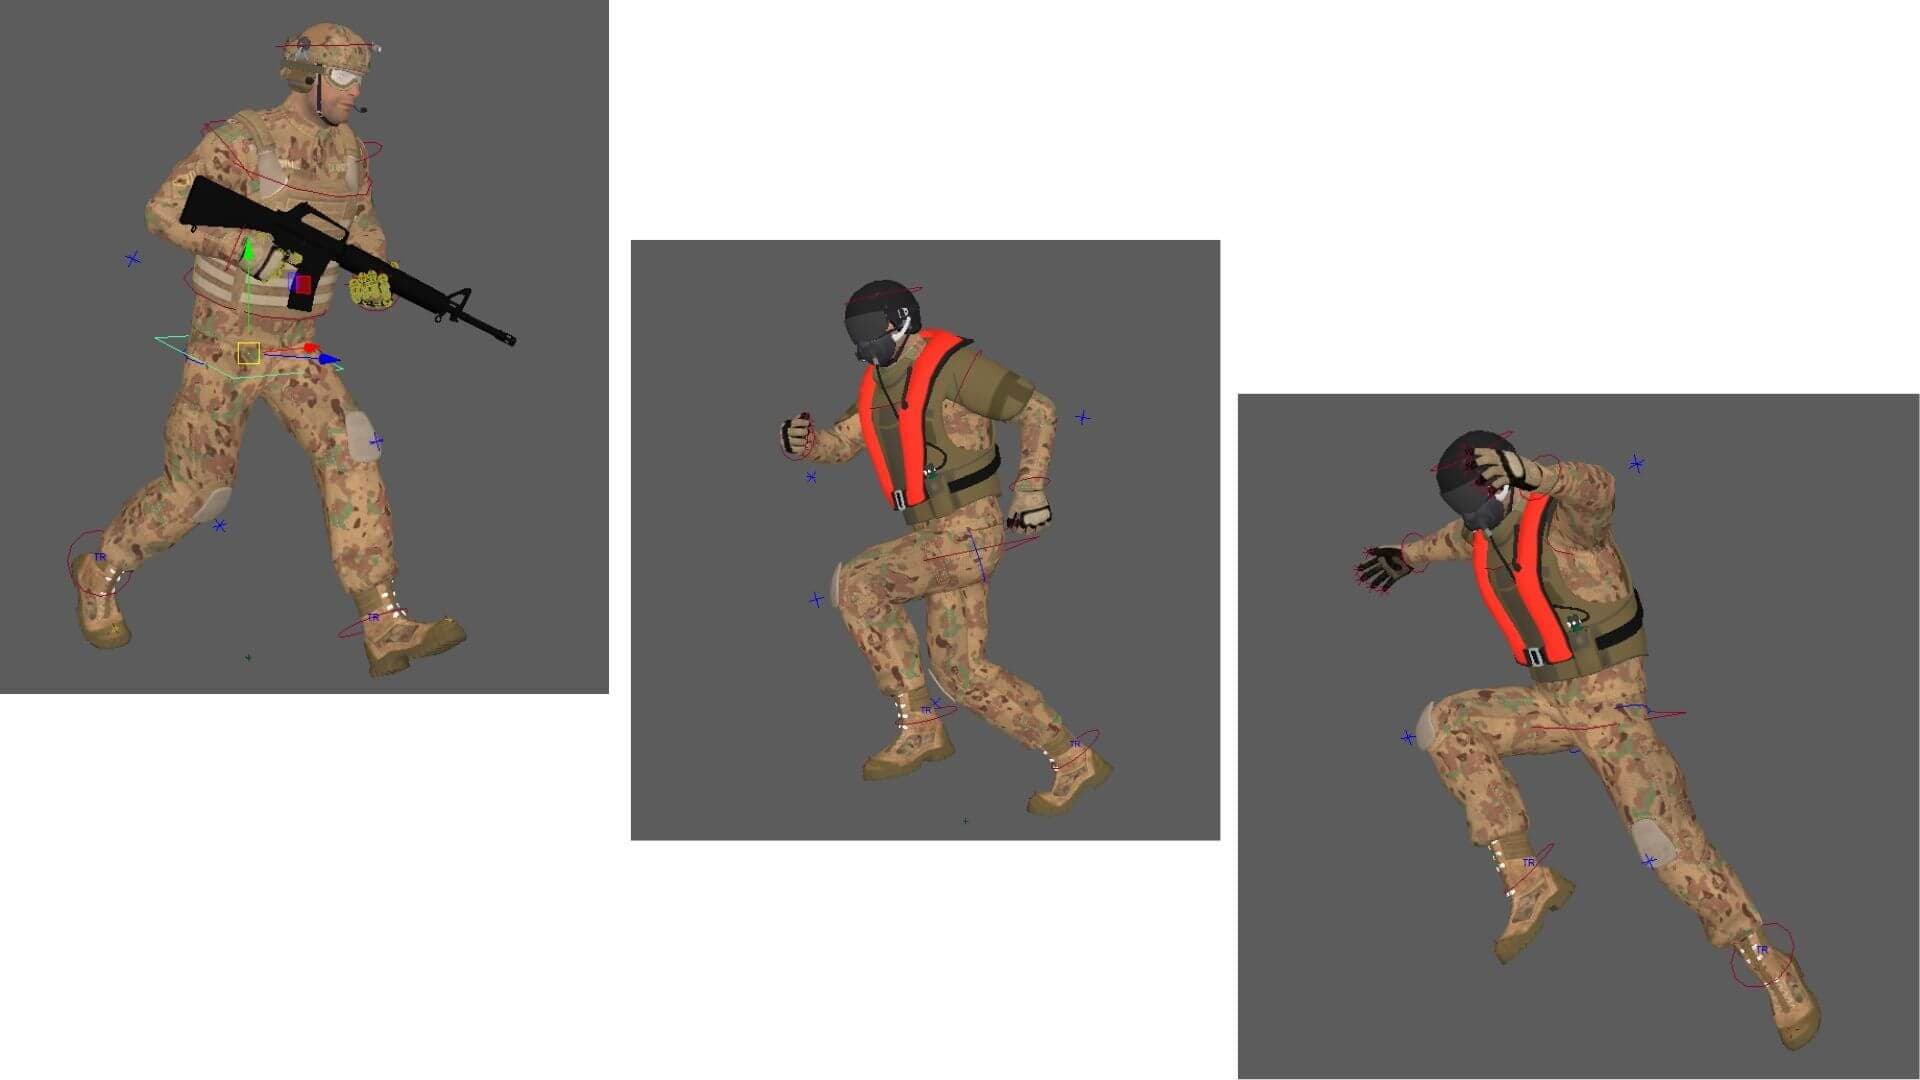
A special thanks to our lead 3D animator, Stefan Gaitan, who was responsible for skinning, rigging and animating the character!
I hope you enjoyed reading my article, Game Character Production - Applying Industry Standards across Production Pipeline.
Follow us on ArtStationto view our U.S Paratrooper 3Dportfolio!
U.S Paratrooper Soldier is available on the Unity Asset Store.


