
Leverage your automated testing framework using Playwright TS - Part II
Introduction
It’s good to see you again! In the first part of our article, we explored the wonders of Playwright and presented some key concepts of this framework. Now, let’s shift gears a bit.
You know the ins and outs of your web application, but the simple thought of diving into coding is so overwhelming. But don’t worry, we’re here to show you how easy peasy lemon squeezy it is to write automated tests, using some known patterns in the automation world.
We’ll break it down, step by step, using simple patterns that even those with little to no coding experience can understand.
Too much talking... grab your favorite beverage and let’s dive right into it! 😊
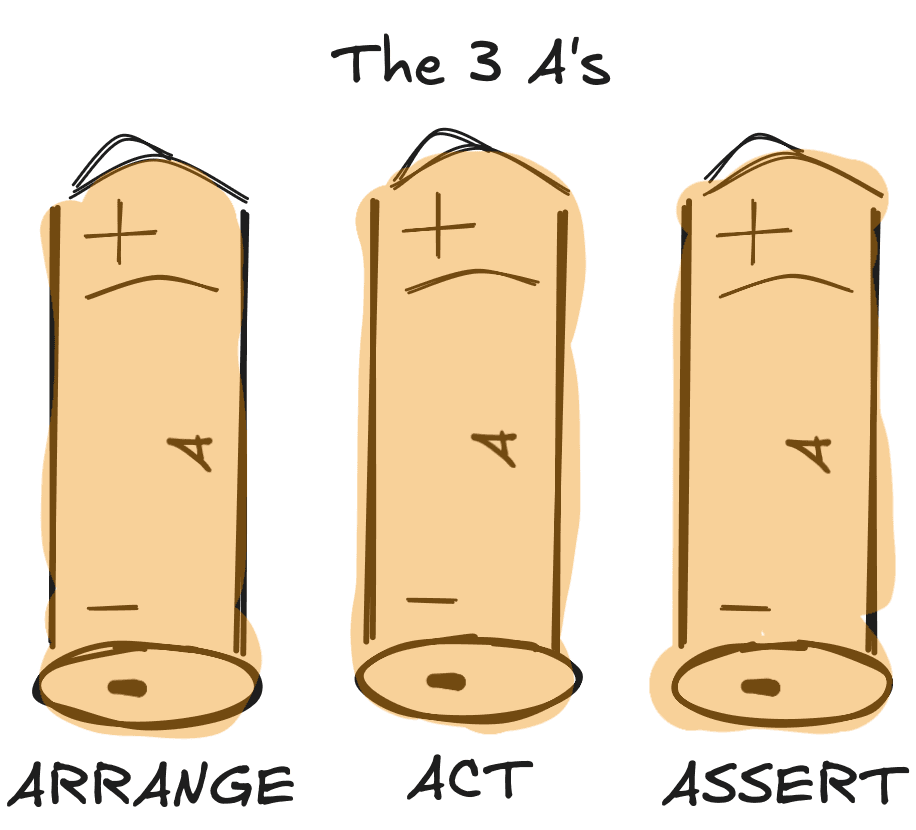
A simple and effective way to structure your tests involves the usage of the AAA pattern (just like the batteries 😊). You might not realize it, but you’re probably already using this pattern in your everyday tasks without knowing it’s called this way: you plan your day (arrange), do your tasks (act), and then check off your to-do list (assert).
In essence, AAA breaks down the test process into three clear steps:
- Arrange: set up test data and environment.
- Act: perform the action that you want to test.
- Assert: verify the action’s outcome.
It’s a simple and effective way to use it because it makes the test easy to read and understand. Here’s a quick example:
import { test, expect } from '@playwright/test';

test.describe('Arrange-Act-Assert example', async () => {
  test('successful login to Sauce Demo', async ({ page }) => {
    // Arrange.
    await page.goto('https://www.saucedemo.com/');

    // Act.
    await page.getByPlaceholder('Username').fill('standard_user');
    await page.getByPlaceholder('Password').fill('secret_sauce');
    await page.getByText('Login').click();

    // Assert.
    await expect(page).toHaveURL('https://www.saucedemo.com/inventory.html');
  });
});
In the ‘Arrange’ part, we will navigate to a website. During the ‘Act’ part, we log into the website and finally assert that we have successfully logged in. See? That wasn’t so bad.
Data-Driven testing (DDT)
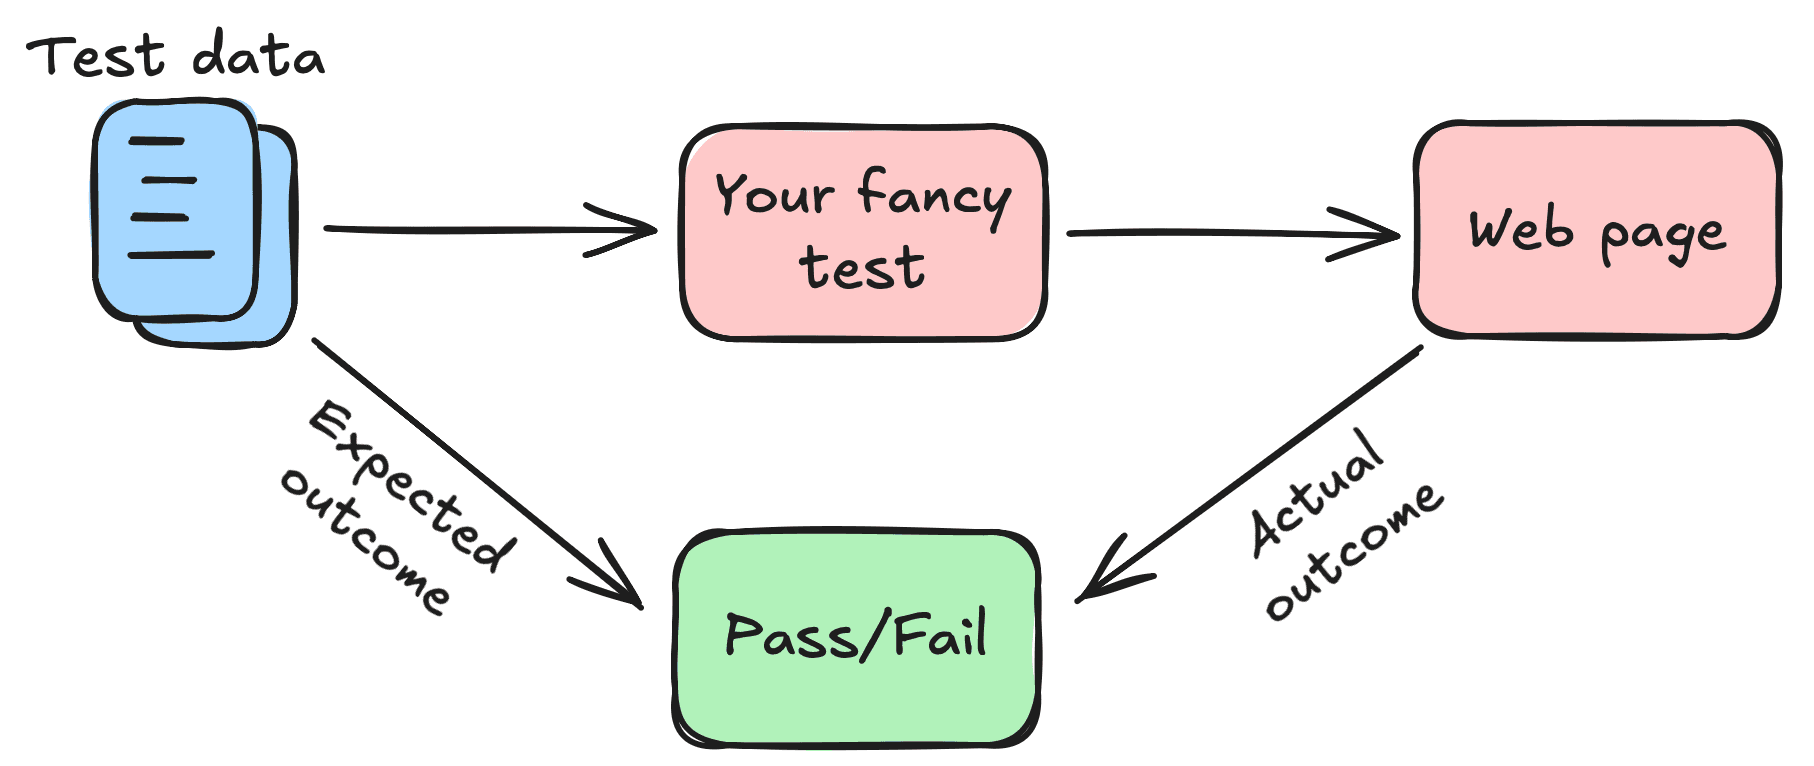
When we talk about Data-Driven testing, we are referring to the technique where the same test scenario is executed several times with different sets of input data. This approach helps us validate that the application behaves correctly with different inputs. It will easily increase coverage while reducing redundancy.
Considering our previous example with the login form, you need to verify combinations of emails and passwords to make sure that the functionality works as expected. Tell me you don’t want to write separate tests for each combination, right? Right...? I’m warning you: it will be a mess, let alone the time invested and possibly the slipped errors.
Let’s have a look at the following implementation. First, we define our test data:
// Define some data that we can use for the login form.
export const validloginData = [
  {
    username: 'standard_user',
    password: 'secret_sauce',
    expectedMessage: 'Products',
  },
  {
    username: 'problem_user',
    password: 'secret_sauce',
    expectedMessage: 'Products',
  },
  {
    username: 'visual_user',
    password: 'secret_sauce',
    expectedMessage: 'Products',
  },
];
We have several roles available in our app. For each role, we define an expected message that we should see once we log in with the said user. We will parametrize our test, as seen in the next snippet:
import { test, expect } from '@playwright/test';
import { validloginData } from './02-valid-login-data';

test.describe('login with different users', () => {
  // Fetch all the records from the validloginData defined in a separate file.
  validloginData.forEach(({ username, password, expectedMessage }) => {
    test(`should handle login for ${username}`, async ({ page }) => {
      // Arrange.
      await page.goto('https://www.saucedemo.com/');

      // Act.
      await page.getByPlaceholder('Username').fill(username);
      await page.getByPlaceholder('Password').fill(password);
      await page.getByText('Login').click();

      // Assert.
      await expect(page.locator('.title')).toHaveText(expectedMessage);
    });
  });
});
The test that we created is like the previous one. The concept’s easy to understand; DDT separates the test logic from the test data. So, you focus on writing the test once, then simply provide different sets of data to run with.
Singleton Pattern
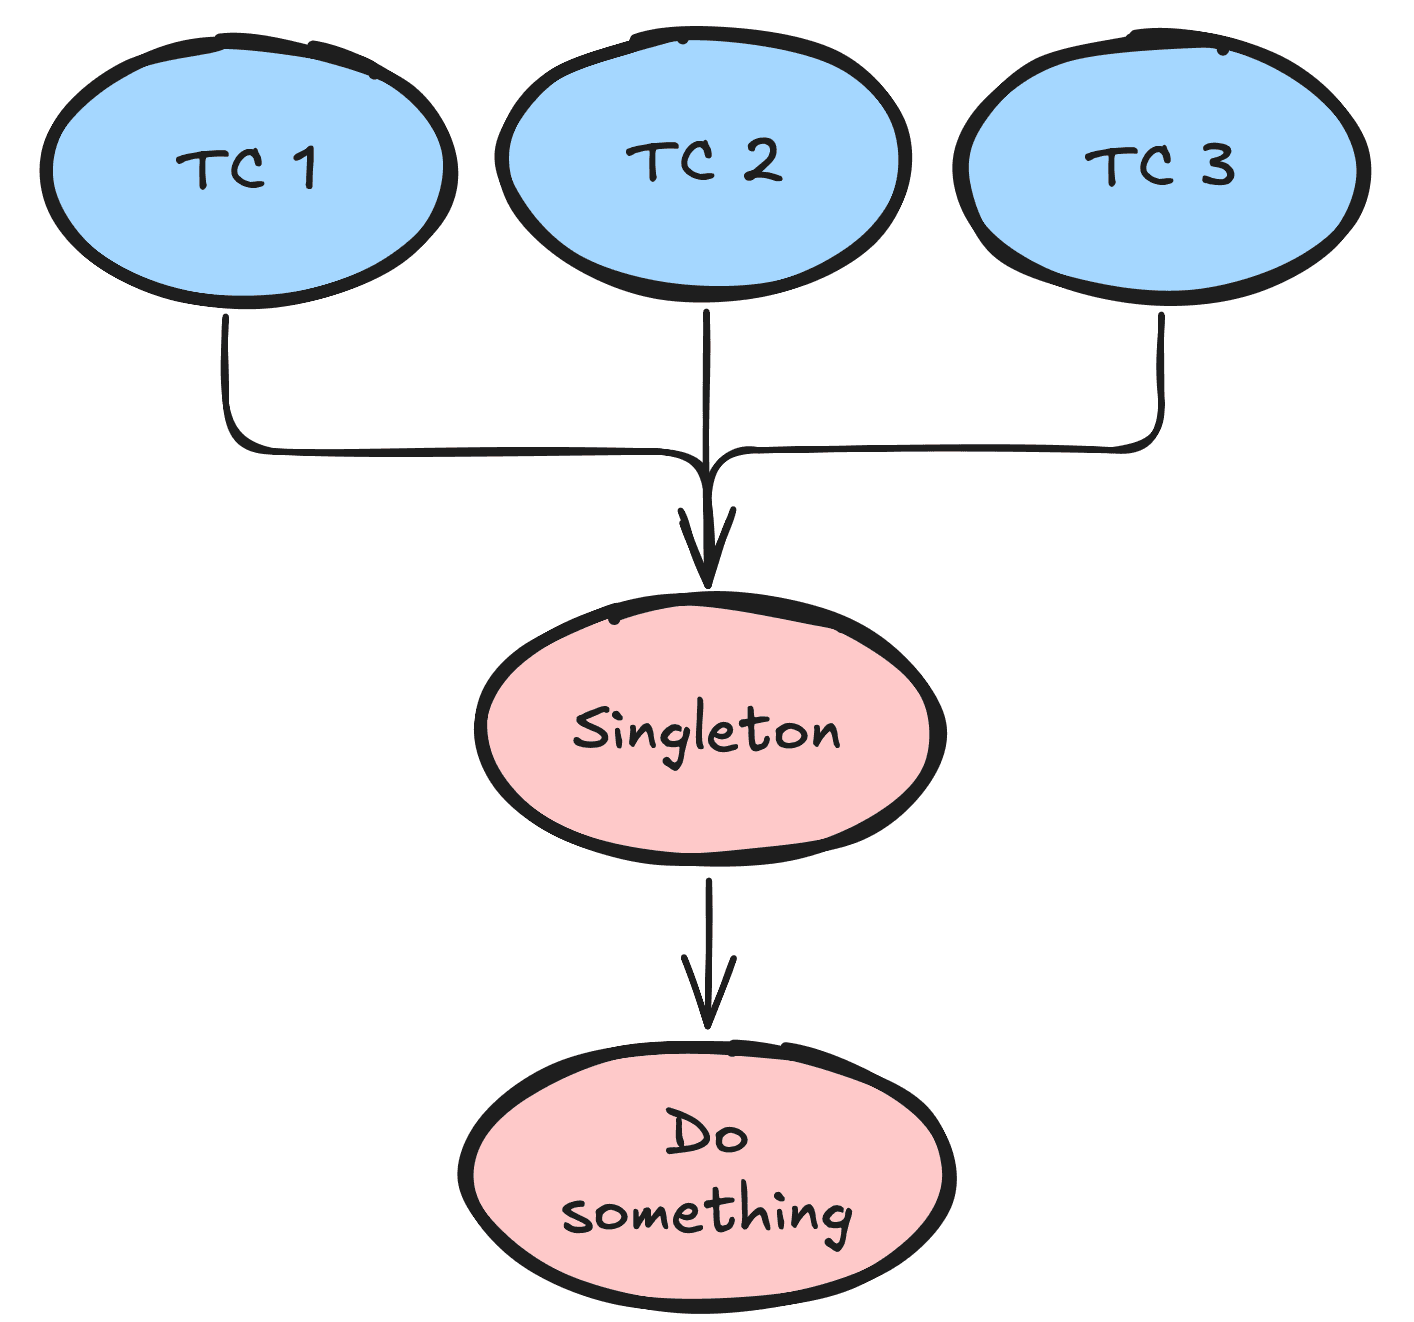
For the sake of explaining the concept, imagine the following case: a family is sharing one car. Instead of each family member owning a car, which is expensive and takes up a lot of space, they share a single car. Everyone has access to transportation whenever needed, and they also save money.
That’s pretty much what the Singleton pattern is trying to achieve: it manages shared resources (such as configurations, external connections, or browser instances) that are spread across the entire application.
If I were to name a few benefits, these would be: consistency, as there is only one instance of a resource that’s being reused, and on the other hand, it provides a global point of access to it.
Let’s take a closer look at how we can use the Singleton for managing browser instances:
import { Browser, chromium } from '@playwright/test';


export class BrowserSingleton {
  private static browserInstance: Browser;


  /**
   * Creates an instance of the Chromium Browser.
   * @returns browser instance.
   */
  public static async getInstance(): Promise<Browser> {
    if (!BrowserSingleton.browserInstance) {
      BrowserSingleton.browserInstance = await chromium.launch();
    }


    return BrowserSingleton.browserInstance;
  }
}
We define a class and we’ll name it ‘BrowserSingleton’, which has a method ‘getInstance’. When called, it will launch an instance of the Chromium browser, but only once. Finally, it returns the created instance of the browser.
Now, inside a test, the implementation will be straightforward:
import test, { expect } from '@playwright/test';
import { BrowserSingleton } from './03-browser-singleton';

test.describe('Login with Browser Singleton', async () => {
  test('successful login to Sauce Demo', async () => {
    // Note that we no longer expose 'page'.
    // Get the instance from our singleton and then create a new page inside the browser.
    const browser = await BrowserSingleton.getInstance();
    const page = await browser.newPage();

    // Arrange.
    await page.goto('https://www.saucedemo.com/');

    // Act.
    await page.getByPlaceholder('Username').fill('standard_user');
    await page.getByPlaceholder('Password').fill('secret_sauce');
    await page.getByText('Login').click();

    // Assert.
    await expect(page).toHaveURL('https://www.saucedemo.com/inventory.html');
  });
});
Fixtures
What on earth are fixtures? That was also my question the first time I read about them, but don’t worry, you’re not alone!

If I were to explain it to you in simpler terms, they're the things you need to have in place before your tests can run. It’s not the answer you want, I know... they sound complicated at first, but once you get to know how they work, they’ll become a key part of your testing routine.
Now let's make it clearer: instead of writing the same code for setting up your test environment, or for logging into a page, or even cleaning up some data after running a test, you will define these steps once, in a fixture, and Playwright takes care of executing them for you.
Looking back at our example of the login functionality, each test needs to open a browser and then enter some credentials. You will typically use the ‘test.beforeEach’ or ‘test.afterEach’ hooks to define your fixture. Here’s how you can implement it:
import { test, expect, Browser, Page } from '@playwright/test';
import { BrowserSingleton } from './03-browser-singleton';

test.describe('login with different users', () => {
  let browser: Browser;
  let page: Page;

  // Hook that is called once before each individual test is executed.
  test.beforeEach(async () => {
    // Use our singleton to get the browser instance.
    browser = await BrowserSingleton.getInstance();
    page = await browser.newPage();

    // Navigate to the page so that we don't do it in every test.
    await page.goto('https://www.saucedemo.com/');

    // Login with an user.
    await page.getByPlaceholder('Username').fill('standard_user');
    await page.getByPlaceholder('Password').fill('secret_sauce');
    await page.getByText('Login').click();
  });

  // Hook that is called once before each individual test is executed.
  test.afterEach(async () => {
    // Close the browser instance.
    browser.close();
  });

  test('check login page', async () => {
    // We are already logged in.
    await expect(page.getByText('Login')).not.toBeVisible();
  });

  test('should handle login', async () => {
    await expect(page).toHaveURL('https://www.saucedemo.com/inventory.html');
  });
});
This is easy stuff. But we are engineers; we like challenges, we like building complex things. Playwright offers custom fixtures. Let’s assume that we need to define user roles in our application: guest, regular, or admin. Instead of writing setup steps for each role (i.e., access our website, enter the credentials, and then log in), we can extend the test to create custom fixtures for each user role.
You might notice that usually, in our tests, we expose some variables (such as ‘page’):
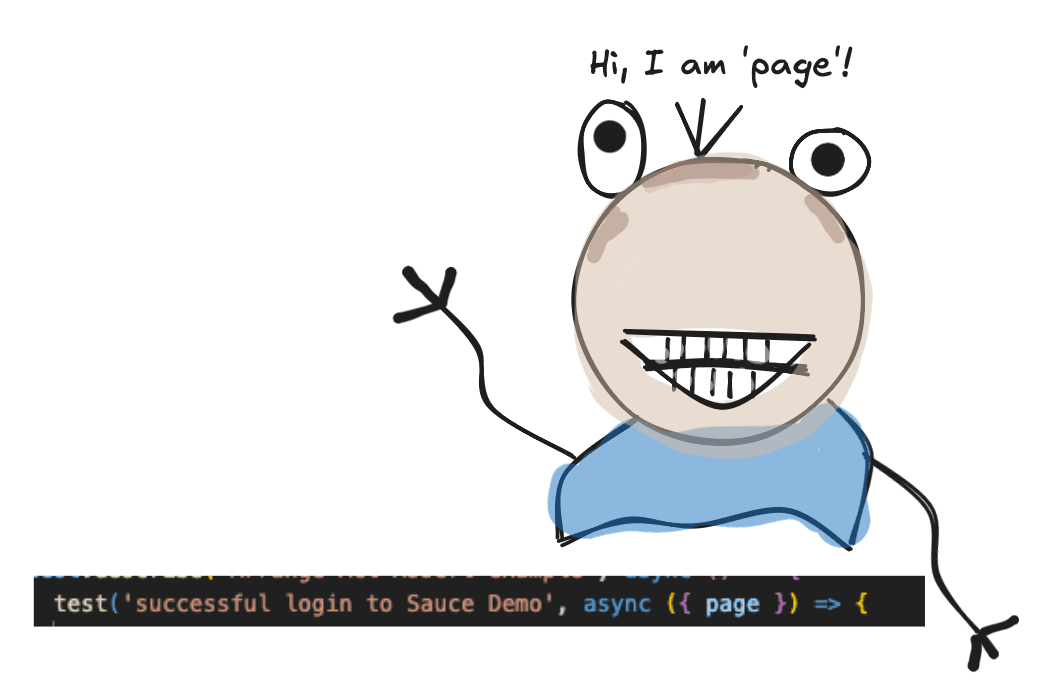
We will do the same thing, but this time, what we will expose will already be at a state where we can simply focus on writing the test, since the setup part was already done. See the following example:
import { test as baseTest, Page } from '@playwright/test';

// Define custom types so we can expose in our tests.
type CustomUserPages = {
  standardUserPage: Page;
  visualUserPage: Page;
  guestUserPage: Page;
};

/**
 * Logs in the user.
 * @param page page reference
 * @param username username of the user
 * @param password password of the user
 */
async function loginUser(page: Page, username: string, password: string): Promise<void> {
  await page.goto('https://www.saucedemo.com/');

  await page.getByPlaceholder('Username').fill(username);
  await page.getByPlaceholder('Password').fill(password);
  await page.getByText('Login').click();
}

// Extending Playwright's test.
export const test = baseTest.extend<CustomUserPages>({
  standardUserPage: async ({ page }, use) => {
    // Login as a standard user.
    await loginUser(page, 'standard_user', 'secret_sauce');

    // Pass the logged in page to the test.
    await use(page);
  },
  visualUserPage: async ({ page }, use) => {
    // Login as a visual user.
    await loginUser(page, 'visual_user', 'secret_sauce');

    // Pass the logged in page to the test.
    await use(page);
  },
});
We define a function, ‘loginUser’, that will handle the authentication on our website, based on some credentials.
We will want to focus strictly on what each role sees, that’s why we will create a type ‘CustomUserPages’ that defines the page instances for: standard user, visual user, and a guest user.
By extending the Playwright’s ‘test’ functionality, we can encapsulate new logic inside those new variables that will be exposed. For each of them, we will log in to the web app with certain credentials that correlate to the user’s role.
Now, the test will look like this:
import { expect } from '@playwright/test';
import { test } from '../part-2/04-login-fixture.ts'; // Note that we are importing the 'test' that we defined previously.

test.describe('Tests using complex fixtures', async () => {
  test('check login page', async ({ standardUserPage }) => {
    // We are using the standardUserPage defined previously.
    // We are already logged in.
    await expect(standardUserPage.getByText('Login')).not.toBeVisible();
  });

  test('should handle login', async ({ visualUserPage }) => {
    // We are using the visualUserPage defined previously.
    // We are already logged in.
    await expect(visualUserPage).toHaveURL('https://www.saucedemo.com/inventory.html');
  });
});
See how nice the test file looks? That’s the magic of fixtures; you don’t need to focus on setting up your environment, like we did previously.
Can Playwright be your new best friend?
Bet! I hope that I have raised your curiosity, and maybe you are now even closer to answering this question.
As usual, you can find the full code from this part and the code from part I on our Github: https://github.com/alexandru-ci-assist/playwright-tutorial
However, the adventure doesn’t end here! Stay tuned for our next article, where we’ll dive into even more complex design patterns to take your automated testing framework to the next level.


