Rotate a Game Object using Unity 3D Gyroscope
Unity3D is a fully integrated game engine,that can easily satisfy multiple needs into game features, from web handling, special effects, animations, and control systems.
In this article we will discuss the gyroscope control in games and how Unity3D handles this input. The gyroscope sensor in Unity is mapped as an interface to the Gyroscope class. The interface has 7 variables that returns values for the different behaviours outputted by the gyro.
Variables used by the gyroscope:
- altitude
- enabled
- gravity
- rotationRate
- rotationRateUnbiased
- updateInterval
- userAcceleration
All of the values are explained in the Unity Scripting Reference website.
At this point I will discuss about the enabled and rotationRate variables, used in the demo project attached in the snippets section. Feature updated will use all of these variables in the demo project and I will update the post to describe the basic functionality of each value.
Returns or sets the enabled status of the gyroscope. Usually the state of the gyroscope is set by the mobile device to enabled, if an actual gyroscope hardware component is in the phone. I mentioned “usually” because on the iPhone it works out of the box, but on Android you need to set the Gyroscope.enabled = true in order to activate it in your app.
To have a stable workflow for every platform when initializing the controller for the gyro, set the enable to true, then check if the value is true, if a gyroscope exists in the device the value will be true otherwise will be false.
Returns the rotation rate as measured by the device’s gyroscope as a Vector3 representing the speed of rotation around each axis in radians per seconds. Observing the variables of the gyroscope class another value is common, rotationRateUnbiased, this value is a filtered value compared to rotationRate. I didn't study the exact filter that rotationRateUnbiased has, I used the raw values from rotationRate and made my own filter.
Before I go further explaining the idea of rotation around each axis concept, let’s make a helper for the beginners who don't know what a Vector3 is.
Vector3 is a structure that contains three values that describes a point in space: x point of position, y point of position, z point of position. The class is a little more detailed as construction by adding procedures to help you get easy access from characteristics of a point in space described as a Vector3(for example the distance between two points in space). For more information, the documentation is on the Unity3D Scripting Page on Vector3 objects.
RotationRate as specified returns a Vector3 value containing the rotation value in radians around each axis.

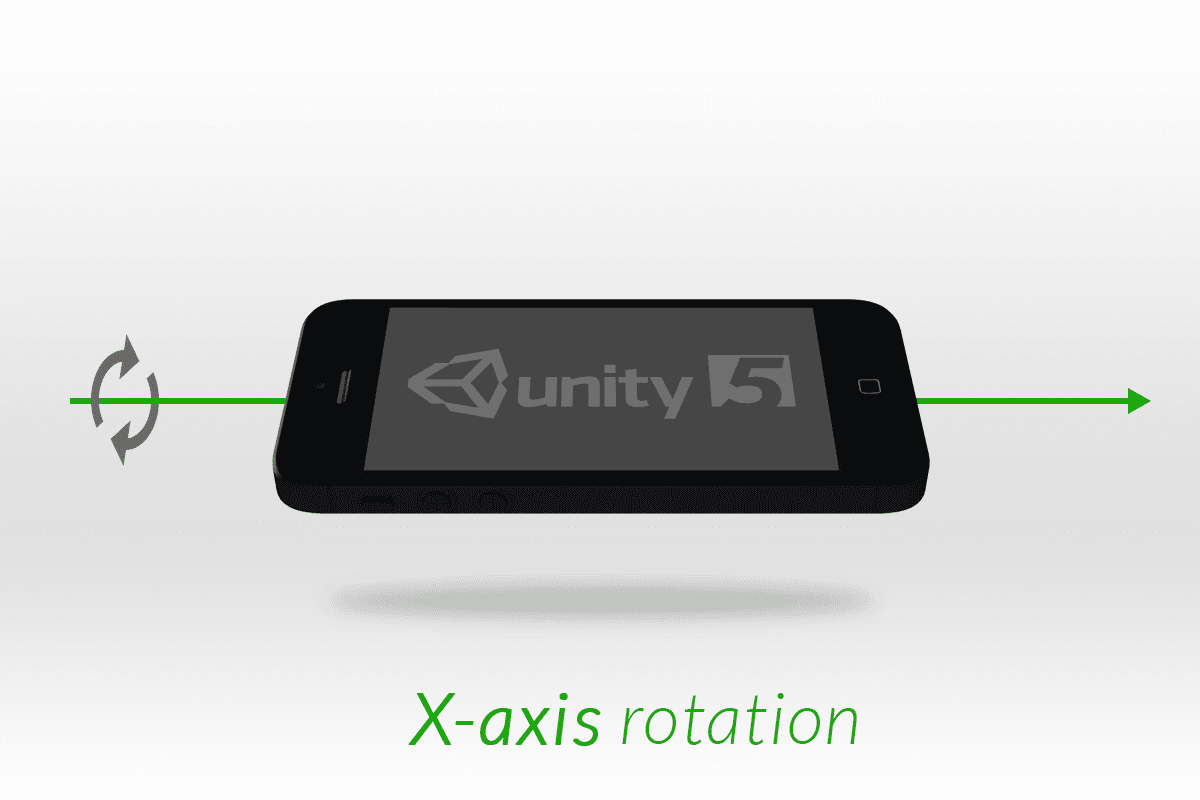
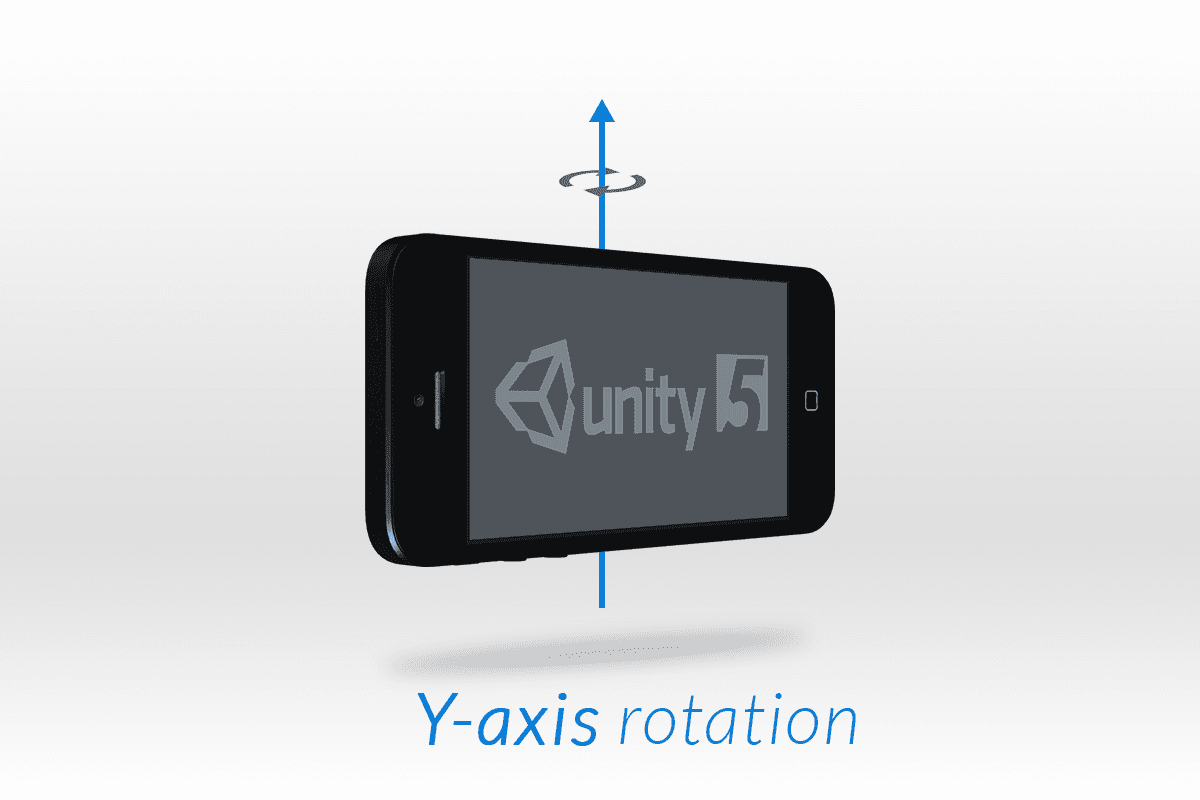
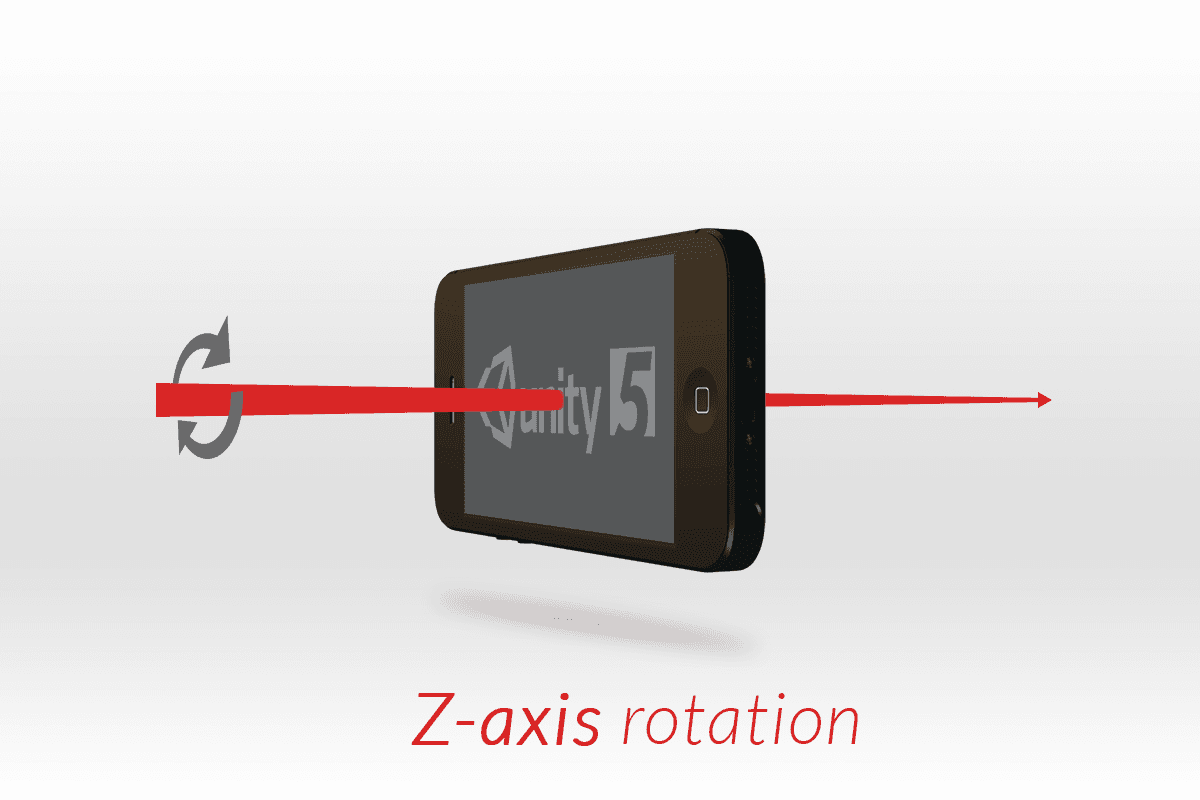
Here we have a visual example for each rotation axis of the phone. The colored vector shows the axis and the arrows specify the rotation.
For example if we rotate the phone around the y axis(tilting the phone up and down) the rotation rate will return something like this (0, 0.3, 0), presuming that the other axis are perfectly still.

The 0.3 value is determined by the way you tilt the phone and the period it takes, for example if you tilt it up, the value is 0.3 but if you try to go down it will be -0.3. The sign depends on the orientation of the rotating axis.
The actual value is dependent on the time it takes you to move your phone or in other words, on how much you move it. If the rotation speed is soft the value will be small ±0.1, but if the rotation is violent the value can go up to a maximum of ±1.

In the demo project I only use the x and y values of the rotation, I apply a filter to ignore the small values to avoid the shaking effect of the camera.
If you liked this article and found it useful please share it on social media or check out other blog posts published by me - https://assist-software.net/team/alexandru-boca
→ If you want to find out more about the author of the article click play on the below video.


