
Building Installation Package Bundle with WiX
WiX (Windows Installer XML) is a set of tools that allows the creation of Windows Installer-based deployment packages for your applications. Microsoft uses WiX to deploy its own software, including Office and Visual Studio. The WiX installer package is, in fact, a relational database containing information about how components of an application should be unpacked and copied.
WiX has a great list of features to create installer packages:
- All individual installer packages can be grouped into a bundle for simplified deployment;
- Installed software is registered in "Apps & Features" and shortcuts can be created;
- Windows takes care of uninstalling all the components that make up the installation bundle;
- Wix provides a way to recover from accidental deletion of files;
- Different versions of the installer can be created;
- Users can update specific areas of the installed software using patches;
- It can rollback to a previous state in case of an abort or if something goes wrong;
- Guided installation can be created using wizard-style dialogs;
- WiX has multi-language support;
- Extensions can be created to extend WiX functionality;
- Ability to run validity checks on MSI package using a suite of tests called Internal Consistency Evaluators (ICE);
- WiX uses GUIDs that can be stored in Windows Registry to avoid name conflicts;
- Copying a large number of files or directories using a harvester named Heat;
- Ability to control the Windows Registry and Windows Services;
- Improved control with launch condition and installed state;
Our Visual Studio Solution contains three types of projects:
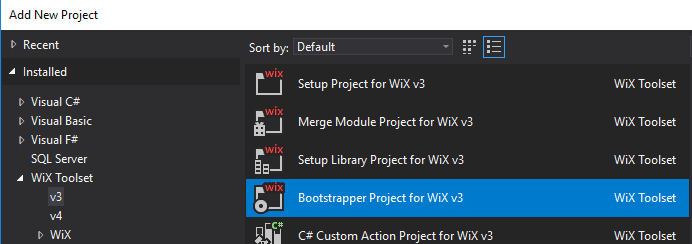
- Bootstrapper Project - Creates a bundle project, containing more installer packages and prerequisites.
- Setup Project - Creates a windows installer package from one or more WiX source files.
- C# CustomAction project - Represents an action that can be performed outside the installation process. It can change the files, adjust user rights, setup database and so on.
As an example, “SetupProject1” will call the method “CustomAction1”, from “CustomAction” project, when its installation is in the finished state.
→ See the Git Repository
The Setup Projects included in the solution have the minimum required elements:
- An XML declaration, the Product.wxs file;
- A WiX element that represents the root of the XML document;
- Product Element - This sets the name, language, version, and manufacturer of the installing software;
- Package element - Contains instructions for the way the software should be installed. In our case, the Package element has two attributes, Compressed and InstallScope;
- Compressed - Instructs the installer to pack all the MSI’s resources into CAB files;
- InstallScope - Represents the installation context: all users or current user;
- MediaTemplate element - Handles the way resource files are presented: Included in the MSI files or provide visibility along with it;
- A directory element - Sets the installer target directory;
- A Feature element - Installer can have a list of components and the user can select what should be installed;
→ See the Code Sample
A Custom Action can be called, depending on an execute sequence, from a Setup Project:
→ See the Code Sample
WiX, which is used for building Installation Package Bundle, creates logs files, including logs from Custom Action calls in the %temp% folder.
Typically, Custom Action is used for:
- Setting a Windows Installed property;
- Setting the location of a directory;
- Running JScript or VBScript code;
- Calling method from a dynamic-link library;
- Running an executable;
- Sending errors that stop the installation;
Custom Actions use “Execute” attribute to define how it should run and “Return” attribute to define the way that returns status should be treated.
To call a Custom Action, an “InstallExecuteSequence” element is needed and a reference to the project that calls the Custom Action.
Custom Actions have the ability to be rolled back, set or get properties, save logs, show message boxes, access features or component state, query and insert rows in the MSI database.
→ See the Code Sample
WiX Burn is a collection of installation Packages Bundles that are chained together in a single user experience. It is often used to install software prerequisites and makes a very large application or suites to be broken into smaller, logical installation modules while still presenting a single product to the end-user. The type of project needed to create this kind of bundle installer is a Bootstrapper project.
To use WiX Burn, a Bootstrapper Project template is needed.
Next, we add the elements to be installed in the Bundle.wxs, an XML file contained in our Bootstrapper project already created.
The Bundle.wxs, by default, contains the following markup:
<?xml version="1.0" encoding="UTF-8"?>
<Wix xmlns="http://schemas.microsoft.com/wix/2006/wi">
	<Bundle Name="Bootstrapper" Version="1.0.0.0" Manufacturer="" UpgradeCode="c4858e43-3e12-4e25-9ec9-d7b393705a16">
		<BootstrapperApplicationRef Id="WixStandardBootstrapperApplication.RtfLicense" />
		<Chain>
			<!-- TODO: Define the list of chained packages. -->
			<!-- <MsiPackage SourceFile="path\to\your.msi" /> -->
		</Chain>
	</Bundle>
</Wix>
<Bundle> is the root element.
<Chain> element - Contains the individual installation packages that should be installed and the order of installation. A “Rollback Boundary” element creates a checkpoint past which the install won’t roll back in case the action failed or it was aborted.
→ See the Code sample
<Fragment> element is a building block of creating an installer database in WiX, the one which is used for building Installation Package Bundle.
The contents of a Fragment element can be linked into a product by utilizing one of the main *Ref elements.
→ See the Code sample
In the chain element, different types of installer packages can be added: MsiPackage, ExePackage, MspPackage (Patch group installer), MsuPackage (Microsoft Update standalone installer). But now we will focus on the MsiPackage element.
PackageGroup element - Make a split in the package definition for increased modularity and place them within the PackageGroup elements.
MsiPackage - Describes a single msi package to install and contains a number of attributes:
- Id - Identifier for this package, for ordering and cross-referencing;
- DisplayName - Specifies the display name in the bootstrapper application data manifest for the package;
- Cache - This option allows easier repair of a software package without requesting the installation media. Package Cache folder is included in %AppData% or %ProgramData% directory depending MSI installation type: “perMachine” or “perUser”. After the first install Burn will cache the files;
- DisplayInternalUI - Display a UI for the current installation package or not. It is equivalent to a silent install;
- Visible - Specifies whether the MSI will be displayed in Programs and Features (also known as Add/Remove Programs);
- Permanent - Specifies whether the package cannot be uninstalled. The default is "no";
PackageGroupRef - Makes a reference to the PackageGroup element in fragment element.
ExePackage
This element will add an executable package to the Bootstrapper install chain.
The attributes of the ExePackage are:
- Vital: Sets whether the bootstrapper should abort and rollback if the package fails to install. The default is set to “yes”;
- Compressed: Checks if the ExePackage should be embedded inside the bootstrapper;
- InstallScope: This will set ALLUSERS property behind the scenes;
- InstallCommand and UninstallComand set to “/s” and “/s /uninstall” will hide the current package UI;
- Condition element - Installation based on evaluation of a custom or preset boolean variable;
RegistrySearch - It is included in the extension named “WixUtilExtension” and uses Root and Key attribute to navigate in the Windows Registry Keys. In our case, the install condition uses RegistrySearch to check if the NetCore2 was already installed and stores the result in the variable NetCore2_x86_Installed. Setting InstallCondition="NOT VersionNT64" will check current Windows version.
→ See the Code Sample
Two important packages that are not included in the code sample but worth mentioning are MspPackage and MsuPackage.
MspPackage - Burn allows deployment of patches, grouping related patches, and deployment of patches with the software that needs an update (Slipstream).
<Chain>
        <MsiPackage SourceFile="filename.msi" />
        <MspPackage SourceFile="Patch1.msp" Slipstream="yes" />
         <MspPackage SourceFile="Patch2.msp" Slipstream="yes"/>
</Chain>

MsuPackage - Microsoft Updates can be installed as MSU packages, on Windows Vista or later.
<Chain>
       <MsuPackage SourceFile="filename.msu"    KB="KB2423423" />
 </Chain
IV.4 Extending WiX functionality
Two of the most common WiX extensions, which are used for building Installation Package Bundle, are BalExtension and UtilExtension. The extensions can be used by referencing the DLL from the WiX Tools installation in “Program Files”.
BalExtension handles the launch conditions, license, Logo, UI and theme options.
UtilExtension is used for closing application, component search, directory and file search, registry search, product search, etc.
→ See the Code Sample
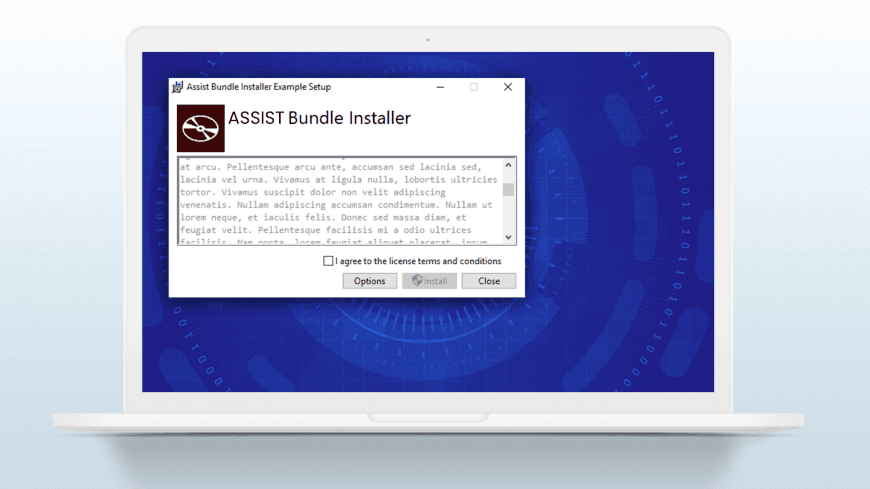
Standard Bootstrapper UI for Burn
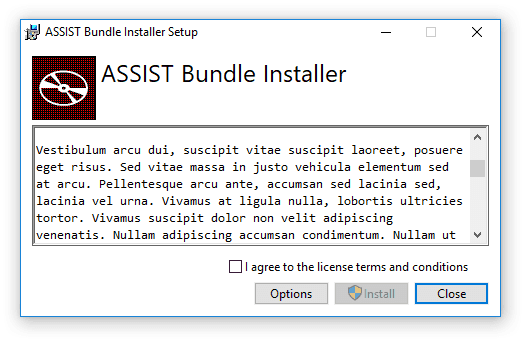
Burn has two interfaces, “WixStandardBootstrapperApplication.RtfLicense” UI and “WixStandardBootstrapperApplication.HyperlinkLicense” UI. The only difference between them is the way that license is presented.
VI. Conclusion
This article explained briefly how to build a standard installation package bundle with WiX. The UI and functionality can be fully customized to get a unique experience. The next article will contain information about building a custom UI installer based on the current one.


