
How to Serialize / De-serialize objects in Unity3D
Hello to everyone!
This snippet describes how to serialize / de-serialize an object, or multiple objects, by using the .NET Framework Class Library Namespace System.Xml.Serialization and save / load data on/from PlayerPrefs in Unity3D. It is very useful when you need to store a lot of data in just one string between game sessions.
First we’re going to start by making our CustomXmlSerialization class which will hold two methods called SerializeObject and DeserializeObject. In the following image you can observe the full class already implemented.
using System.Xml.Serialization;
using System.IO;

namespace Tutorials
{
	public static class CustomXmlSerialization
	{
	///
///
///
Snippet 1. The custom class with the serialization methods
This is all you need to successfully serialize objects to one string and then de-serialize that string. Both methods are realized by using method-specific generic type parameters because this allows us to call any method with a different type every time.
Next, we’re going to create a demo to illustrate how the object class should be in order for the serialization to be successful in Unity3D. I’ve created a class called Warrior and a nested class called Weapon as illustrated in Figure 2. In the Warrior class we have three public attributes that defines the class, a string name, a float height and the weapon that the warrior will use called axe and defined by the attribute name.
using UnityEngine;
using System.Collections;

namespace Tutorials
{
[SerializeField]
	public class Warrior
	{
		public string name;
		public float height;
		public Weapon axe;

		public Warrior()
		{
			name = "AxeWarrior";
			height = 2f;
			axe = new Weapon ("DoubleAxe");
		}

		public Warrior(string _name, float? _height, Weapon _weapon) : this()
		{
			name = _name;
			height = _height ?? height;
			axe = _weapon;
		}

		[SerializeField]
		public class Weapon
		{
			[SerializeField]
			string name;

			public string Name {
				get;
				set;
			}

			public Weapon()
			{
				name = "defaultWeapon";
			}

			public Weapon(string _name) : this()
			{
				Name = _name;
			}
		}
	}
}
Snippet 2. Object that will be serialized
After creating the Warrior class it’s time to create the test script that will do all the work in serializing and de-serializing the class. I’ve created a script called Test.cs in which we’ll create an object of type Warrior and serialize it.
using UnityEngine;
using UnityEngine.UI;

namespace Tutorials
{
public class Test : MonoBehaviour {
//PUBLIC VARIABLES
public Text displayText;

//PRIVATE VARIABLES
Warrior specialistWarrior;
string serializedData;
const string prefsStringKey = "WarriorObject";

// Use this for initialization
void Start () {

	//Create the Warrior instance by using the second constructor
	//First parameter is the name of the warrior
	//Second param is the height of the warrior
	//Third param is the type of weapon the warrior is using
	specialistWarrior = new Warrior ("AxeWarrior", 2.5f, new Warrior.Weapon ("DoubleAxe"));

	//store the serialized data in a global string variable
	serializedData = specialistWarrior.SerializeObject ();


	//display the serilized data to a Text on the UI
	displayText.text = serializedData;

	//Save the serialized data in player prefs with the key "WarriorObject"
	//And the value stored previously
	PlayerPrefs.SetString (prefsStringKey, serializedData);
	//Save the data
	PlayerPrefs.Save ();
}
Snippet 3. The testing class with the serialization steps.
As seen in the figure above, in the Start method I’ve created a “specialWarrior” object of type Warrior with the name “Axe Warrior”, with a height of 2,5 m and with a weapon called “Double Axe”. Then I’ve serialized the warrior and stored the data in a global variable called serializedData and displayed onto a Text component in the UI. To store data between game sessions, Unity provides a class called PlayerPrefs that a developer can easily use. I’ve used the SetString method that sets the value of the preference identified by key.
The final step is saving the information to disk. Unity by default saves the preferences to disk on Application Quit event, but in case that the application crashes it is best to save your preferences in different checkpoints around the game.

Figure 1. Output after serialization
Now that we have our preferences saved, we can retrieve the data saved by doing the following.
void Update () {

//When we press the "D" key and if we have any data stored in player prefs with the specified key
	if (Input.GetKeyDown (KeyCode.D) && PlayerPrefs.HasKey (prefsStringKey)) {
		//delete the previous instance of the warrior
		specialistWarrior = null;

		//empty the serialized data stored in the global string
		serializedData = string.Empty;

		//retrieve the data from player prefs with the specified key
		serializedData = PlayerPrefs.GetString (prefsStringKey);

		//deserialize the string and convert it to the Warrior class
		specialistWarrior = serializedData.DeserializeObject<Warrior> ();

		//and display the information deserialized
		displayText.text = "De-serialized data:\n" + specialistWarrior.name + "\n"
			+ specialistWarrior.height + "\n"
			+ specialistWarrior.axe.Name;
	}
}
Snippet 4. De-serialization process
In the figure above, I’ve illustrated how we can de-serialize the data stored in PlayerPrefs. In the Update method I’ve made an if statement with the conditions if we’ve pressed the D key from the keyboard and if in we have the specified key in PlayerPrefs then we’ll delete the special warrior instance and the serialized data stored in the global string, then we’ll get the information needed from PlayerPrefs by using the GetString method that returns the value corresponding to key.
Now that we have our serialized data stored once again, it’s time to de-serialize it by calling the static generic method DeserializeObject and giving it the type to return, in our case Warrior. After all the information has been de-serialized and stored in the special warrior instance, we’ll display again the information to the UI.
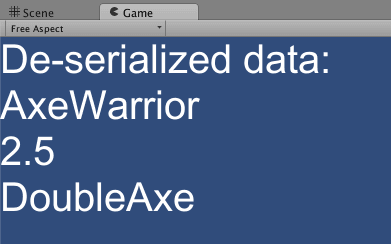
Figure 6. Output after de-serialization
I hope that everything is now crystal clear and that this tutorial helped in understanding How to Serialize and De-serialize objects in Unity3D.
→ If you want to find out more about the author of this snippet click play on the below video.


