
How to level up your mobile automation strategy using Appium
Everything seems to run smoothly in the world of mobile testing enthusiasts: we show up at the office, hop into a few meetings, glance at the backlog, and roll up our sleeves to start testing. We go through a story or two, switch between devices, and chase edge cases that vanish when we try to reproduce them. It gets the job done, but sometimes we need to pause and wonder: Are we really as efficient as we could be? Are we doing our best work or just ticking boxes?
Efficiency, at its core, means getting results without wasting resources, and in this case, my dear QA folks, we are the most valuable resources. When tasks start to feel like déjà vu, it’s usually a sign they’re ripe for automation. We need mobile automation for speed, consistency, and to stay sane in the long run.
Now that mobile apps are everywhere and users expect lightning-fast performance, testing needs to keep up.
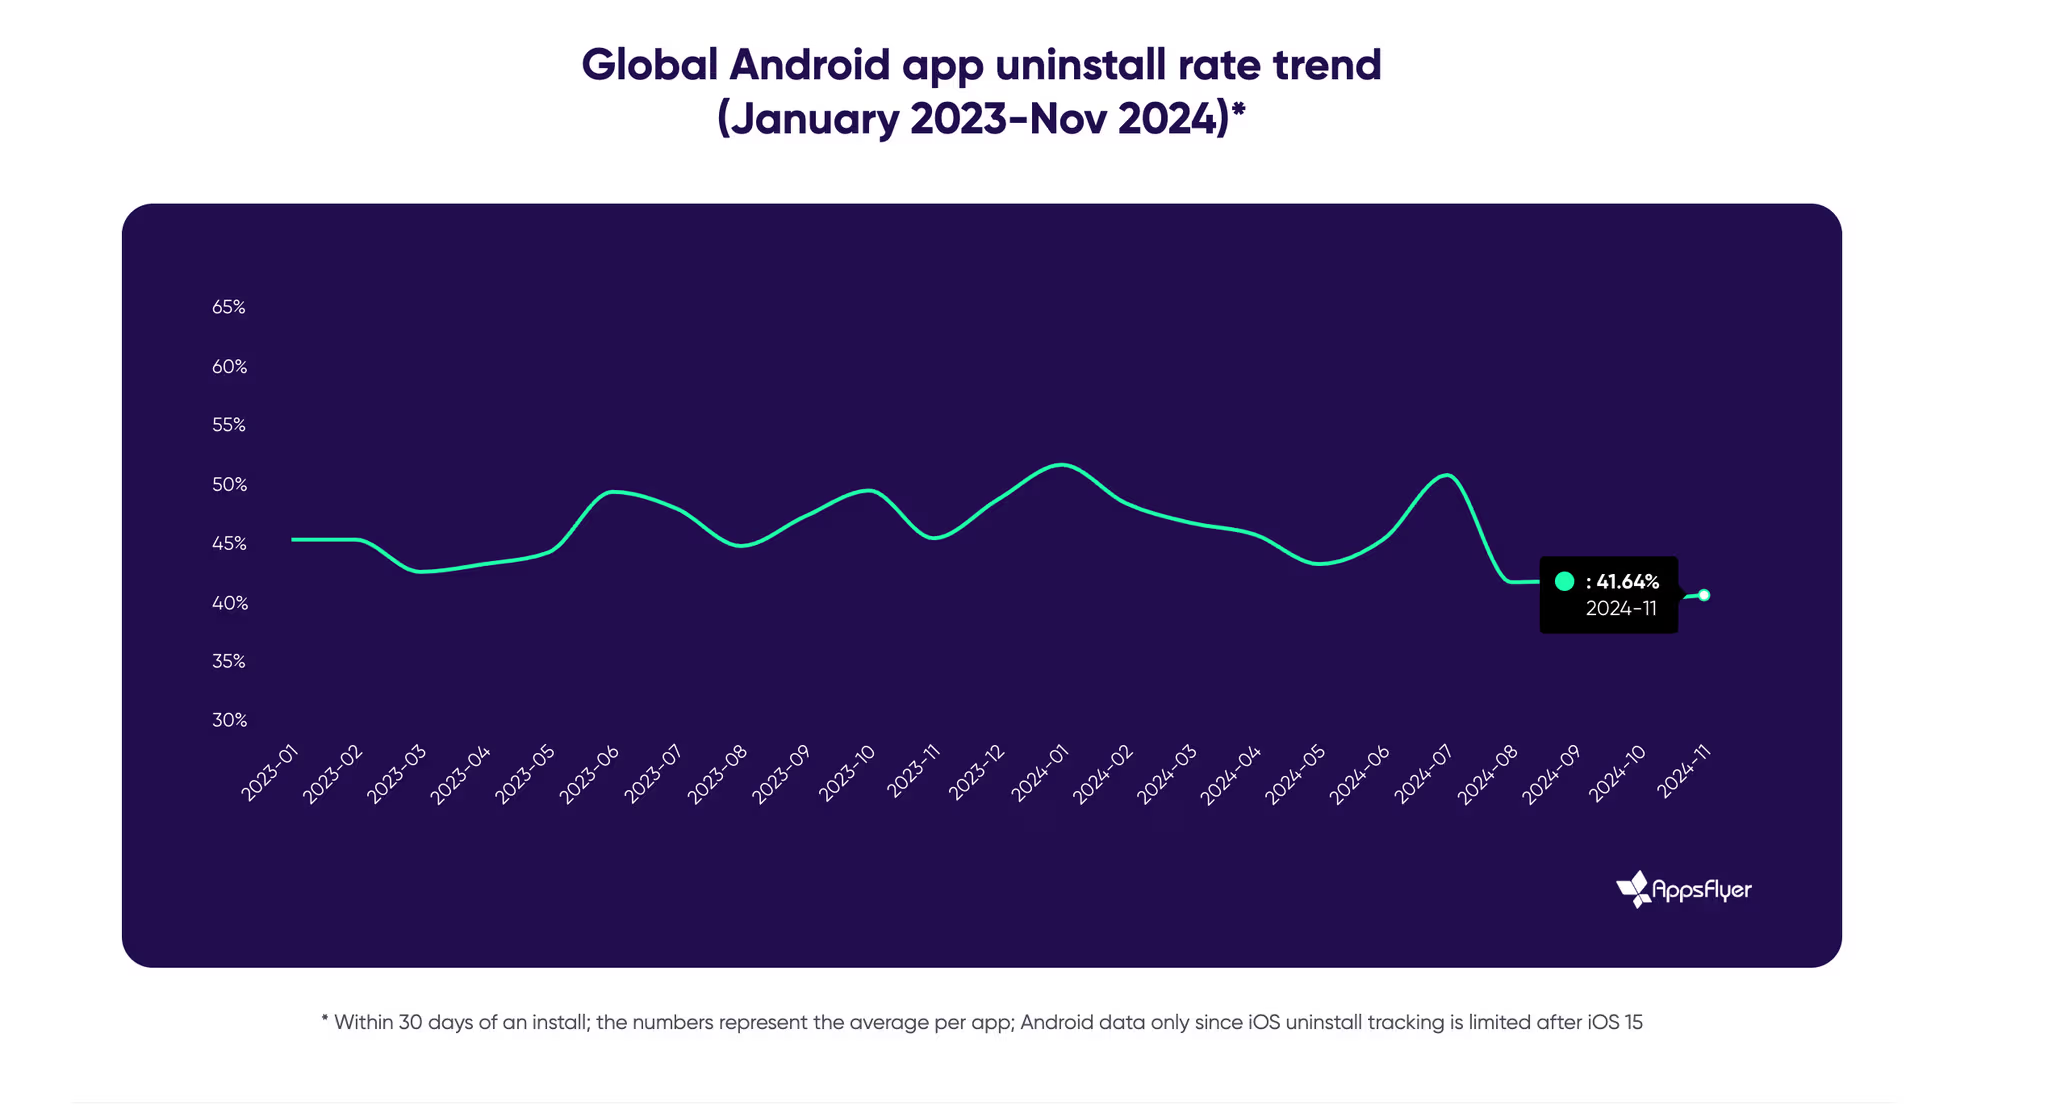
If an app loads slowly, crashes, or doesn’t offer a smooth experience, users won’t think twice before uninstalling it. In fact, according to Appsflyer, over half of all installed apps go uninstalled within the first 30 days. That’s a clear sign that users have little patience for apps that don’t meet expectations when they have so many alternatives, just a tap away.
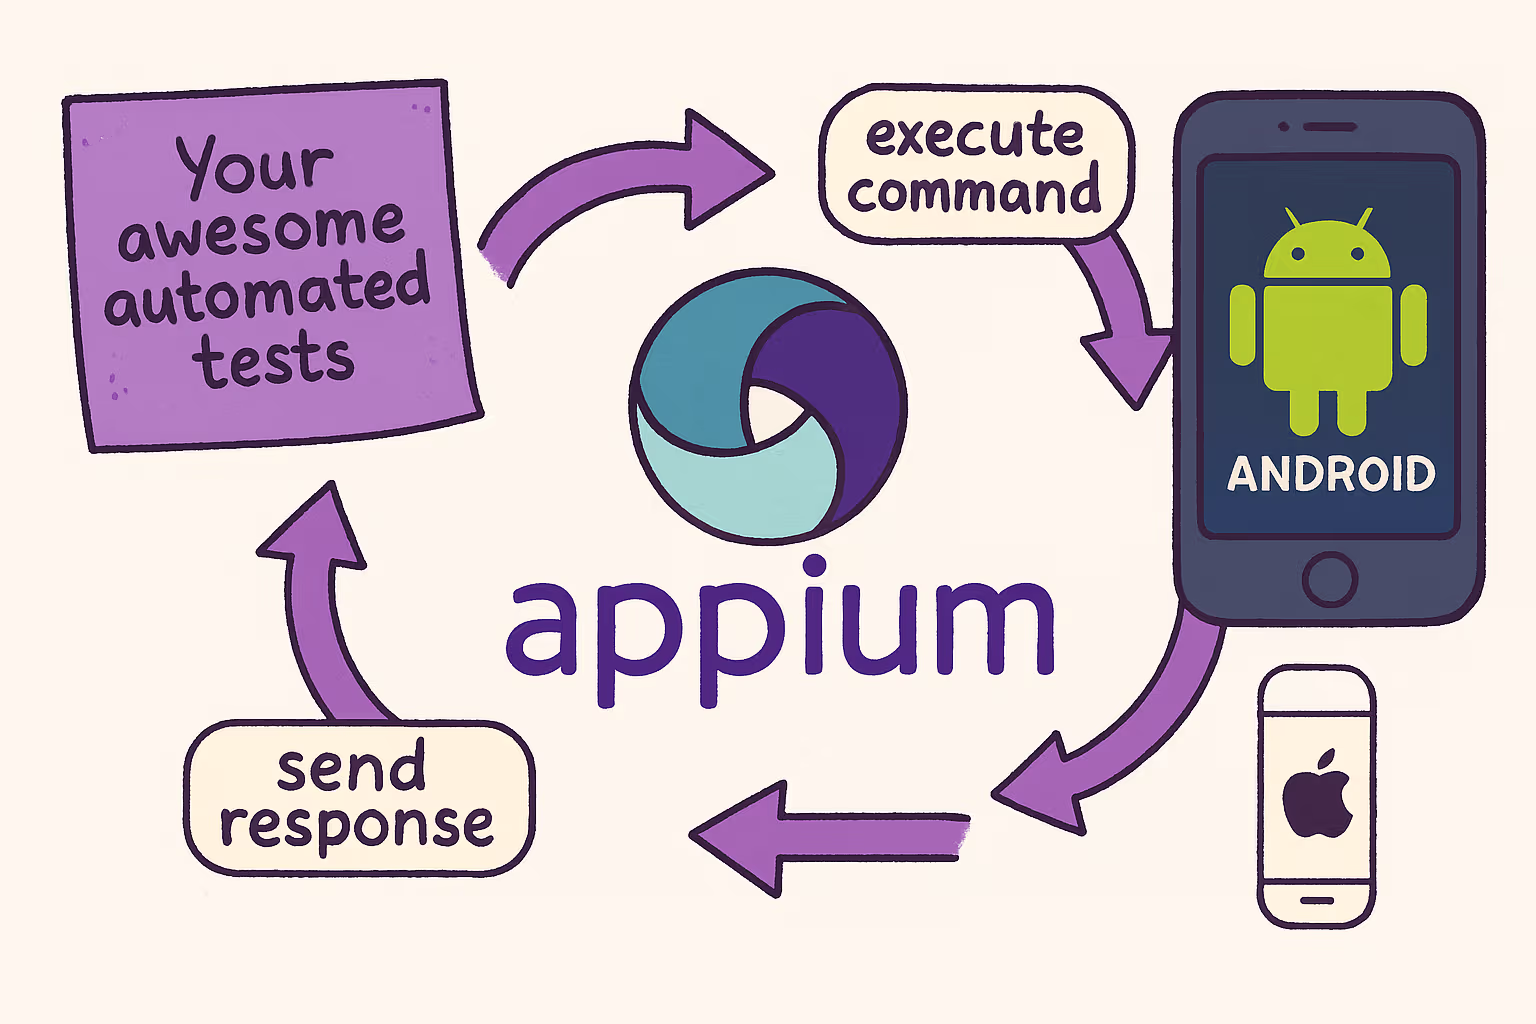
This is exactly where Appium shines.
Appium is a flexible and open-source mobile automation framework that works fine with your favorite programming languages. Whether you're handling regression tests or juggling multiple devices, Appium is the silent workhorse keeping things steady.
Lately, there's been a lot of buzz in the tech community around some of Appium's newer and more advanced features, like In-App Authentication using Face ID, the Events API for better debugging and test tracking, or parallel execution enhancements.
Enough talking, though. Let’s not waste another minute and jump straight into the practical side of mobile automation.
👇 It’s time to dive in and explore some of these features together.
1. Go parallel: Speed up your Appium test runs
If you've ever written automated tests for mobile apps, you know how quickly execution time can become a bottleneck, especially as your test suite grows. Luckily, Appium has our back with a powerful feature: test parallelization. How does it help us? Instead of running one test at a time, we can run multiple tests simultaneously across different devices or emulators. The result? Faster feedback and a happier QA team. 😁
One of the most common setups is Appium + WebdriverIO. WebdriverIO makes parallel execution straightforward with built-in support for multi-capabilities and session isolation.
🚀 How does Parallelization work in Appium?
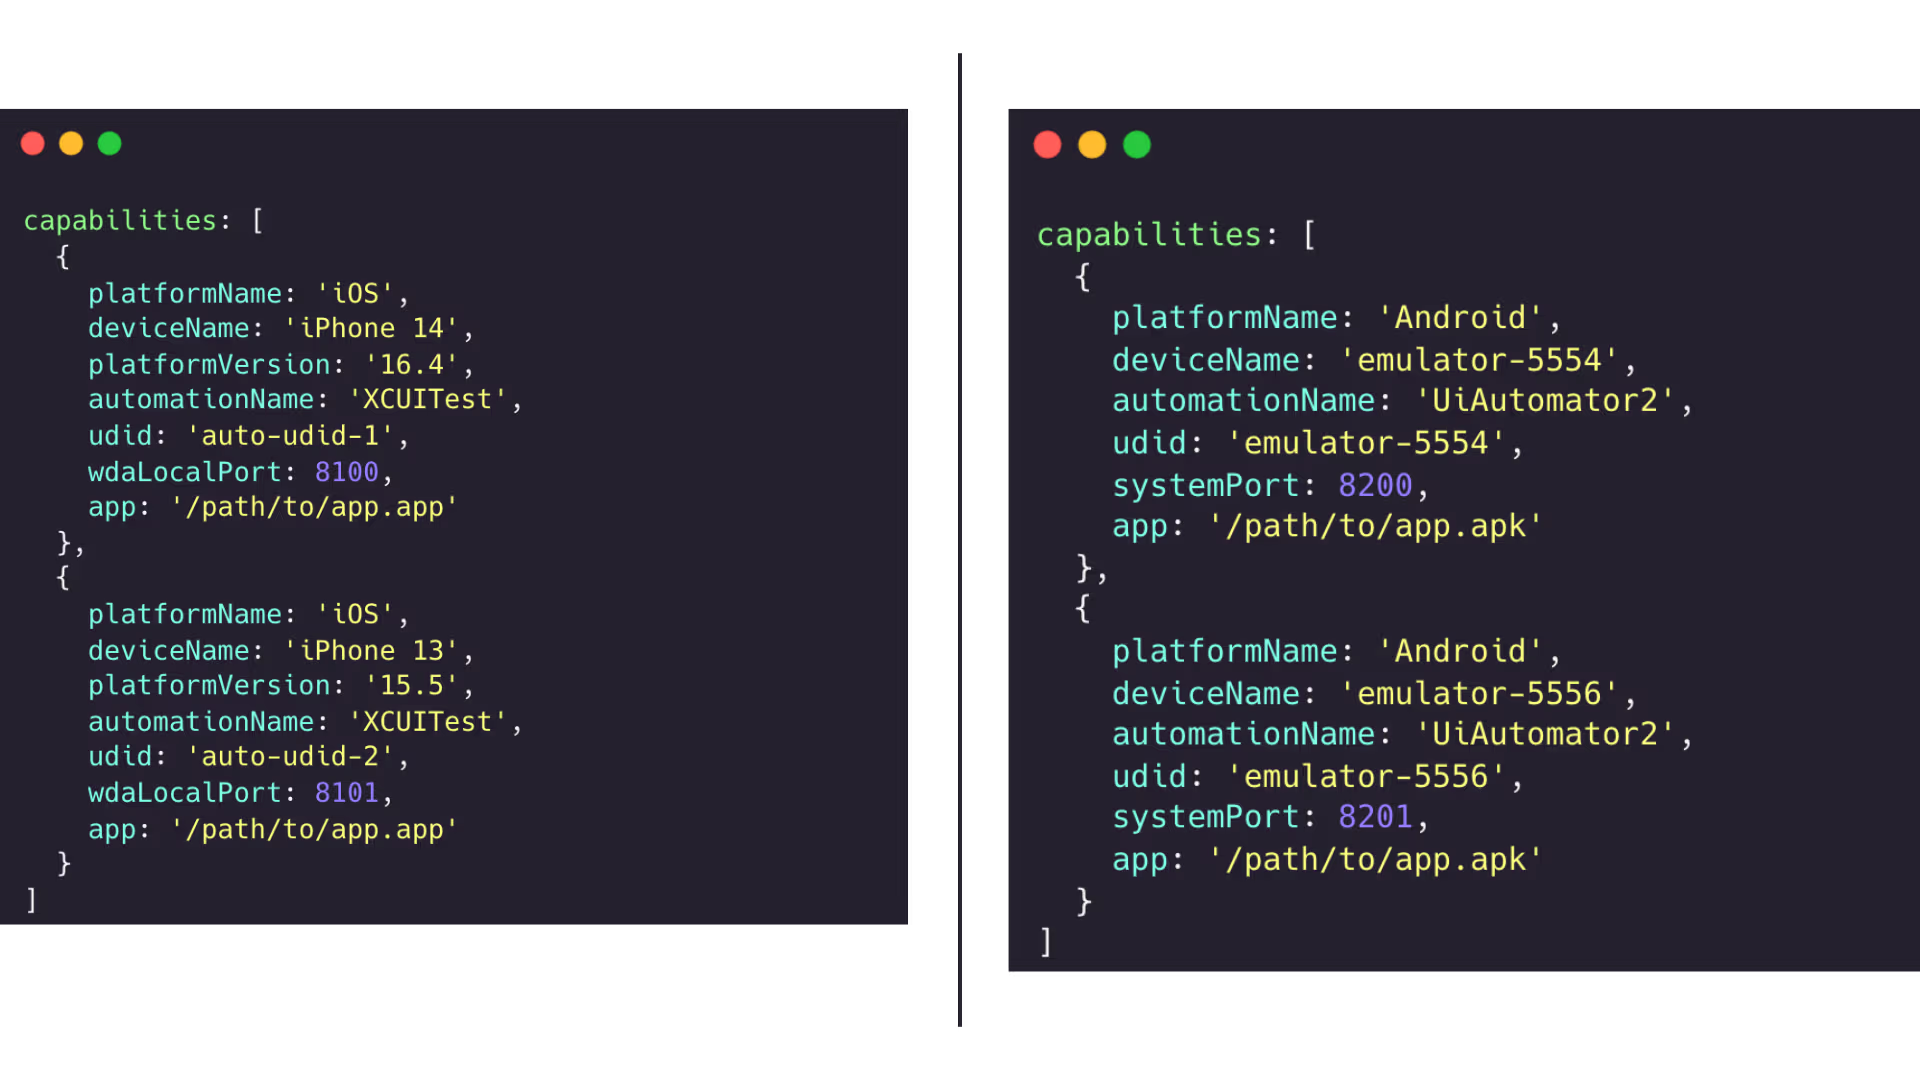
Appium creates a separate session for each test device. To avoid conflicts, each session needs unique capabilities, like a different udid, systemPort (for Android), or wdaLocalPort (for iOS).
Here’s how it looks in practice:
Parallel Testing on Android & IOS with Multiple Emulators
🔧 WebdriverIO config setup
In wdio.conf.js, the following is required to enable parallel execution:
maxInstances:2, //or more, depending on available devices
WebdriverIO will automatically manage multiple sessions based on your defined capabilities. You can either start multiple Appium servers on different ports or let the @wdio/appium-service handle it for you behind the scenes.
💡Smart enhancements
Already running tests in parallel? Awesome. Now let’s level up your setup with a few easy (but powerful) improvements:
- Use dynamic port allocation with Helper functions: Build a helper function that dynamically assigns ports based on the number of instances you're running:
const getPort = (base, index) => base + index;

capabilities : Array.from({ length: 2 }.map((_, i) => ({
platformName: 'Android',
deviceName: `emulator-${5554 + i * 2}`,
automationName: 'UiAutomator2',
udid: `emulator-${5554 + i * 2}`,
systemPort: getPort(8200, i),
app: '/path/to/app.apk'
})));
- Tag tests by device type or feature: If you're using Mocha or Jasmine in WebdriverIO, you can tag your tests with custom metadata. This helps you filter or prioritize certain test types in CI pipelines (e.g., smoke tests on Android only):
describe('[@android] Login flow', () => {
it('should login successfully', async () => {
// ...
});
});
- Parallelize by feature, not just devices: You can run tests in parallel by feature/group, not only by device. In WebdriverIO, this means splitting specs in the config:
specs: ['.tests/smoke/*.js', './tests/regression/*.js'],
maxInstances: 2, //each spec runs in its own thread
2. Face ID: The gatekeeper we all need to automate
Biometric authentication like Face ID used to be a fancy feature, but now it’s quickly becoming the norm. Whether talking about banking, shopping, or productivity apps, users expect fast, seamless, and secure login flows. For QA engineers, this shift brings new challenges: How do we properly test and automate something that relies on physical biometrics?
Luckily, if you're using simulators and Appium, there's a reliable way to simulate Face ID logins without needing an actual face. No creepy masks, no 3D models. Just a few magical commands.
There are three biometric superpowers the simulator gives you and Appium just hands you the remote.
🎭 Enroll: "I have a face now!"
This command simulates a user enrolling in Face ID.
It’s crucial. Without this, Face ID is just a button that leads to disappointment.
await driver.execute('mobile: enrollBiometric', { isEnabled: true });
Use this at the start of your test run to enable Face ID support. Want to disable mid-test? No problem! Just set:
isEnabled: false
👩 Match: "Hello, it’s me."
This command simulates a successful Face ID scan, just like looking into the camera and getting instantly recognized. It’s useful for testing login, payment confirmation or any flow that requires user authentication.
await driver.execute('mobile: sendBiometricMatch', {
type: 'faceId',
match: true
});
❌ Non-Match: "I don’t know you, stranger."
This one fakes a failed biometric attempt. Maybe you’re trying to simulate a sleepy user who’s holding the phone upside down.
The app should say “Access denied” and your test should validate the correct response.
await driver.execute('mobile: sendBiometricMatch', {
type: 'faceId',
match: false
});
Automating face ID may sound like hacking reality, but actually, it just allows you to guide the simulator to play along
The right Appium commands make it possible to orchestrate your identity (not fake it!). Just like that, you can simulate both successful and failed Face ID interactions without ever lifting your eyebrows.
Here’s a quick GIF showing how the magic happens on the iOS simulator:
Now go forth and automate like the QA wizard you are. ✨
3. Events API: Understanding performance bottlenecks
Let’s be honest, we’ve all run a test and wondered: “Why is this taking so long?”
You open logs, throw in some console.log() calls, maybe even rerun the test with a stopwatch in hand… but the answers often remain fuzzy.
That’s where the Appium Events API comes into play by giving you a clear, behind-the-scenes view of what your automated tests are really doing.
🔍 What is the Appium Events API?
This API emits detailed, structured data about every command: when it starts, how long it takes to execute, how long it takes to communicate with the server, and whether any delays are sneaking between steps.
It’s like X-ray vision for your mobile automation test performance.
If you're using WebdriverIO, integrating this insight is really simple. With just a few hooks in your wdio.conf.js, you can monitor each Appium command and measure its duration.
Why does this matter? Because it puts you in control. You can quickly pinpoint bottlenecks, understand how your app responds to real-world interactions, and compare different builds to catch performance regressions before they reach users. It also helps you optimize your test scripts by identifying unnecessary waits or redundant actions.
Already convinced? Great, so let’s skip the fluff and dive into a concrete example.
Inside your wdio.conf.js, you can hook into two lifecycle events: beforeCommand and afterCommand :
const commandTimings = {};

beforeCommand: function (commandName, args) {
const start = Date.now();
commandTimings[commandName] = { start, args };
console.log(`[COMMAND] ${commandName} → ${JSON.stringify(args)}`);
},

afterCommand: function (commandName) {
const end = Date.now();
const duration = end - commandTimings[commandName].start;
console.log(`[RESULT] ${commandName} ← Duration: ${duration} ms`);
},
- beforeCommand runs just before any WebDriver/Appium command is sent (e.g., click, setValue, execute). It logs the time and the command’s arguments.
- afterCommand fires right after the command completes. It calculates and logs the total duration of that command.
Now, if we take the biometric authentication example from earlier and run the test, we’ll be able to see the following output in the console:
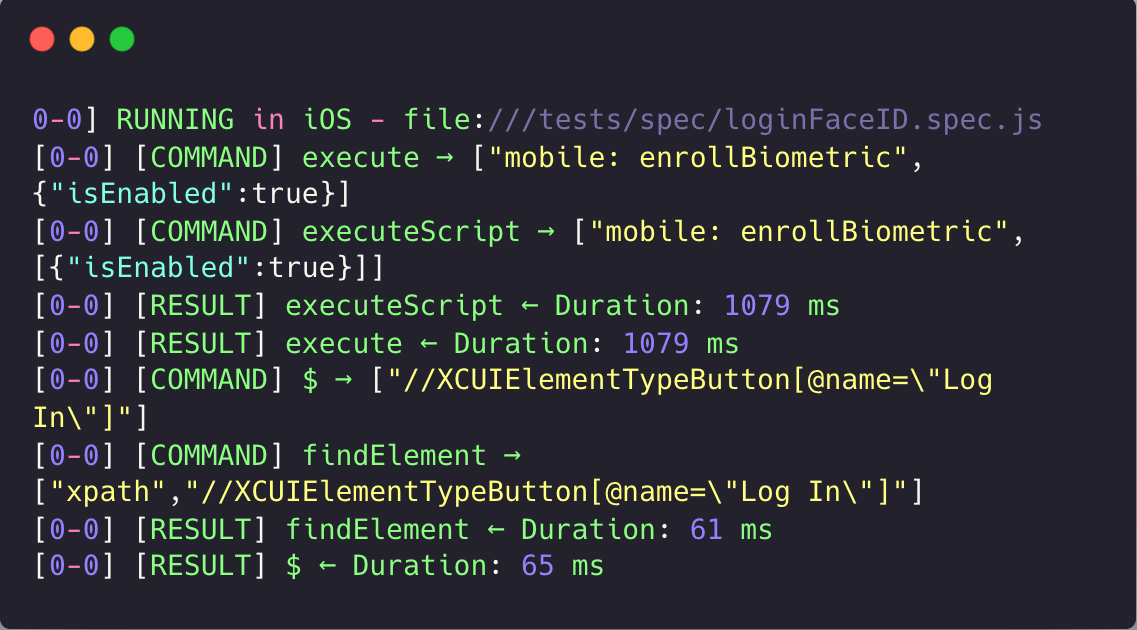
You can clearly see how long each step takes. If a simple click is taking nearly 700ms, that might be a sign of slowness in the app or some unnecessary overhead in your test.
🧰 Bonus: Make It Scalable
If you're running mobile automation tests at scale and want to go beyond basic console logs, you can enhance visibility and performance analysis by integrating your results into a more robust monitoring workflow.
Start by exporting command performance data using a custom WebdriverIO reporter, either in JSON or CSV format. Once you have these structured logs, you can pipe them into external platforms like Allure, Grafana, or DataDog for deeper insights. This allows you to track trends, identify slow operations, and visualize metrics through a lightweight dashboard, fully tailored to your team’s needs.
If you care about speed, efficiency, and clean feedback loops, give it a try. It might just save you hours of confusion and help your tests feel more like a high-performance engine than a black box.
Closing thoughts: Why Appium just makes sense
To wrap things up, Appium continues to stand out as one of the most flexible and powerful tools for mobile automation. Whether you're working on native, hybrid or mobile web apps, Appium provides a unified framework that speaks your language. That includes keeping up with modern features like parallelization, biometrics and performance monitoring.
What makes Appium really shine is its ability to integrate naturally into the real-world software development lifecycle. More than clicking buttons or filling in forms, it means enabling realistic, user-focused automation that mirrors how your app behaves in production. Moreover, with tools like the Events API, Appium empowers teams to go beyond basic assertions and truly understand how their apps perform under the hood.
💡 Feel free to explore our GitHub repository for full code examples and implementation details:
AlinaEnea0/appium-tutorial: How to Level Up Your Mobile Automation Strategy Using Appium
Are you ready to take the next step and walk through building the actual performance pipeline step by step?
Stay tuned and keep testing smart. 🚀


