How to connect an Ethereum node to the web browser
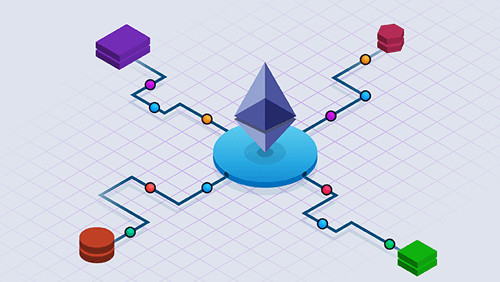
Nodes are instances of the Ethereum network. Each node hosts all the Ethereum transactions ever made and syncs constantly with all the other nodes in the network.
Ethereum Nodes: Go Ethereum - Geth, Ethereum - cpp, Parity, MetaMask (a bridge between nodes and your browser).
Ethereum Blockchain node implements Ethereum Protocol, with a node you can:
-
connect to other nodes;
-
access the blockchain;
-
mining on the blockchain;
Interacting with an Ethereum blockchain can be done via transactions or calls. The differences between these are:
Transaction (write):
-
published to the network;
-
processed by miners;
-
if is valid written to the blockchain (update the state of the blockchain);
-
consume Ether (gas);
-
asynchronous;
-
the return value is transaction-hash after the transaction is verified;
Call (read-only):
-
read-data from blockchain;
-
doesn't consume Ether (gas);
-
local only;
-
synchronous;
-
the return value is returned immediately;
Because every time we want to update the state of blockchain will cost Ether (gas) and our smart-contracts can’t be changed once are deployed, we should first implement contracts on private blockchain or public Testnet blockchain. Also, you need to know that on these networks Ether is worthless.
2.1 First, install node package manager needed for other installations.
2.2 Install MetaMask in your browser, in this way you will not have to download an entire node.
2.3 Install git.
2.4 Install on your project Web3.js or clone it if it’s a new project.
2.5 Install http server.
- npm install -g http-server
First, we need an Ethereum node (Mainet or Testnet). We have at least 3 different ways to do this:
-
use Mist wallet (Testnet or Mainet) which will run a node in the background. After that, you will need to sync the blockchain and also, you will need some Ether for deploying your code (this could take from few hours to days);
-
create a private blockchain and run the node on local. Here we must pay attention to our own contracts (we have to verify the transactions) and also, it’s important to mention that you don’t need to have a node explorer;
-
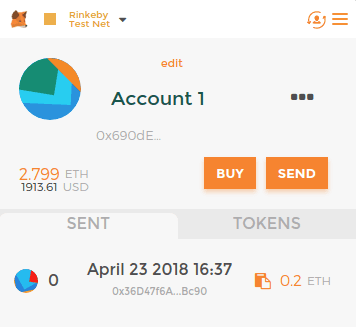
use Metamask bridge to connect to a Mainet or Testnet node. So in this way, we will not have to worry about syncing the node, verifying our transactions or mining Ether (you can also request some Ether on Testnet).
-
create an account;
-
select a Testnet Rinkeby or Ropsten;
-
request some Ether with a buy button (this will be for free);
Start with http server:
-
from your cloned Web3.js start a console and run your http server with the command: http-server;
-
make sure you are logged in MetaMask and pay attention when opening a new browser! Because you will be disconnected automatically from your account.
Now let’s connect our node with Web3.js. In the Web3.js cloned project we create an index.html and use this JavaScript.
if (typeof web3 !== 'undefined') {
	// Mist, Metamask
	web3 = new Web3(web3.currentProvider);
} else {
	// set the provider you want from Web3.providers
	web3 = new Web3(new Web3.providers.HttpProvider("http://localhost:8545"));
}
Let’s test it! You will get balance from the first account.
web3.eth.getBalance(web3.eth.accounts[0], function(error, result){
	if (error) {
		console.error(error)
	} else {
	    document.getElementById("myBalance").innerText = web3.fromWei(result.toNumber());
	}
});
As I said reading from blockchain is synchronous, the exception appears when the node is not locally. On MetaMask you must add a callback even for reading.
If you run your node locally (mist or private blockchain) is enough.
document.getElementById("myBalance").innerText =
web3.fromWei(web3.eth.getBalance(web3.eth.accounts[0]))
Let’s deploy a basic smart contract:
First, we need to compile our solidity code so we can run it in JavaScript. After this, from the compiled code we will use the ABI (Application Binary Interface) and the bytecode.
The best compiler out there is https://remix.ethereum.org because it has a great debugger for your contracts. Also, it is possible to import a solidity compiler in JavaScript project but will not be as good as the first (the one I recommended to you) because it has no debugger.
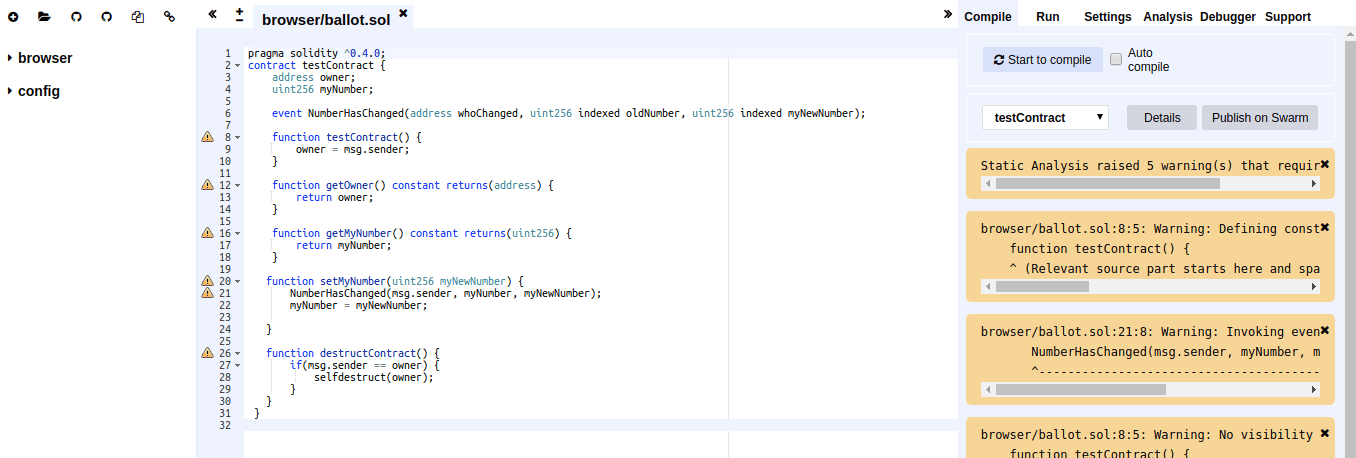
After we compiled our code, we go on details and get the ABI and Bytecode.
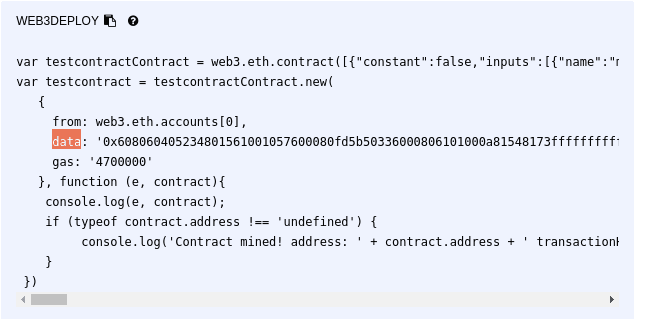
The ABI is the parameter passed to web3.eth.contract and the Bytecode is the data. You can copy the entire code from web3deploy into your JavaScript file and deploy it (also you can deploy it from remix with run and create). However, you must pay attention because you can deploy your contract only once and the code from contract can’t be changed. So, if you need to update the code, you better destroy the contract and create a new one.
To interact with the contract we need the contract instance, which we can save it in a variable right after we deploy our contract (the contract instance is the response from callback, ‘contract‘).
The second way to save your contract instance is from a previously deployed contract with ABI and the contract address.
contract_instance = web3.eth.contract(contract_abi).at(contract_adress);
When a contract is executed as a result of being triggered by a message or a transaction, every instruction is executed on every node of the network. This has a cost; for every executed operation there is a specified cost, expressed in the number of gas units.
Because of this, you will need to unlock the account in order to make the transaction. On the other hand, if it is about MetaMask a pop-up will appear and ask to submit the transaction with the amount of the gas and gas price (the amount of ether you are willing to spend on every unit of gas). The value of gas is driven by the market and the nodes that prioritize higher gas prices when mining transactions.
web3.personal.unlockAccount(web3.eth.accounts[0], "password")
Let’s make a transaction and update the state of the contract.
contract_instance.setMyNumber(setVal,
	{from: web3.eth.accounts[0]}, function(error, response) {
		if (error) {
			console.error(error)
		} else {
		    console.log("https://rinkeby.etherscan.io/tx/"+response)
        }
})
If it’s a public function, any address can call it. So when you make the call, you need to add an extra parameter which represents the caller. You can also add gas amount as well but is not necessary because it is an optional parameter.
Let’s take a small look at events:
myEvent = contract_instance.NumberHasChanged({},
	{fromBlock:"latest", toBlock: "latest"});
myEvent.watch(function(error, result){
	if(error) {
		console.log(error)
	} else {
		console.log("number has changed", result)
	}
})
The first parameter of event watch is a filter. This is optional and the second object is self-explanatory.
That was a basic example of smart contract deployed with Web3.js. Also, you need to know that, Web3.js can not only be used with Ethereum, but with at least other 40 blockchains and in combination with many javascript libraries and frameworks: Angular, React, Vuejs.
-
web3-eth is for Ethereum blockchain and smart contracts;
-
web-shh is for whisper protocol to communicate p2p and broadcast;
-
web3-bzz is for swarm protocol, the decentralized file storage;
-
web3-utils contains useful helper function for Dapp developers;
5. Conclusion
Developing smart contracts requires extra testing. Although the gas cost is insignificant, it doesn’t exist an easy way to guarantee your contracts don’t have any security loopholes. Because smart contracts are still in the early days, I say it’s a good thing to try it and have a head start.

