
Hand Painting 3D Models in Photoshop
The texturing process of the 3D models has focused lately in creating photorealistic textures and automating the process. But with this new pipeline a lot of the creativity and originality of the artist and even the uniqueness of the textures are reduced in the process.
In the gaming and movie industry the trend of hand painting the 3d models has started to mature and the results are very impressive and beautiful. At the same time a great amount of detail can be introduced in a very low poly model.
I'm not a traditional painter who uses brushes and pencils on a daily route. For this project I used a Wacom tablet which allowed me to use the brushes in Photoshop and do the blending of the colors much easier and in a more natural way.
The first step was to model the 3d blade and the shield, after creating the UV map (fig.1), I exported the wireframe of the model as an image and started painting in Photoshop.
Before you start the painting process you need to understand the wireframe, and think in at the same time how you want to paint it and what materials to use on the shield and blade.
The next step is to think in what way the light influences the individual materials and how it influences the volume of the model.
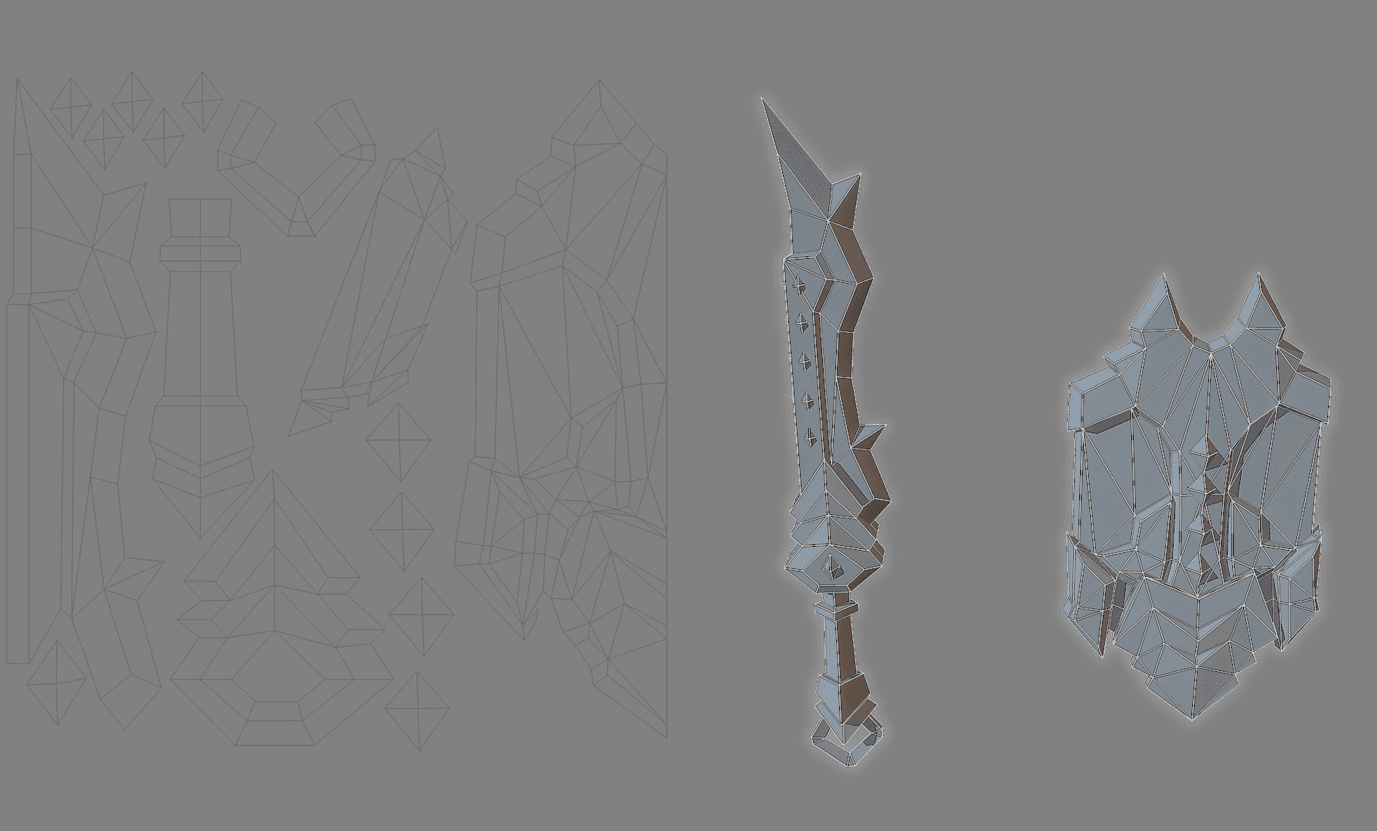
Figure 1
I start making the sword blade with basic darker color of grey (fig.2). I use a normal brush and as I add more details on, I use frequently the color picker to blend the colors. After having the base detail of the blade I add a light grey to create the highlights and the change of faces of the weapon.
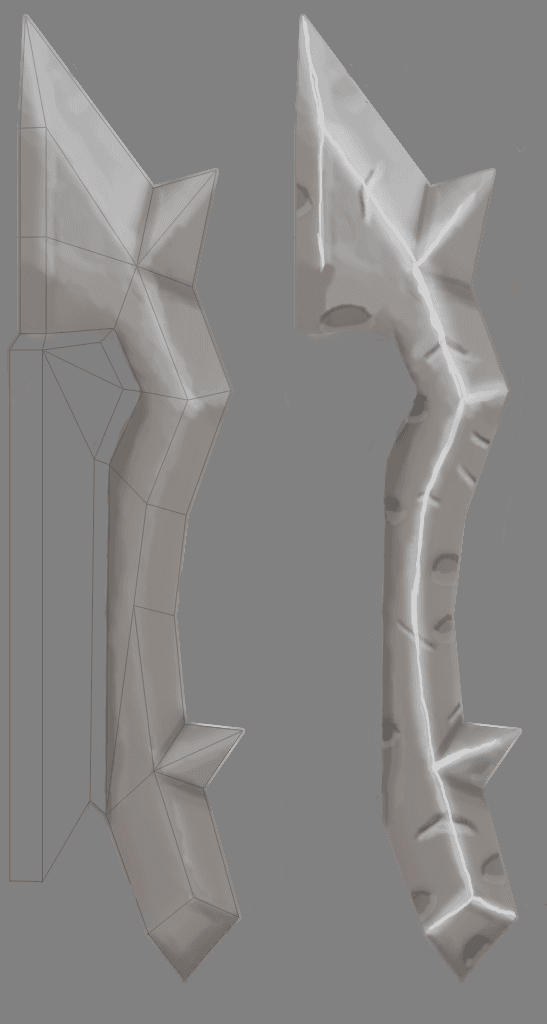
Figure 2
For extra detail I painted the ambient occlusion effect of the light (the approximation of environment lighting for accentuating small surface detail) .Beside the ambient occlusion I added some high frequency details in the form of scratches and dents on the sword for an extra touch. The final details focused on tweaking the light, color variation to give a better 3d feel to the texture (fig.2)
The next part I started painting was the upper support for the blade of the sword. I used the same technique only with a variation of the colors.

Figure 3
The final image (fig.3) has some darker spots in the texture. This is the ambient occlusion of the spikes. For them I used a mix of base color and I added some lighter colors for simulating the light. I used different gradients to create the 3d illusion (fig.4).

Figure 4
The final part of the blade was the handle and its detail sub elements. I started with a darker brown as a base color, and then I mixed different gradients to create the volume of the shape and of course the illumination. The final touches are scratches, dents and some green color on the edges to give the impression of old stylized copper (fig.5).
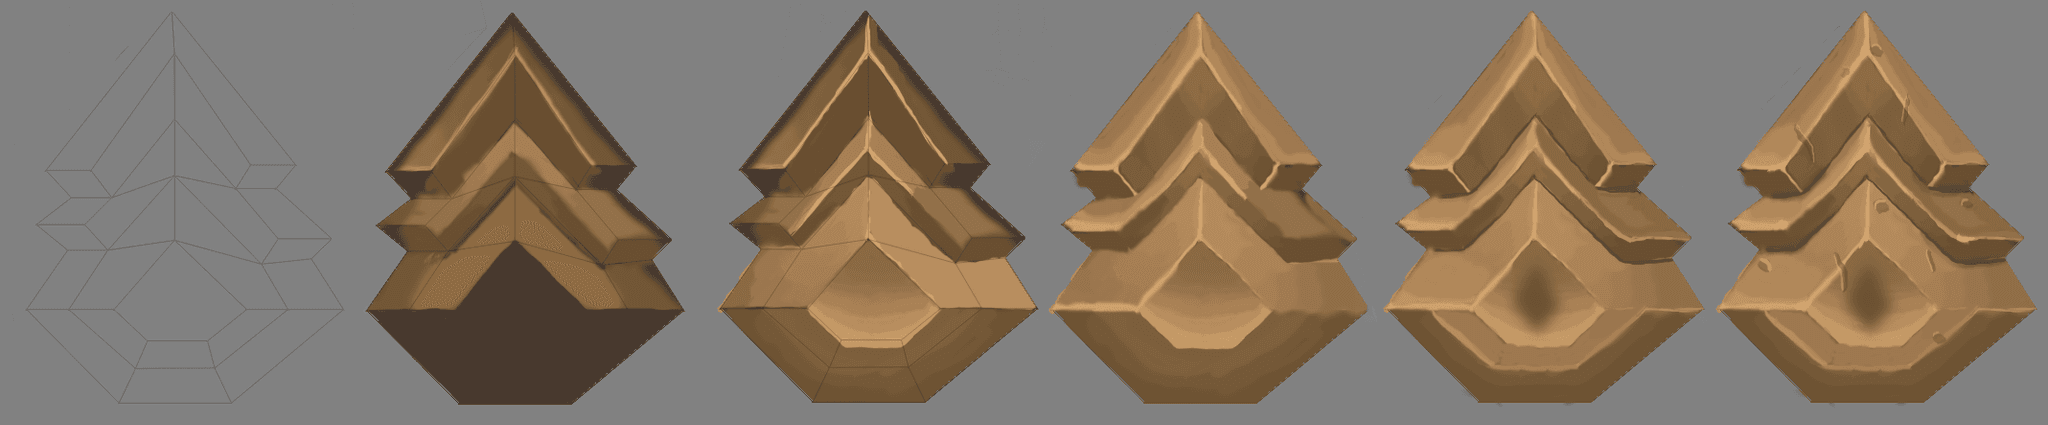
Figure 5
For the handle I opted for a used, old leather look strapped around. The process was similar the parts above but with the focus on creating a more organic feel to the material. The final touch was a copper piece around the handle to break the leather bands(fig.6).
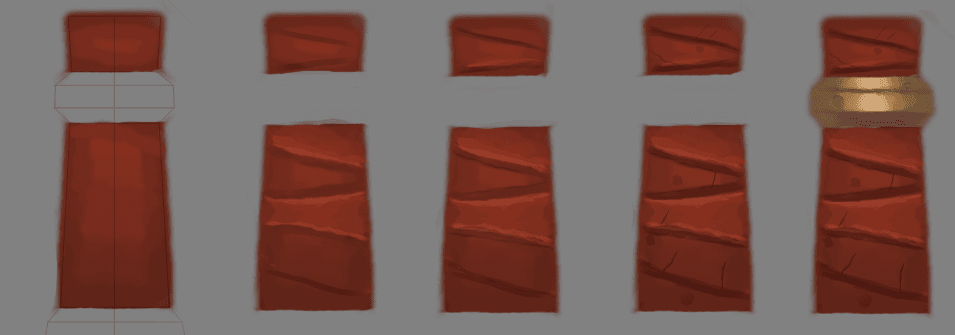
Figure 6
Now let's move to the shield. For this I decided to keep the materials used for the handle of the sword and add a wood texture for the base structure. I paint over the wireframe because it helps me focus on each individual part. Much of the work on the shield was creating a good volume especially that it has a lots of components that go over each other and change their lines quite dramatically (fig.7).
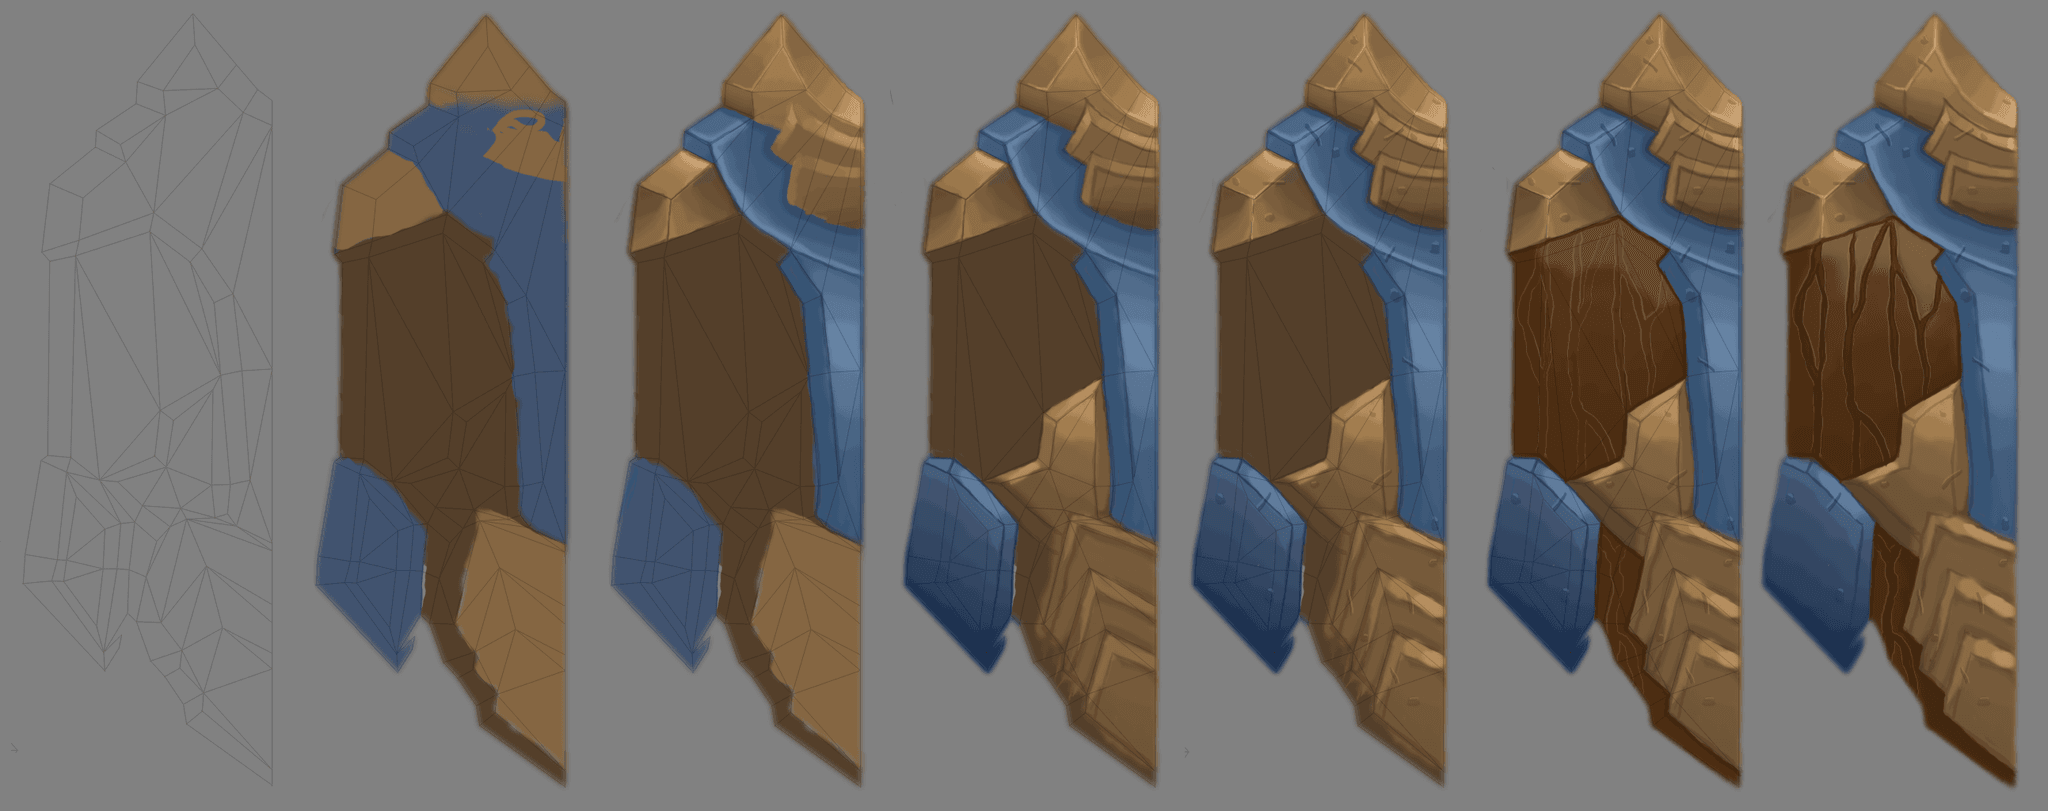
Figure 7
So basically this is the work starting from a simple wireframe to a game ready hand painted texture, but this is not the end of the story.
After I finished the first texture I decided that I want to paint a variation. The beauty of handspring is that you can play with the colors, lighting and even the shapes of the texture so you can easily produce an impressive amount of variation without the need to change the actual 3d model. So I chose a more fantasy look for the blade and the shield to give the player a sense of progression even if the model remains the same(fig8).
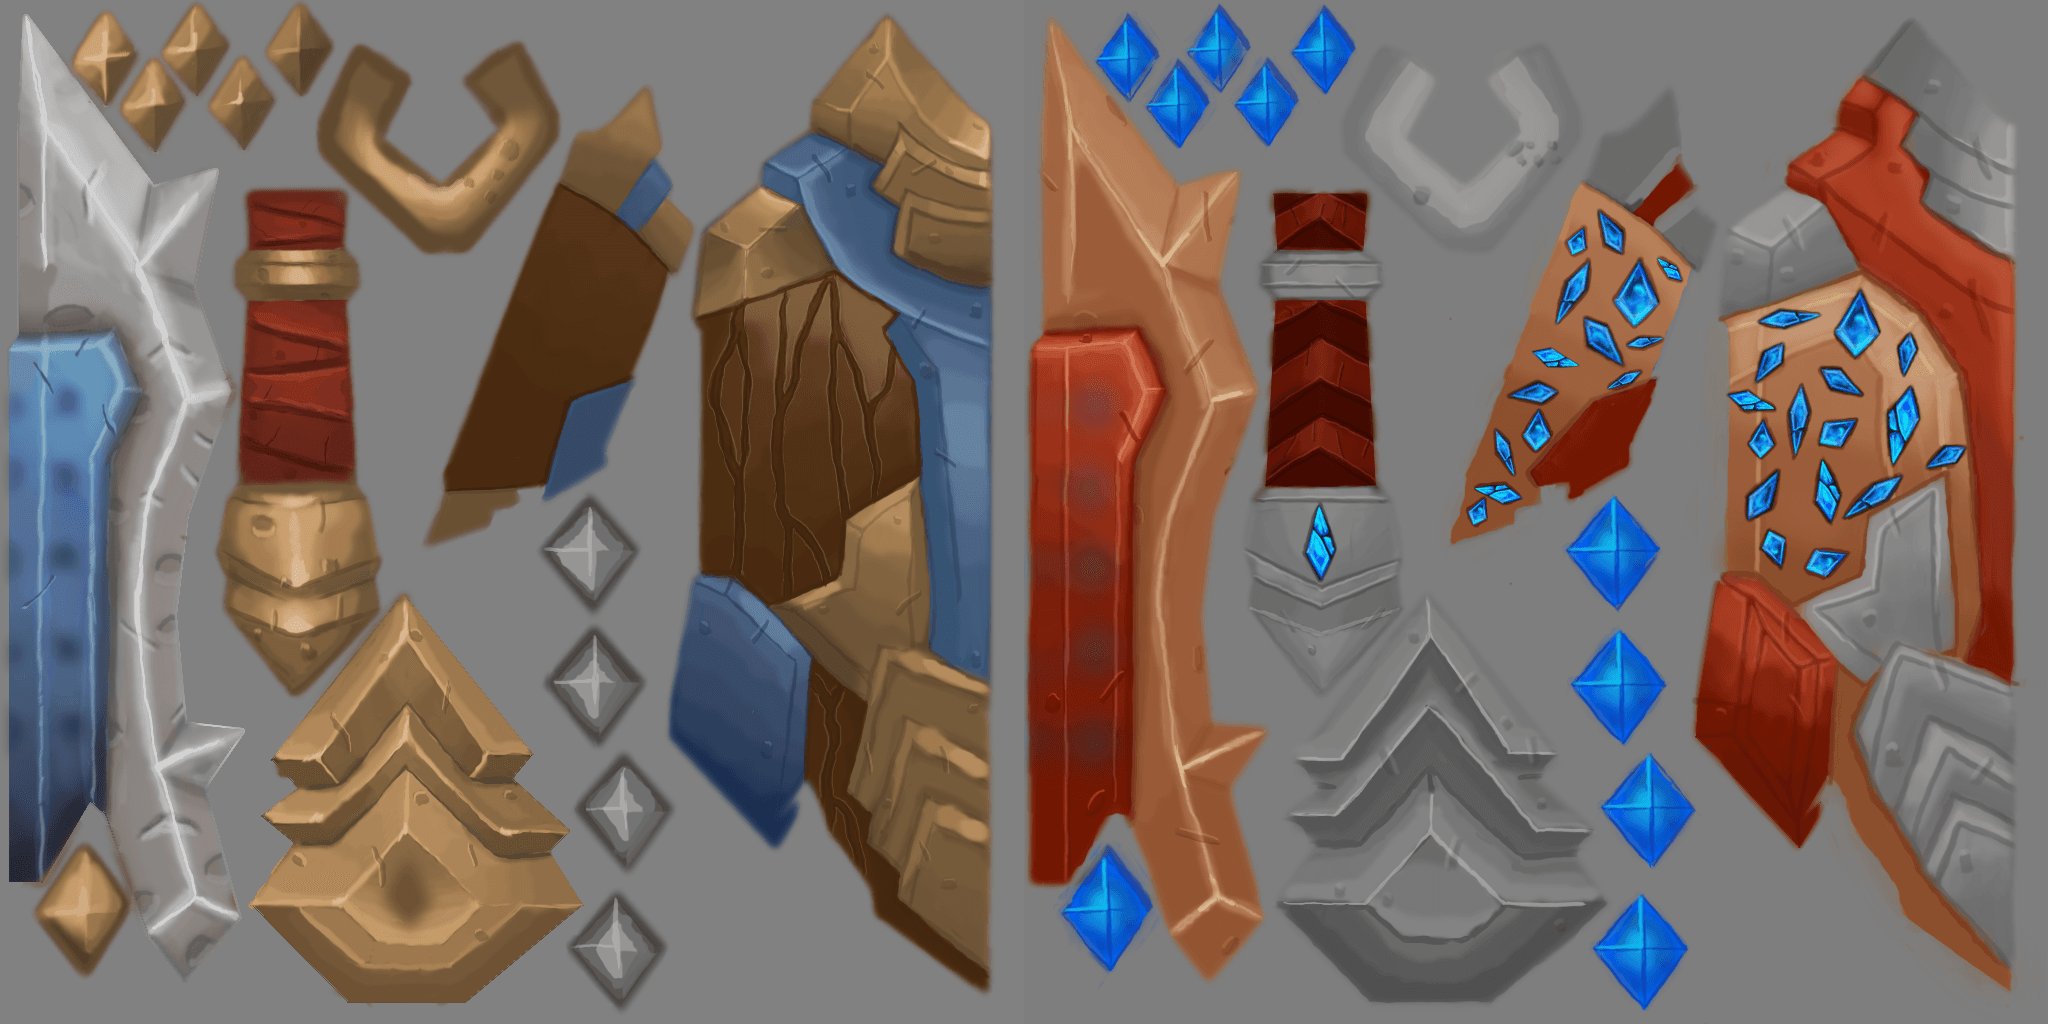
Figure 8
In most cases this texture could be used with ease in the final game asset. But we can add an extra detail layer with the help of a physic based shader texture. Usually this type of map is used for creating photorealistic textures with physically accurate proprieties but in our case we can use it to better focus on different elements and give each component a different feel.
Now let's talk a little about Substance Painter. This is a program designed to make the texturing work a lot easier. Here you can import your own shaders, use smart materials and do 3d and 2d painting in all material slots(albedo, normal, specular, gloss and so on).
After I created an ID map in Photoshop (to easily select each component) I made the metalness map that gives reflectivity value of each element and better distinguish each element not only from a color stand of point. You can see the difference between the models with and without this map.
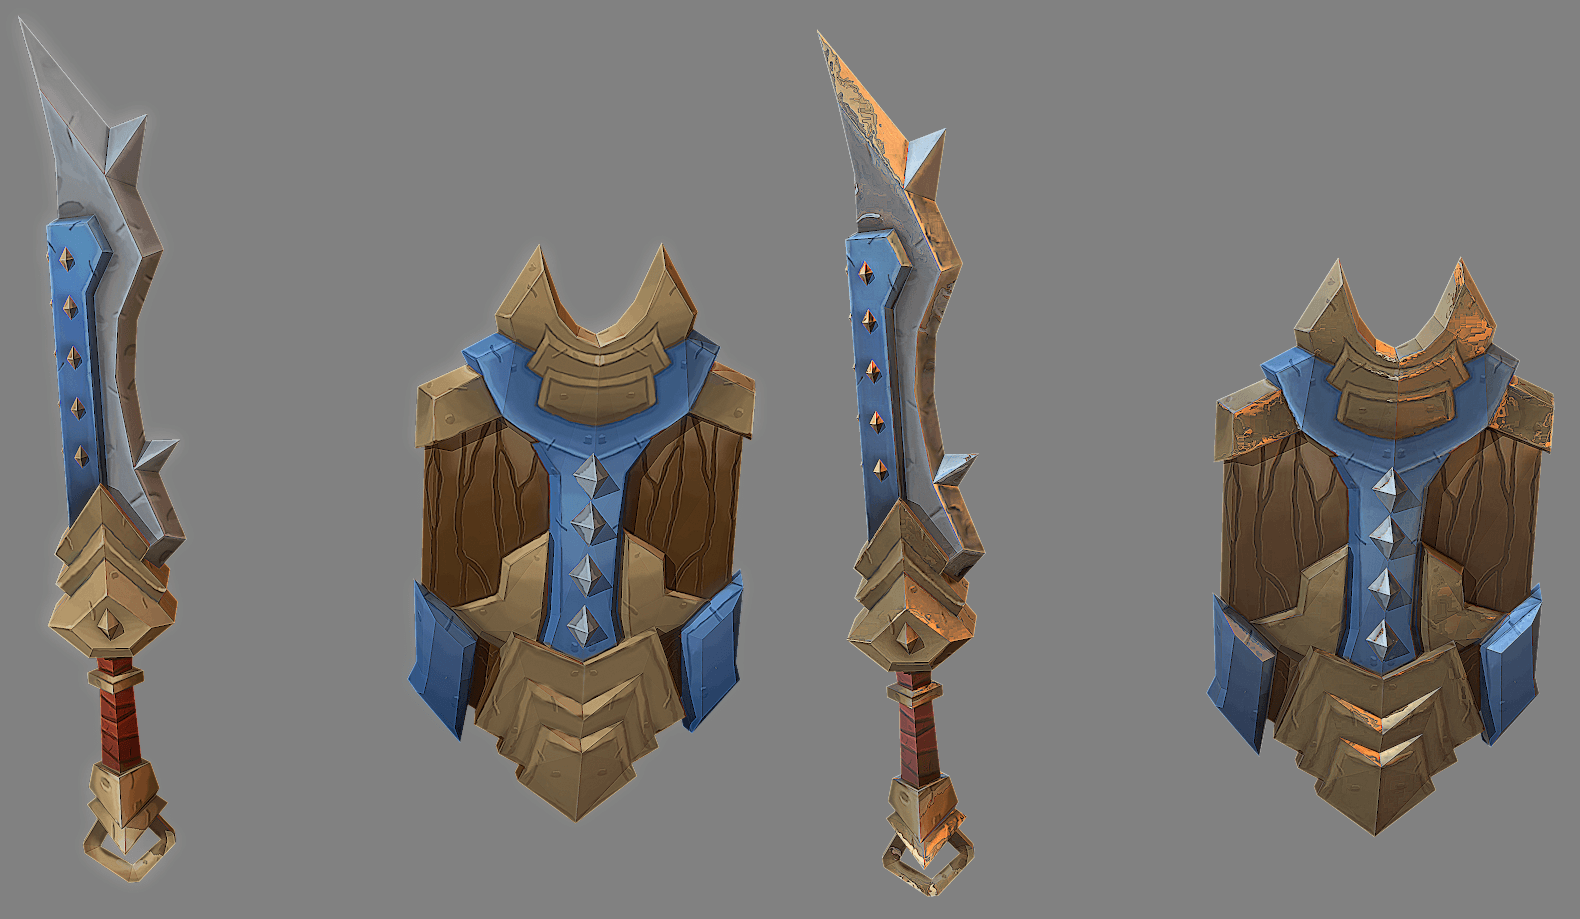
Figure 9
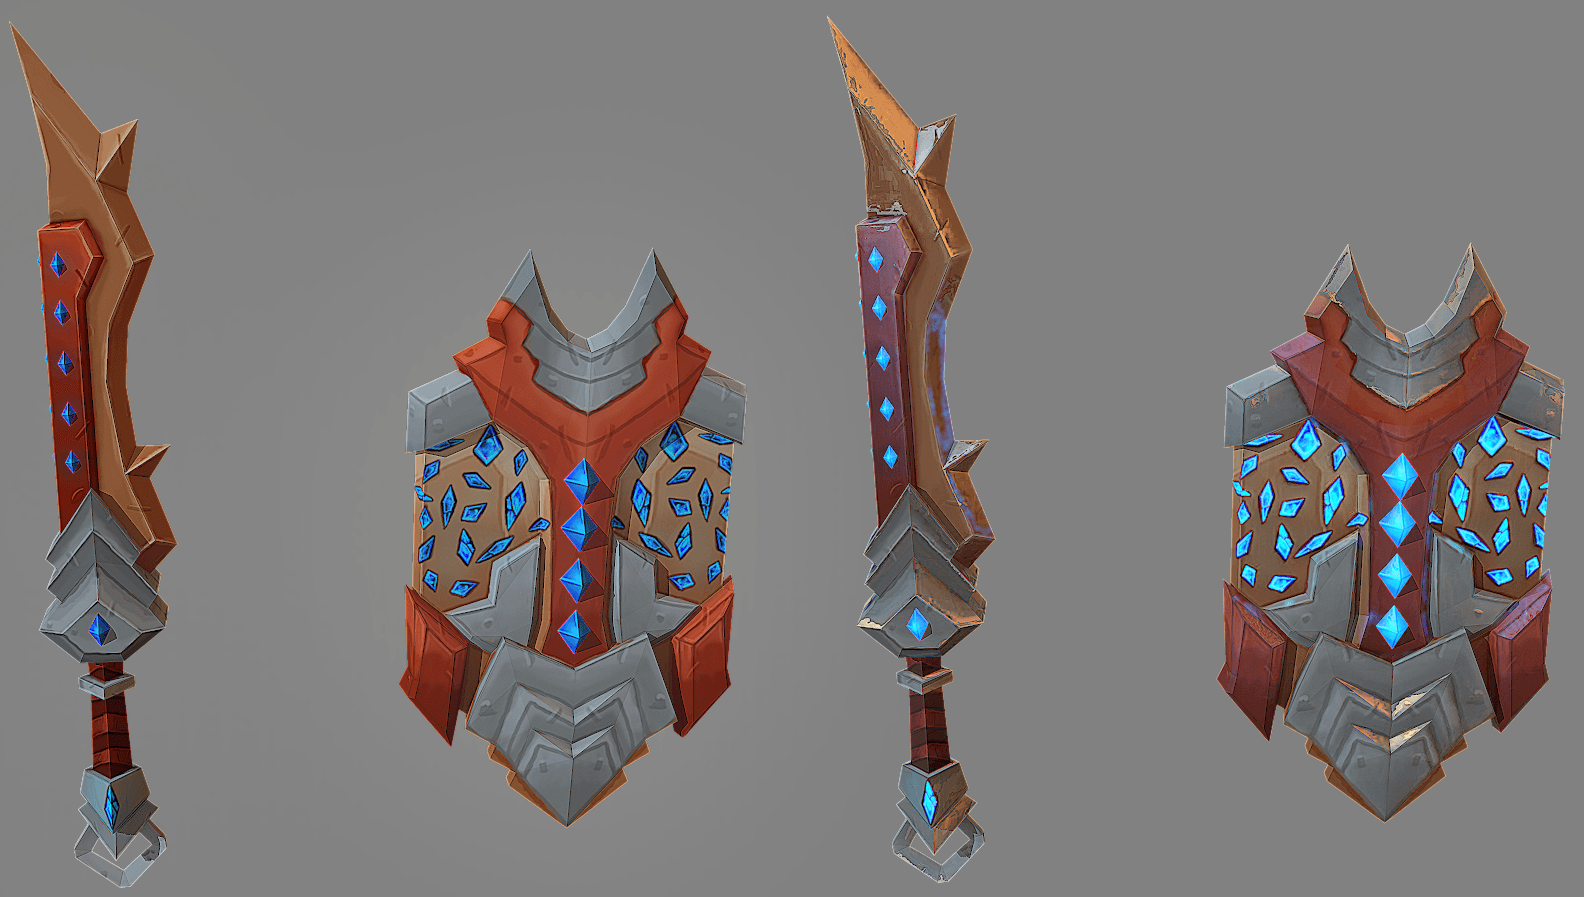
Figure 10
Hand painting textures for 3D models has a more artistic and personal feel than the normal texturing system with tiling and/or projection but at the same time it does require you to be a 2D artist. Only with practice you can create beautiful things and by combining the 2D and 3D knowledge you can easily tweak and play with the assets with almost no limitations. Step by step the line between 2D and 3D art is disappearing and you can easily see how they blend together creating truly unique and beautiful art.


