

The Blacksmith’s House - A 2D to 3D workflow pipeline

This is a 2D to 3D workflow pipeline presentation created by our colleagues Andrei Barba and Raluca Verdis, who will guide you through the process of creating a game-ready asset for the unity game engine targeting both mobile/web and high-end pc/console devices. From the first line drawn to exporting and optimizing the model this is the story of the blacksmith’s house.
Hey there, I’m Andrei, a 2D artist and this is my first try on a blog post in a very long time.
As the newest member of the graphics department here at ASSIST, my job from the get-go is to fill a gap between the idea and the 3D result, therefore I’m tasked with the concept sketching. Introductions being over, what you’re about to see below is the first project I did regarding this matter, along with my colleague on the 3D part.
The task we’ve been given was straightforward: sketch and design a medieval building depicting a blacksmith/forge-like structure, that could be used in a video game. So after doing some research on medieval buildings, we form some basic ideas that would translate into the early sketches, like materials being wooden, a big forge on the front of the building, smoke coming out of it, and also a pile of firewood on the side of the building to fuel it.
With the blueprints done for each of the 4 views, the concept is ready now to be handed over to the 3D artist and be recreated there. These are the 4 views needed by Raluca in order to model to blacksmith:

While the 3D asset is being created, we got some time to think about the color palette of the building.
As always, best way to do this is to find examples of what you have in mind and then extract from there colors and tones that you want to use in your image:

So the next logical step is to use the colors we just extracted on our sketches, and see what we get, then fine-tune and reach the look and feel we want for the building.
And these are the final concept sketches for our blacksmith:

Hello I am Raluca, 3D Designer at ASSIST Software, and I will present you the pipeline of creating the low and high poly model and exporting the assets to Unity 3D. I hope you will enjoy and learn new things about 3D modeling.
Low and High Poly Modelling
I received the 2D concept from Andrei and I started analyzing and decomposing the concept into smaller elements.
So I decided to create smaller pieces, like windows, doors, furnaces, chimneys and so on to easily model each individual piece. In 3D modeling is especially important to model as many components as you need and never try to model from on geometry piece all of the model.

At the same time is very important and helpful if the 2D concept artist gives you the model from all perspectives so you understand entirely to model's structure.
The first step before starting the modeling process is to arrange the images you received from the 2D artist in 3D Max so you have a clear guide of the model.

Now we can start modeling, I made the base of the door from a box. I always start with a basic shape and after that I add stacks to add new geometry to the model and at the same time keep and easily access the base model. The last editable poly stack is for adding the loops that help create the smooth high poly model:

In the last image you can see the door and the elements added on her.
The reasons why stacks are useful is due to the fact that it’s very easy to add and play around with new geometry without destroying the base mesh, it’s a modular workflow and by modifying the stack order new effects can be easily generated.
The bad part is that if you add geometry in a lower stack you destroy the upper stacks and for adding new geometry you must always add a new editable poly stack.
Before you move to the low poly model you have to put the ID color in the high poly mesh. The ID map helps you texturing the model in Substance Painter by easily selecting geometry by color ID.
Here is the high poly model finished and ready to extract the low poly objects from it.

One is way to create the low poly model is to delete all the upper stacks of the high poly model and leave only the base mesh. In some cases its necessary to recreate entirely the low poly mesh or start from a different stack but it depends on the pipeline and the requirements of the finished model.

Before we can export the objects for Substance Painter we have to do the UV unwrapping. This is the translation of the 3D model to a 2D plane. The process is relatively straight forward but it’s important to have a good scaling of the elements and good grouping of the textures.

Substance Painter Texturing
Once the low poly and high poly elements are ready, I exported the house model in substance painter so I could extract all the details to the low poly version. The input maps generated by the application ( normal map, ID map, ambient occlusion and so on) have been used to create the diffuse texture hand painted in Photoshop. In most cases the texturing will be done in this application but we wanted to keep the hand painted feel of the model so we exported only the normal and metalness maps for unity 3D engine.
With the 3D model of the house finished and all the different maps exported, we can start the laborious process of texturing the house, as per the concept from the color sketches.
For this, we’ll be using Adobe Photoshop and the input maps from the 3D model. Mainly we will paint on the diffuse map, but we’ll use the ambient occlusion map for some hints of light on the edges. For a beginner in the texturing of a 3d object, like me, the most confusing part was to successfully locate different elements of the unwrapped object over the maps, so I could paint them properly. I was also using a software called Marmoset Toolbag 2, which allowed me to see in almost real time the changes I was doing in Photoshop on the maps, directly on the 3D model. The house was split into several groups, each containing their own maps, so that I’ll have enough space to paint the details I wanted.
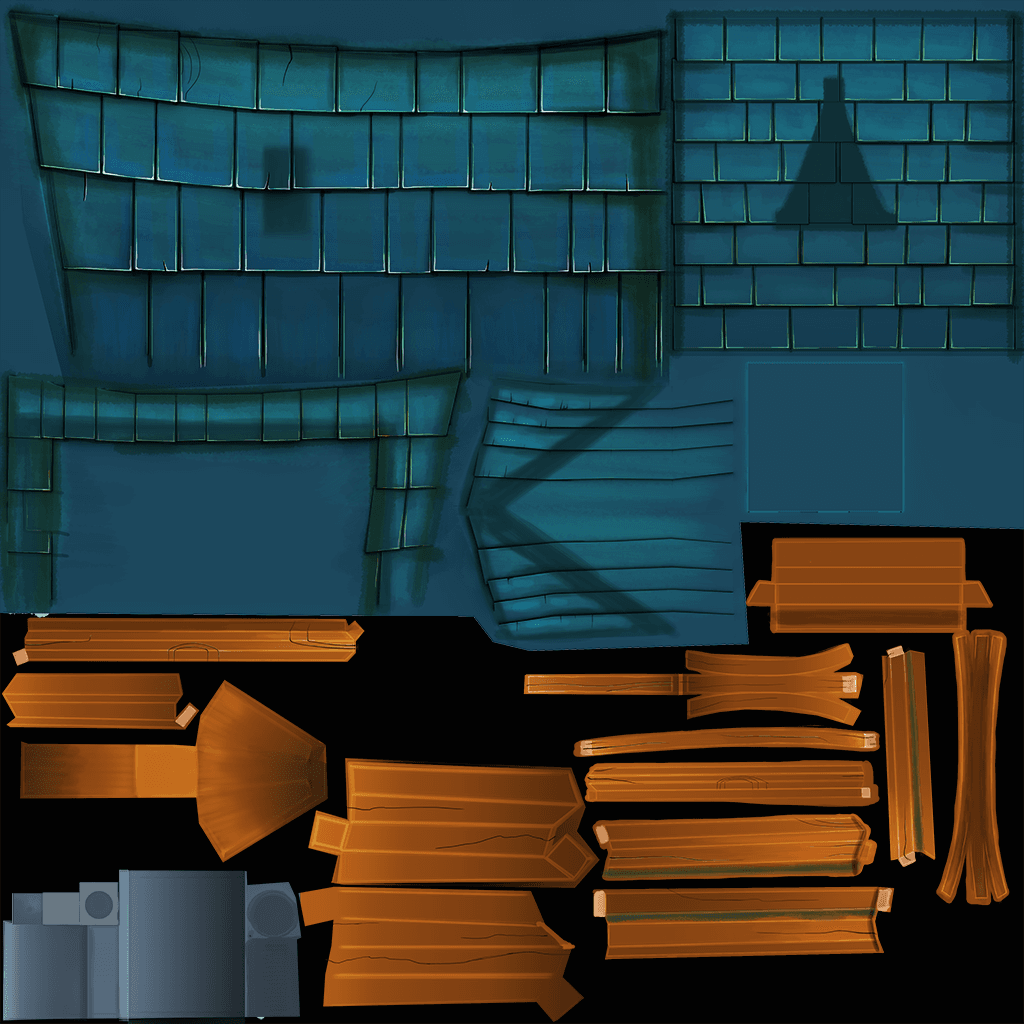
Roof texture:
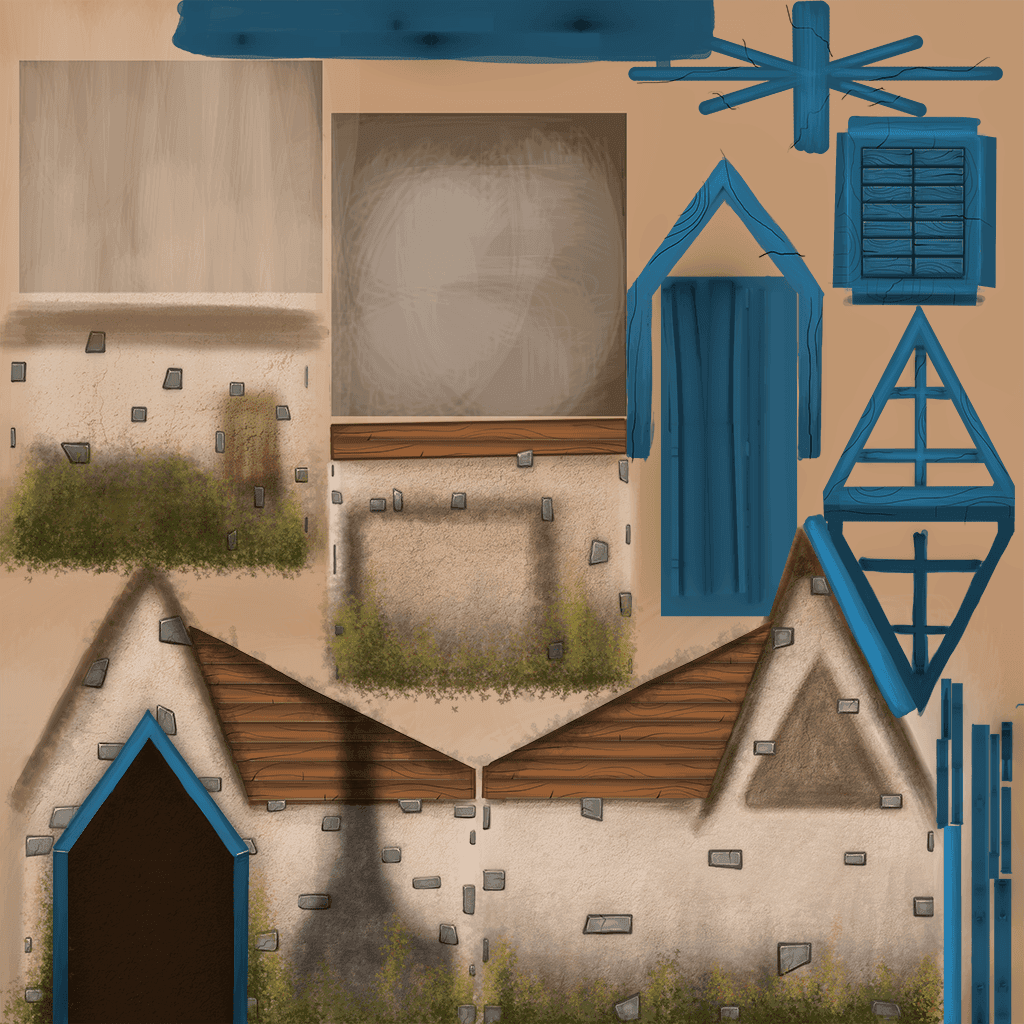
Walls and house texture:
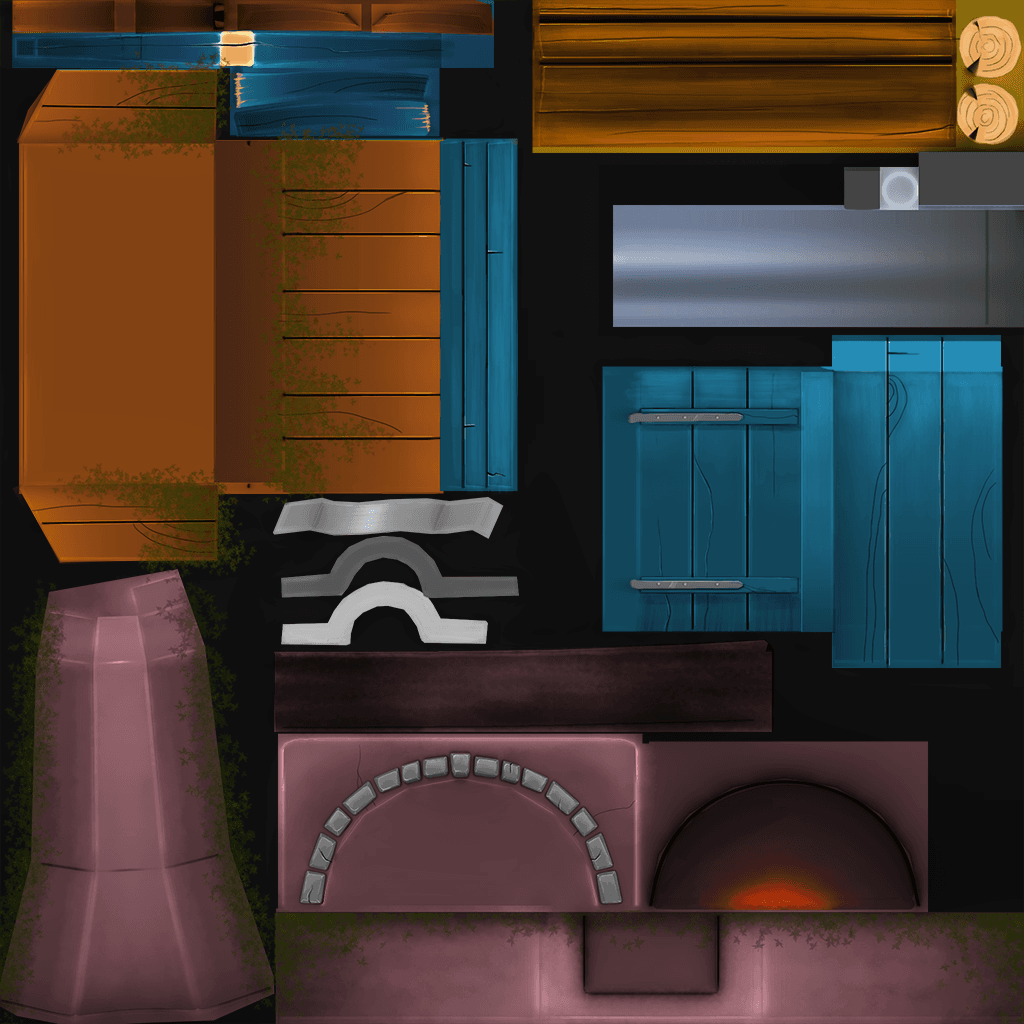
Elements texture:
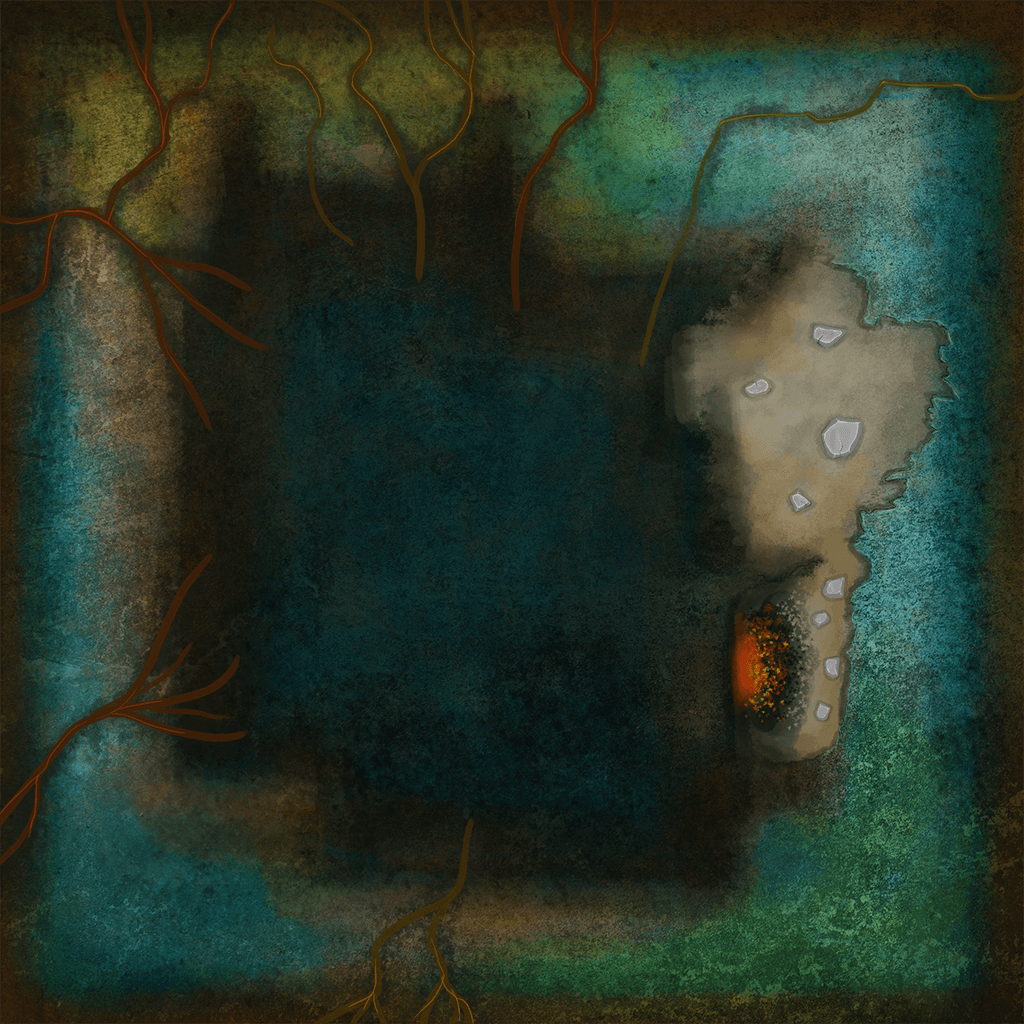
Ground texture:
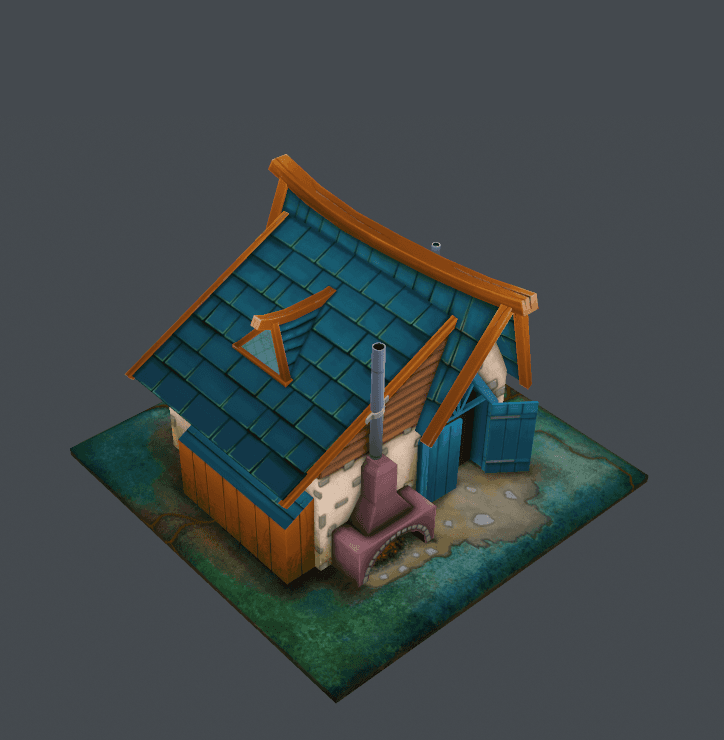
And these are a few screenshots of the final result:
The final step was to import the low poly model and the textures pack into Unity 3D. For the standalone version, we used the 4K resolution textures with dynamic real-time lighting and shadows and with physic-based materials for an extra touch of detail. For the mobile/web version we went down to 1K textures and disabled all lighting effects and used an unlit material that is the most optimized material for low hardware platforms.
Hope you liked our small 2D to 3D workflow pipeline presentation in creating game assets that use both the more classical and artistic tools and new technologies.


