Integrating MSSQL server with Django 2.0.7 and Python 3.6.5 using Ubuntu 18 as a local environment
If you want to install Docker on your Linux system, please check out this link and if you want to find out more about Docker, please go to the official page. In addition, you need to install Docker Compose and this can be done by following this tutorial. After you have installed Docker and Docker Compose on your system, you have to download the image you want and create a new container based on that image.
Inside your Django app, create a new folder called docker_config. In this folder, create a new file called docker-compose.yml with the content below. I prefer keeping all of the Docker settings together in the docker_config folder, but this is not compulsory.
version: '3'

services:
  db:
    image: microsoft/mssql-server-linux
    environment:
      SA_PASSWORD: StrongPass123
      ACCEPT_EULA: Y
      MSSQL_PID: Developer
    ports:
      - "1433:1433"
After creating the docker-compose.yml file, run the command below in order to create the container.

docker-compose up -d
You will see that the image will be downloaded.
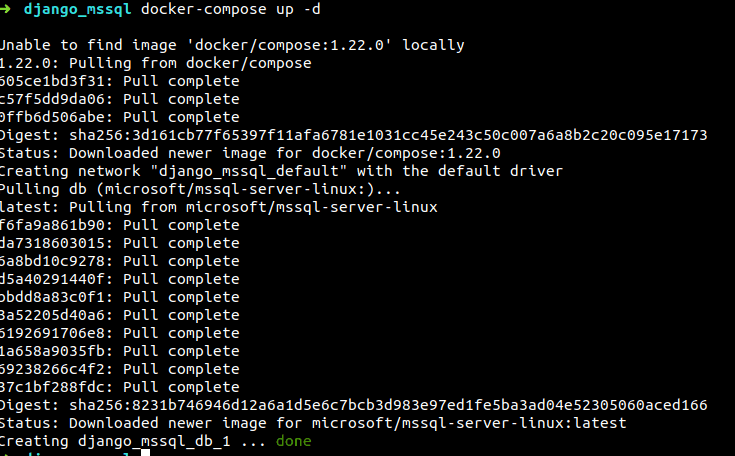
Now, if you run docker images, you will see that microsoft/mssql-server-linux has been downloaded.

Furthermore, if you type docker ps, you will see a list of containers. In order to check if your container is running, type docker ps -a.

If the container is not running, docker start <container_id> will start the container.
In the example below, <container_id> is 9f2f18715afe.
If you want to stop running a specific container, you can use:
docker stop <container_id>.
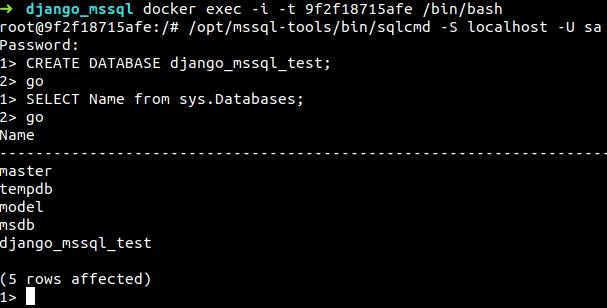
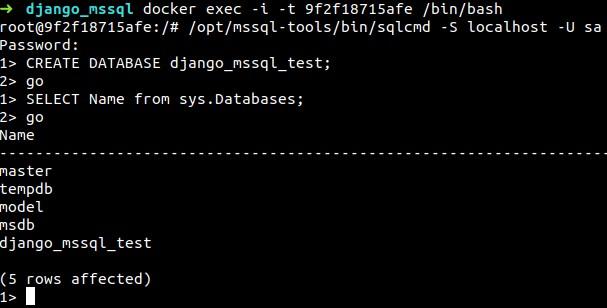
In order to run some commands inside a container, run the following command. If everything is ok, you will be inside the container bash.
docker exec -i -t <container_id> /bin/bash
You can access MSSQL server by running:
/opt/mssql-tools/bin/sqlcmd -S localhost -U sa
The default username for MSSQL server is sa. After you run this command, type the password written in the docker-compose.yml file. If everything is ok, you will be able to make interrogations inside mssql.
Now that you have configured the Docker container, you can check the connection from the outside of the container. This can be done by running the following script written in Python.
import pyodbc
    server = '127.0.0.1'
    username = 'sa'
    password = 'StrongPass123'
    PORT = '1433'

    cnxn = pyodbc.connect(
        'DRIVER={FreeTDS};SERVER=' +
        server + ';PORT=' + PORT + ';UID=' + username + ';PWD=' + password)
    cursor = cnxn.cursor()

    print ('Using the following SQL Server version:')
    tsql = "SELECT @@version;"
    with cursor.execute(tsql):
        row = cursor.fetchone()
        print (str(row[0]))

“FreeTDS is a set of libraries for Unix and Linux that allows your programs to natively talk to Microsoft SQL Server and Sybase databases.”
sudo apt-get autoremove freetds-dev freetds-bi
In order to install the latest version of FreeTDS, run the following commands:
sudo apt-get install wget
sudo apt-get install build-essential
sudo apt-get install libc6-dev
To find the latest version of FreeTDS, check this link. Then run the following command by changing the version of FreeTDS (at the time of writing this article, the latest version was freetds-1.00.92).
wget ftp://ftp.freetds.org/pub/freetds/stable/freetds-1.00.92.tar.gz
tar -xzf freetds-1.00.92.tar.gz
cd freetds-1.00.92
./configure --prefix=/usr/local --with-tdsver=7.3
sudo make
sudo make install
After FreeTDS is installed, it must be configured. In the /etc/ folder, add or update the following files with the content shown below.
odbcinst.ini

[FreeTDS]
Description = v0.91 with protocol v7.3
Driver = /usr/lib/x86_64-linux-gnu/odbc/libtdsodbc.so
odbci.ini

[dbserverdsn]
Driver = FreeTDS
Server = 127.0.0.1
Port = 1433
TDS_Version = 7.3
freetds/freetds.conf

[global]
    # TDS protocol version, use:
    # 7.3 for SQL Server 2008 or greater
    # 7.2 for SQL Server 2005
    # 7.1 for SQL Server 2000
    # 7.0 for SQL Server 7
    tds version = 7.3
    port = 1433

;   dump file = /tmp/freetds.log
;   debug flags = 0xffff

    # Command and connection timeouts
;   timeout = 10
;   connect timeout = 10

    # If you get out-of-memory errors, it may mean that your client
    # is trying to allocate a huge buffer for a TEXT field.
    # Try setting 'text size' to a more reasonable limit
    text size = 64512

    # A typical Microsoft server
    [dbserverdsn]
        host = 127.0.0.1
        port = 1433
        tds version = 7.3
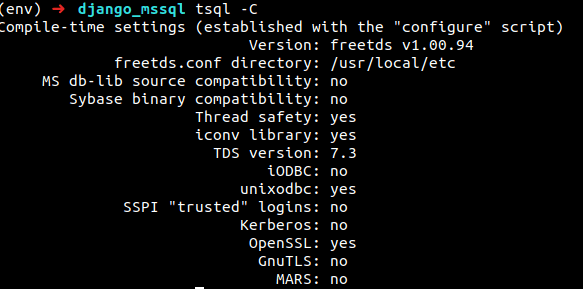
If you want to check the FreeTDS version, type tsql -C and you will receive an output like the one shown below.
If you try to run the script again, you will receive the following output.

You can access the MSSQL from your container by typing:
tsql -S 127.0.0.1 -U sa
In order to configure your Django app to run on MSSQL server, you must have the following packages installed:
django-pyodbc-azure==2.0.4.1
pyodbc==4.0.23
and you must update the settings or local_settings file as shown below.
DB_ENGINE = 'sql_server.pyodbc'
DB_NAME = 'django_mssql_test'
DB_USER = 'sa'
DB_PASSWD = 'StrongPass123'
HOST = '127.0.0.1'
PORT = '1433'
DB_OPTIONS = {
    'driver': 'FreeTDS',
    'unicode_results': True,
    'host_is_server': True,
    'extra_params': 'tds_version=7.3;',
}

DATABASES = {
    'default': {
        'ENGINE': DB_ENGINE,
        'NAME': DB_NAME,
        'USER': DB_USER,
        'PASSWORD': DB_PASSWD,
        'HOST': HOST,
        'PORT': PORT,
        'OPTIONS': DB_OPTIONS
    }
}
After running the migrations, you will see that all of the tables will be created in the MSSQL database from the container.
Most of the time, updating packages or operating systems to the latest version can create compatibility issues. This becomes a problem when you work on several projects. With the help of Docker technology and the package django-pyodbc-azure, you will be able to connect your Django application to MSSQL database locally using the latest version of Ubuntu (Ubuntu 18), even though MSSQL is not officially supported yet.

