The Pipeline Behind modeling, animating and integrating the Flak 88 AA Gun in Zelgor
Modelling a Flak 88 AA Gun or any mechanical model requires a different approach from modeling a character due to the technical and physical requirements that come along with creating a game ready weapon.
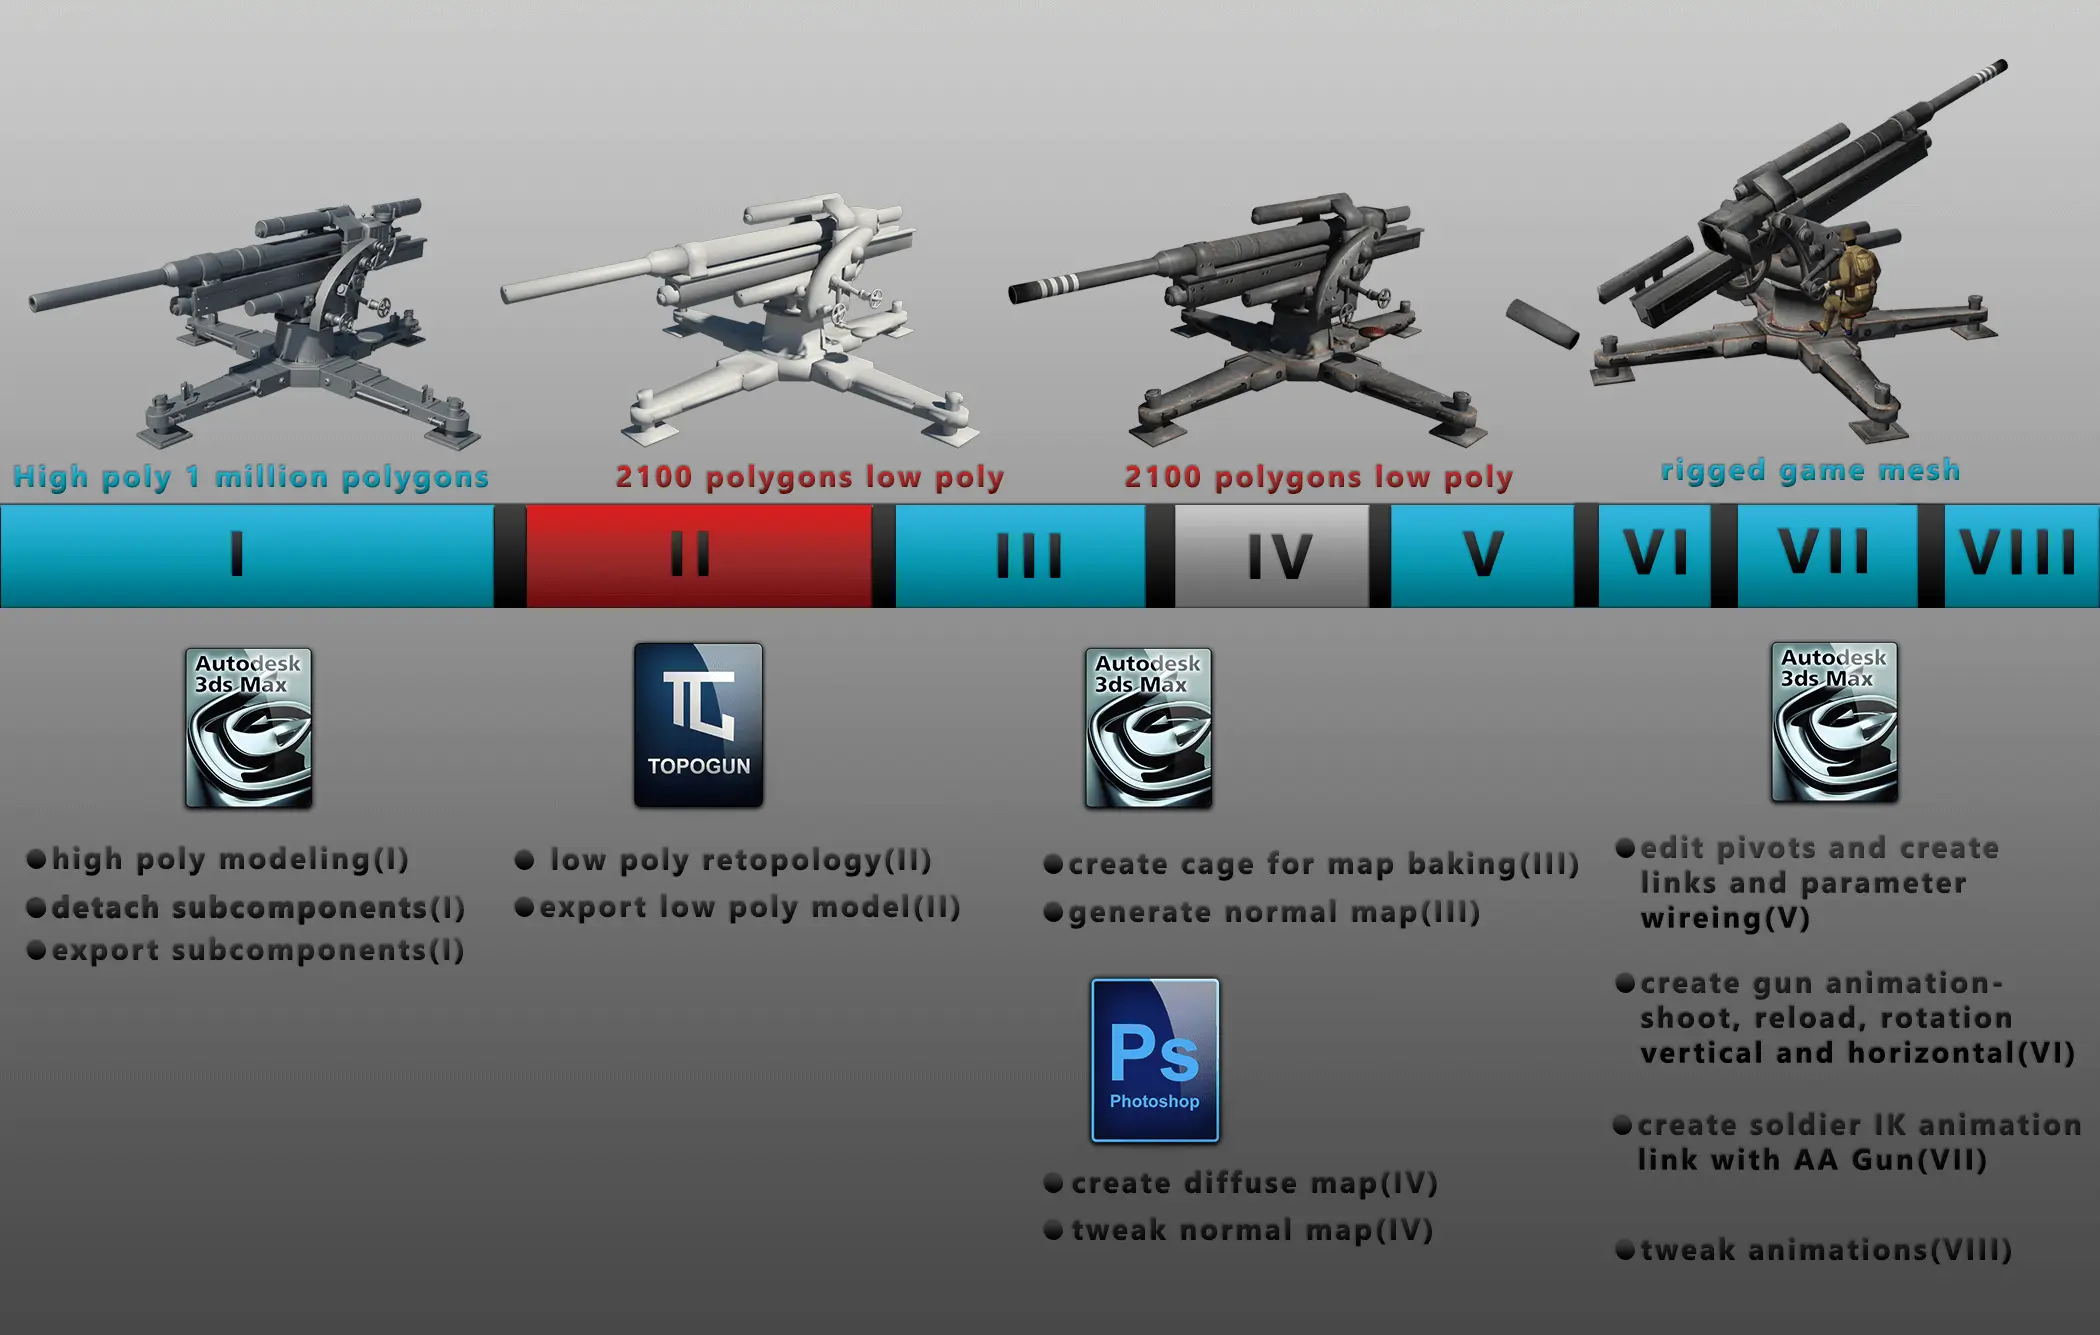
To make things more interesting I divided this presentation in two core components: the text part were I will focus on the more technical aspects of the pipeline and a video presentation that will cover the workflow behind the flak 88 in a more dynamic and easy to understand style. As with the building pipeline of the World War 2 soldier, I divided the process in eight distinct segments, with the size of each part representing the time spent in it.
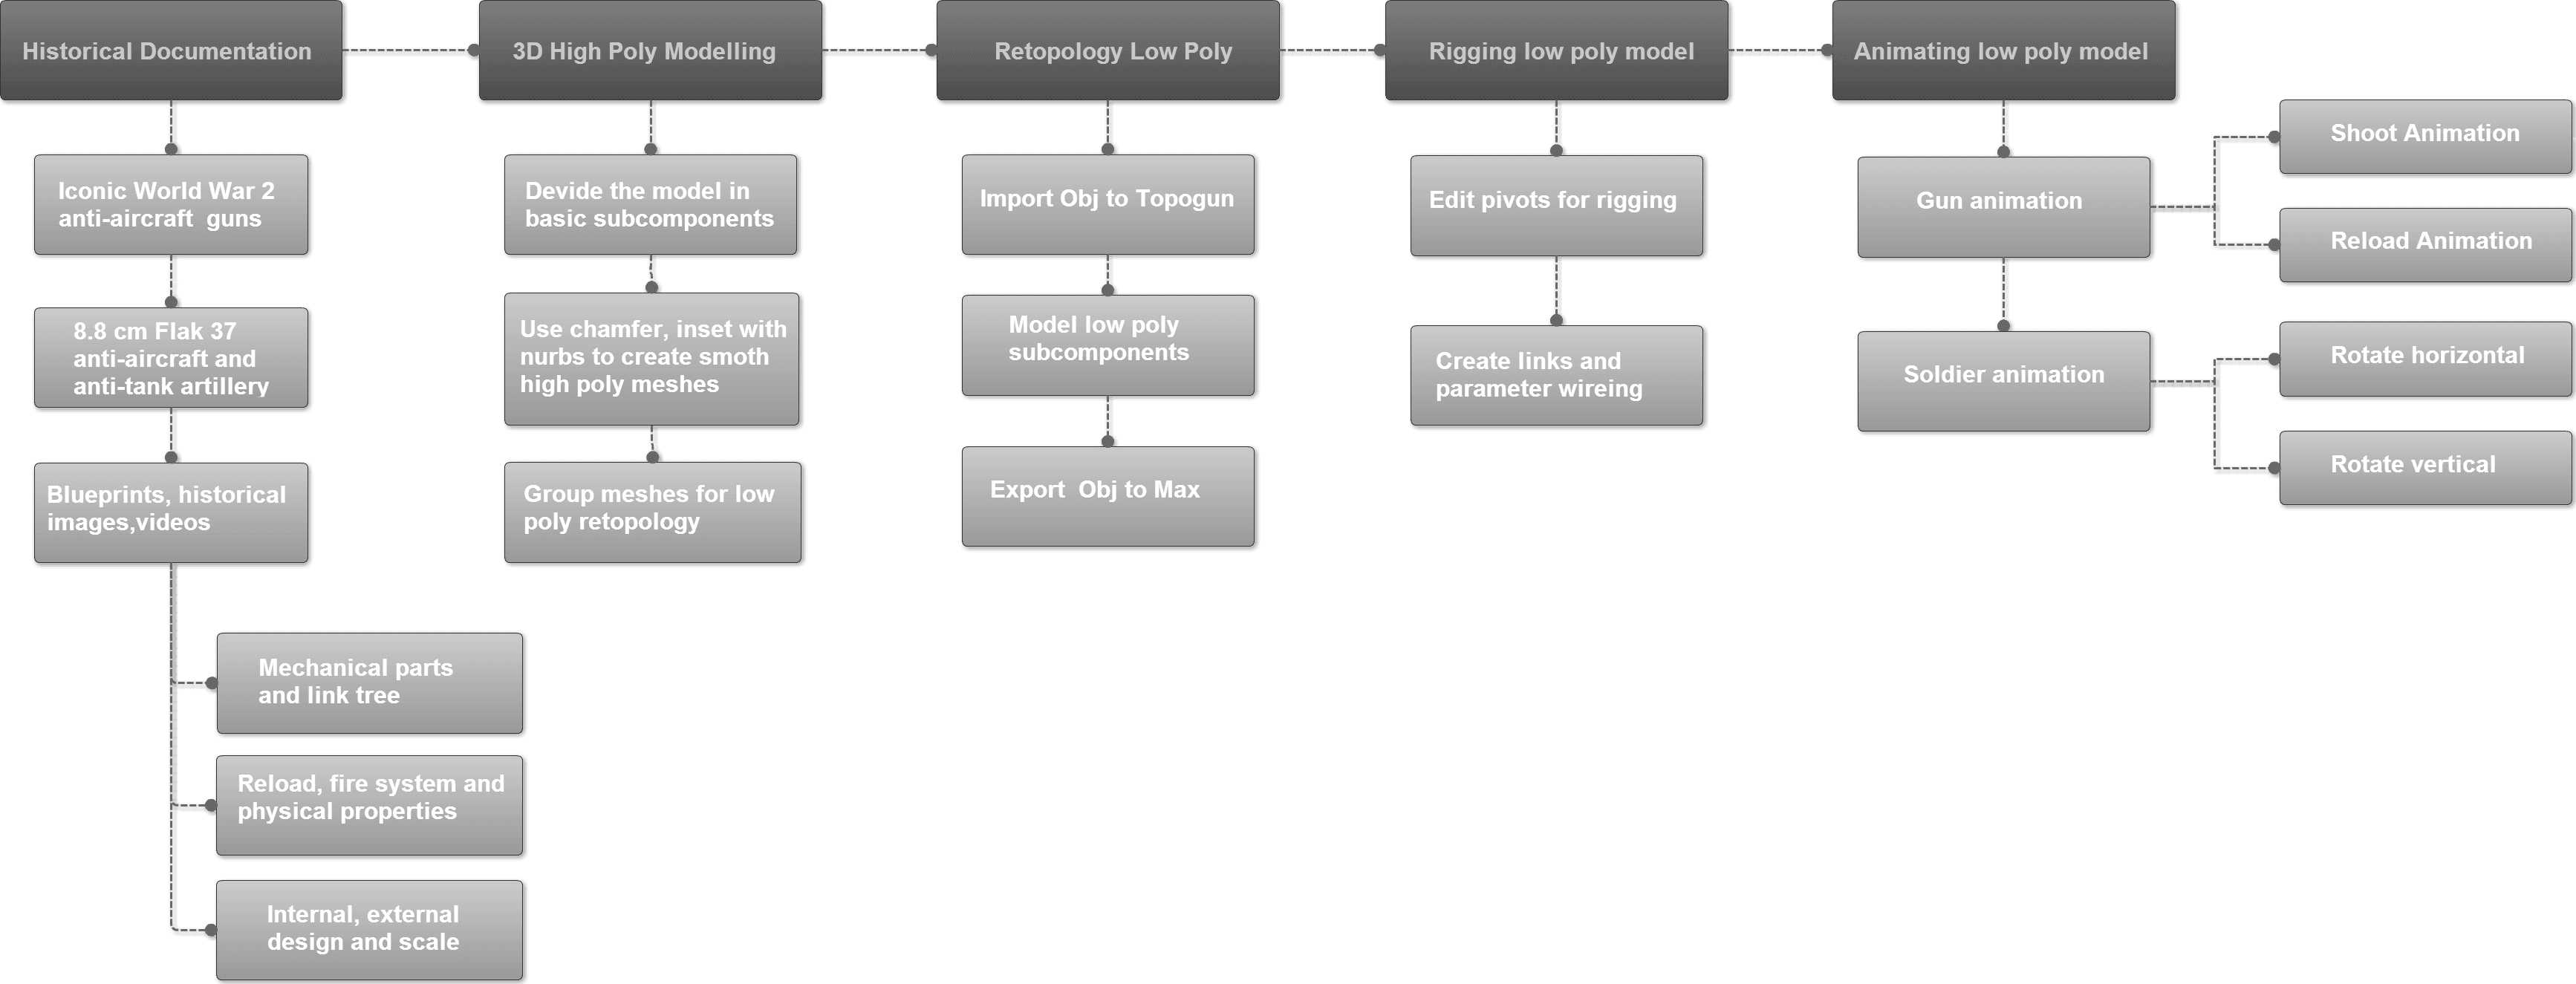
In addition to the pipeline I added a workflow image that is focused on the big picture, and in some ways it can be seen as an alternative to the pipeline image above.
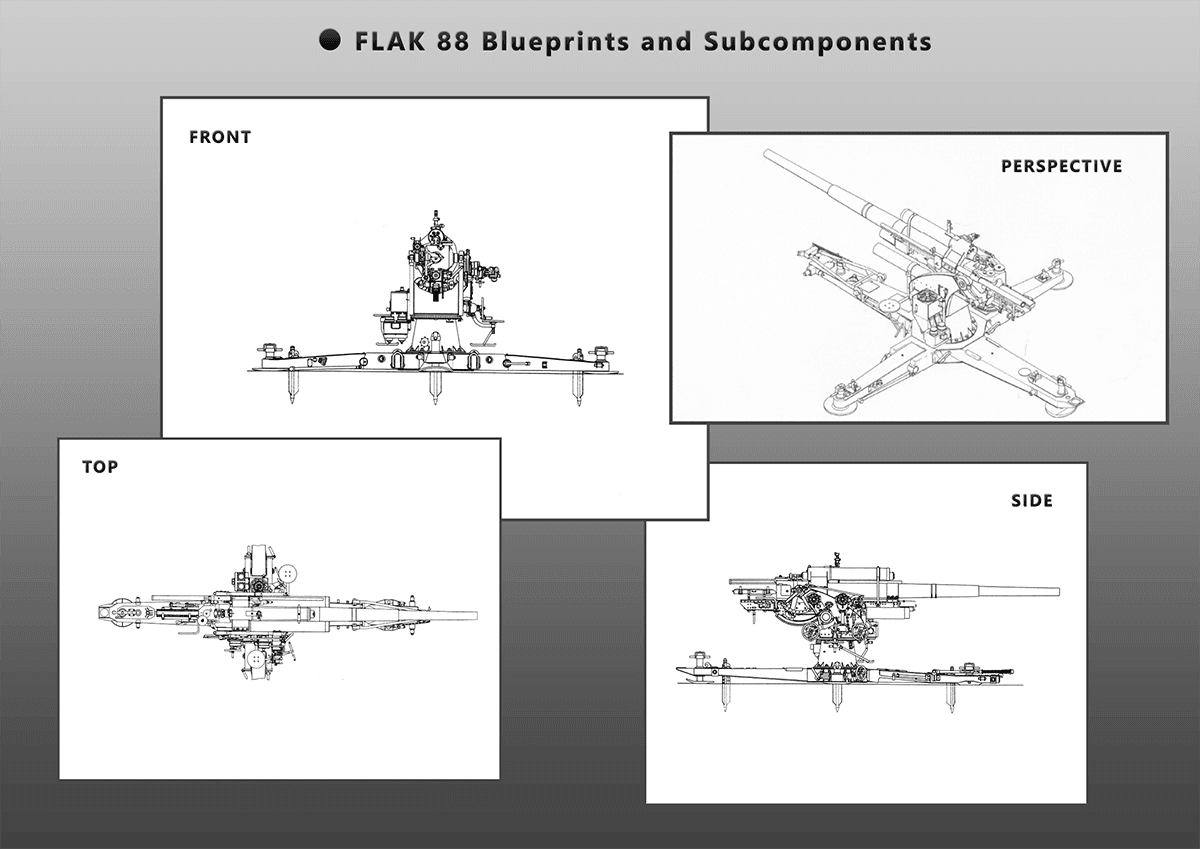
Before starting the modelling process, the first step is to understand how the specific weapon worked and for this we need blueprints, pictures and videos of the real weapon. The Flak 88 is one of the most known anti-aircraft and anti-tank artillery gun from World War II. The versatile carriage allowed the eighty-eight to be fired in a limited anti-tank mode when still on its wheels; it could be completely emplaced in only two-and-a-half minutes. Its successful use as an improvised anti-tank gun led to the development of a tank gun based upon it. These related guns served as the main armament of tanks such as the Tiger I: the 8.8 cm KwK 36, with the "KwK" abbreviation standing for KampfwagenKanone (literally "battle vehicle cannon", or "tank cannon").
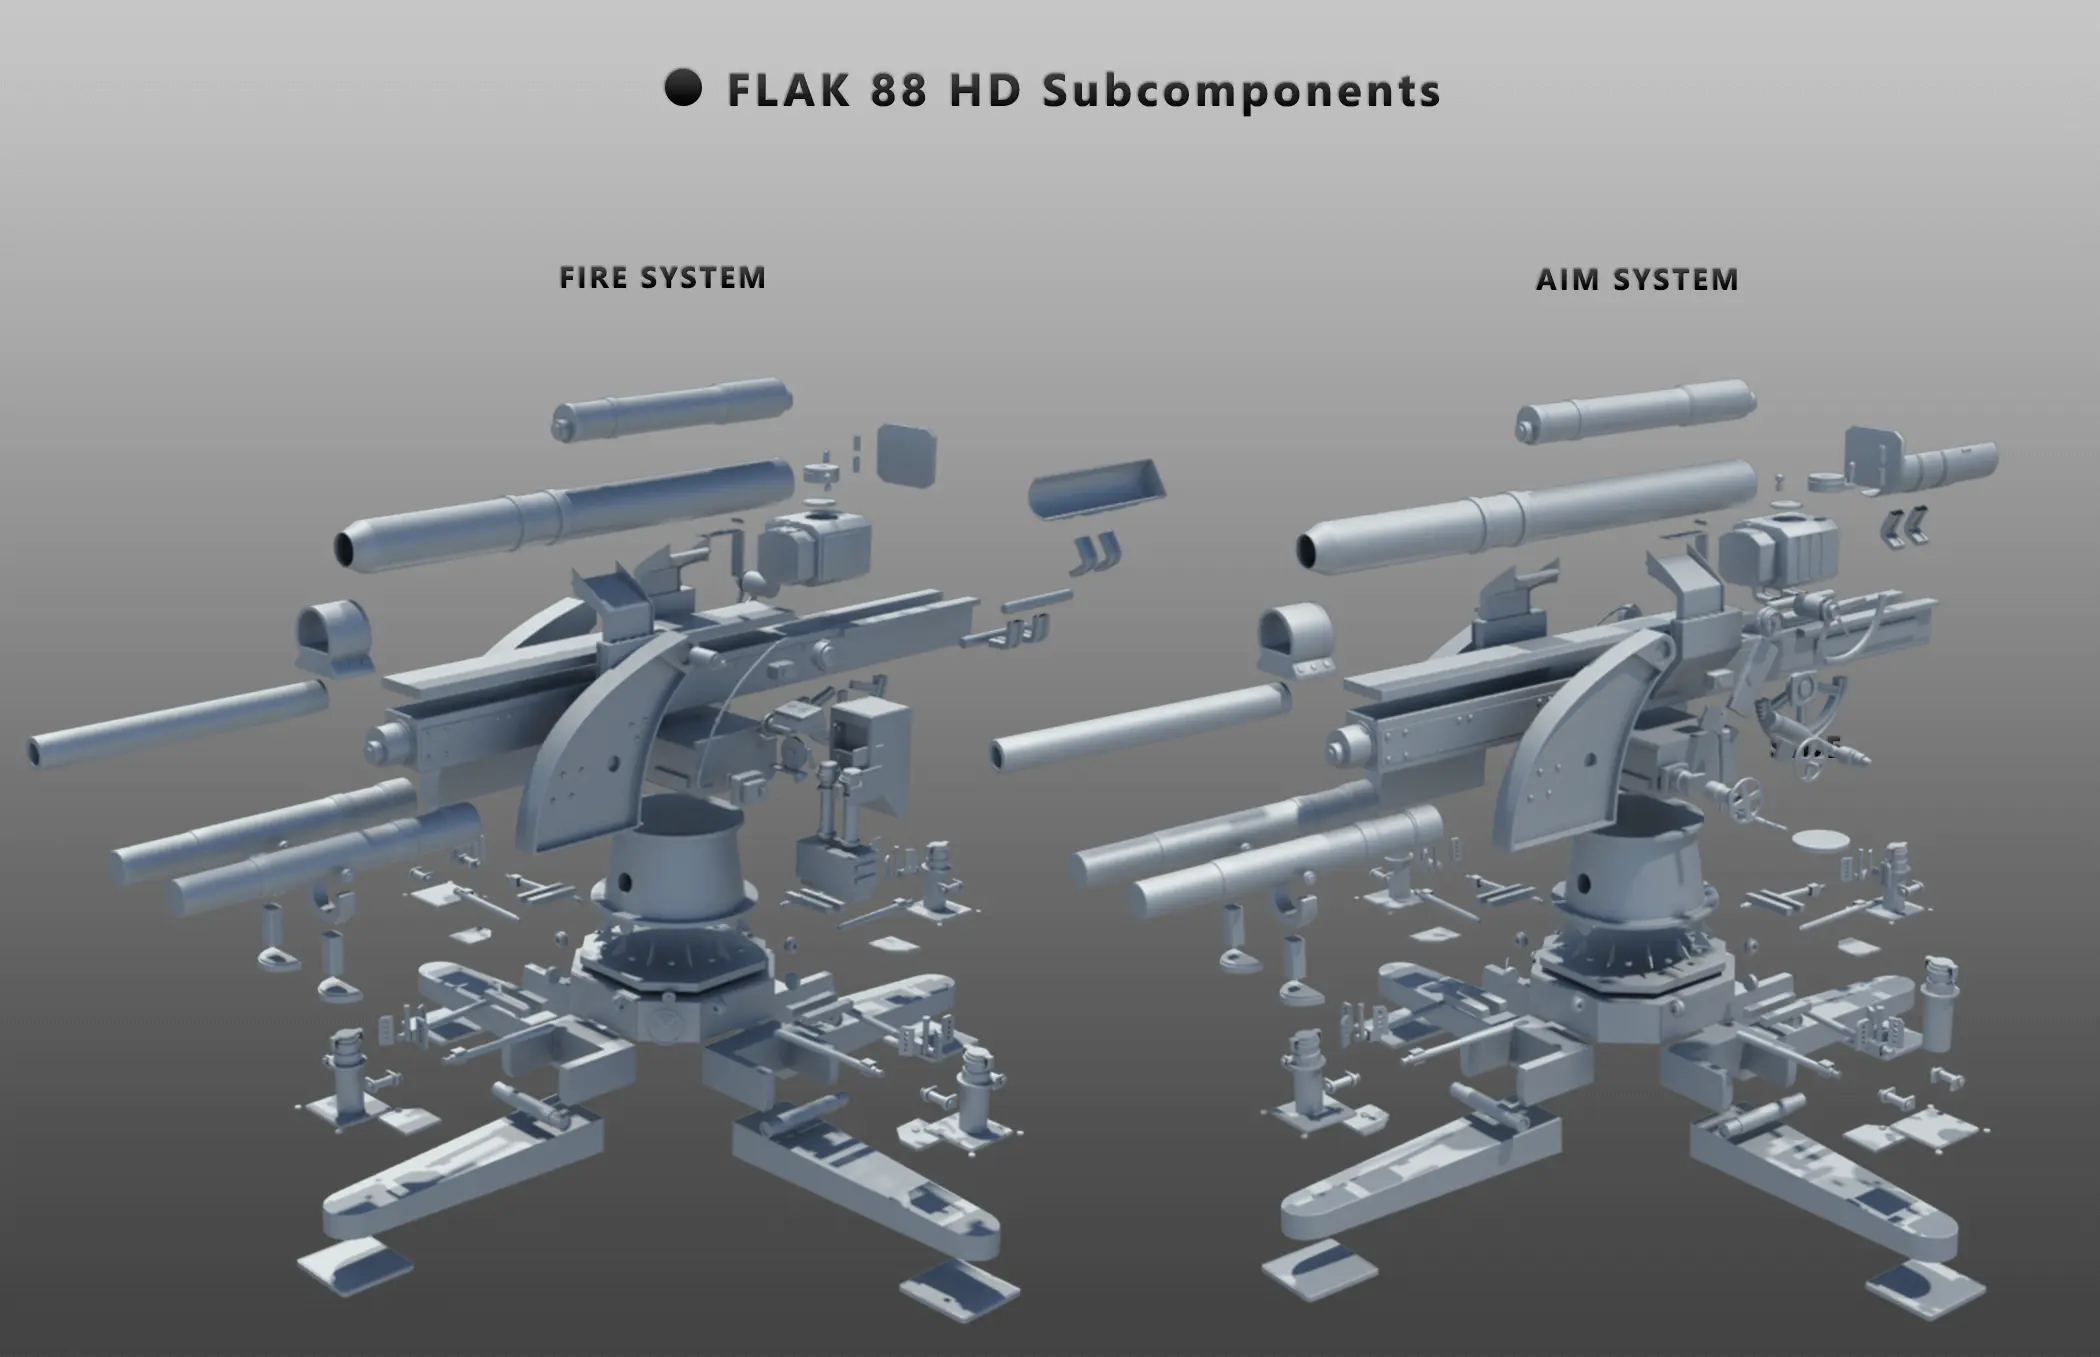
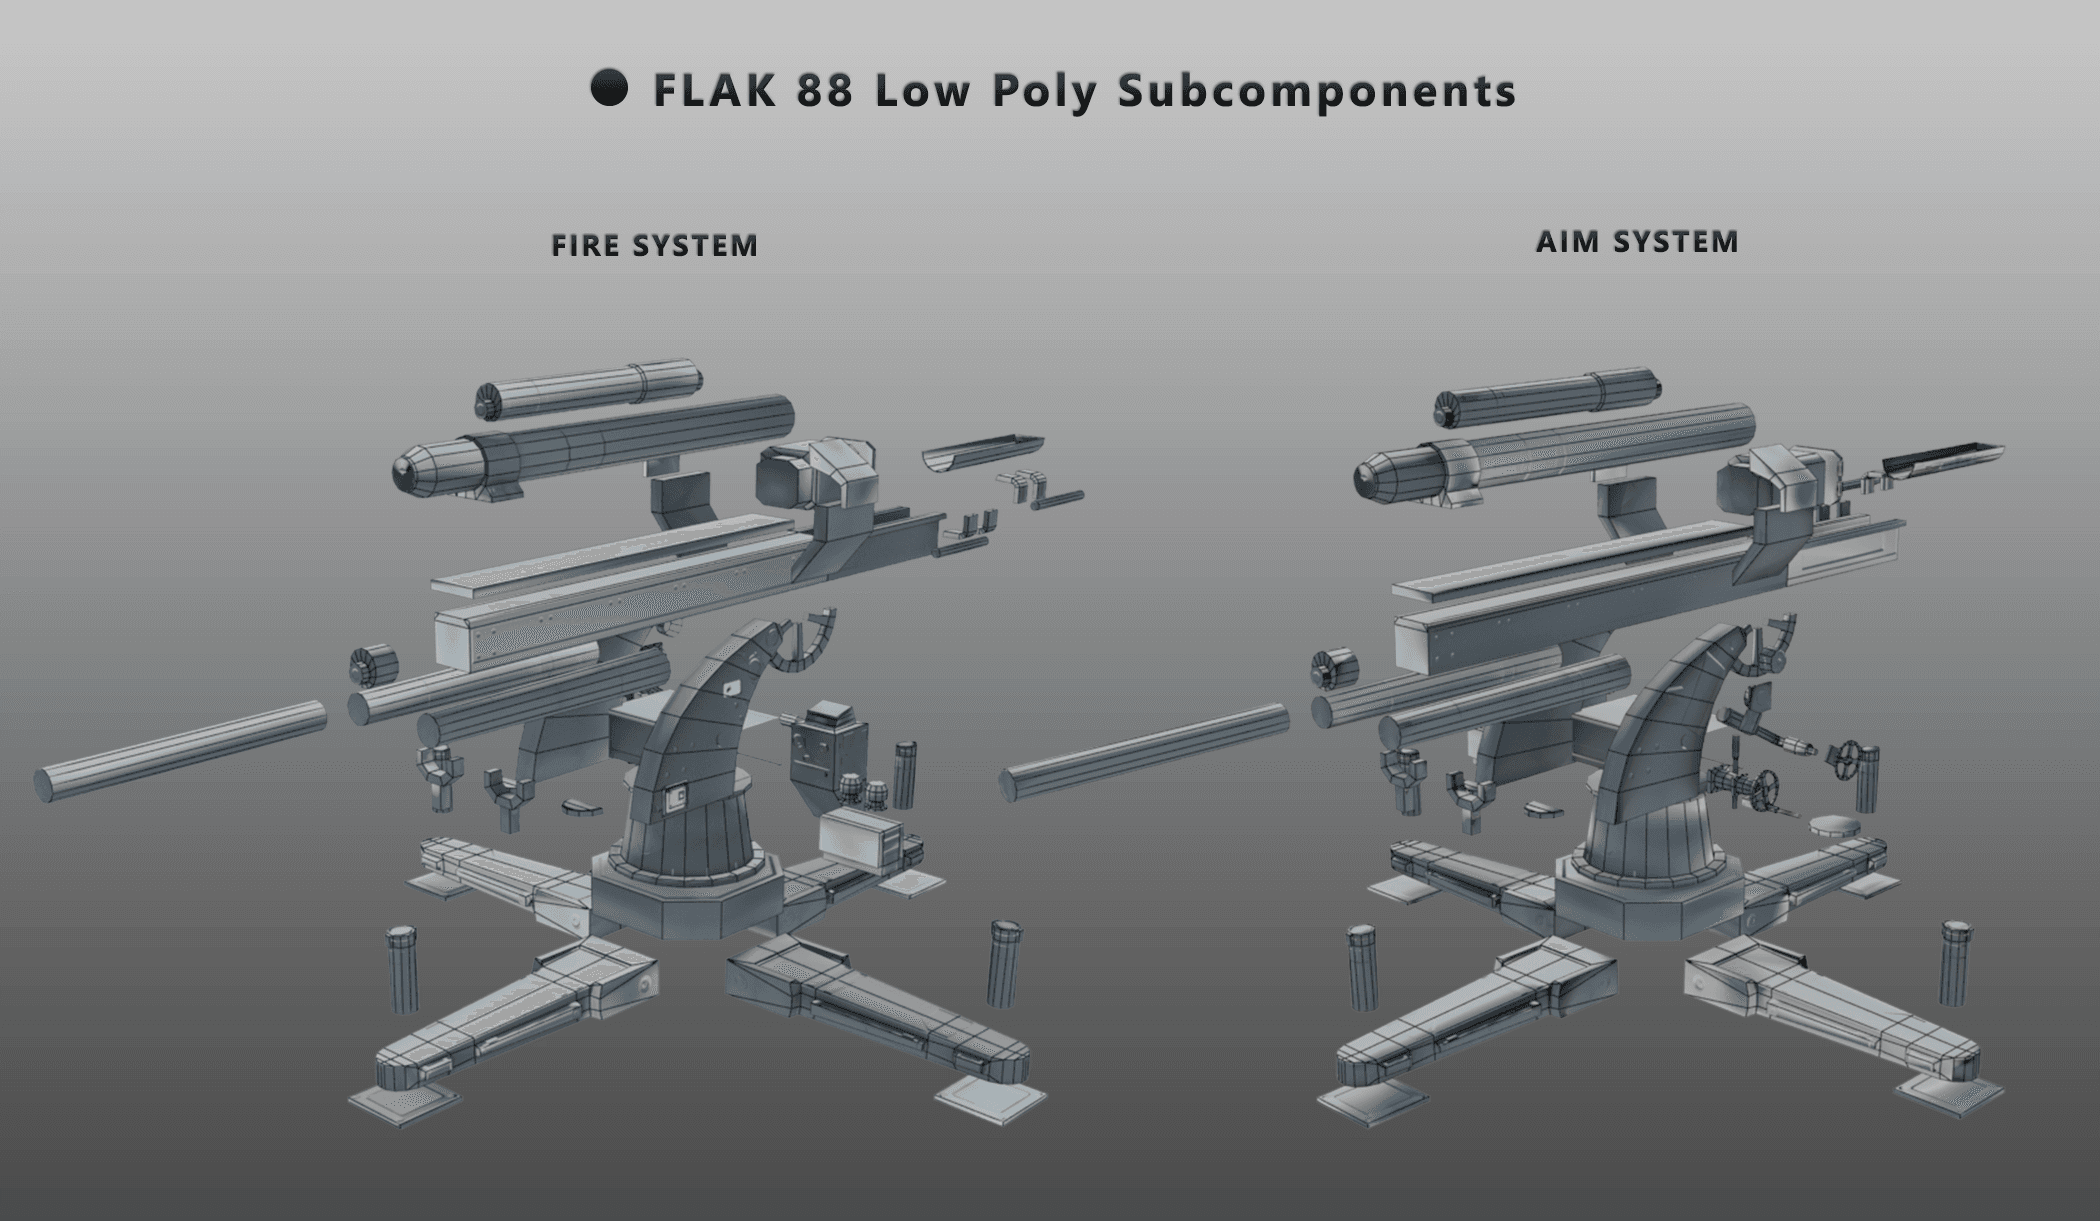
The next step was to divide the model in five core systems that would be used for the ingame model:
- pivot system (the base of the gun with its stationary components)
- aim system( with the soldier controls and the rotation components)
- reload system( reload tray and its components)
- ammo system ( shell and bullet)
- fire system (barrel, recoil components)
The first rule in modeling a high detail model is to create as many components as you need. Never try to create the whole model from one element. The Flak 88 model has over 300 components each a unique 3d mesh. Because the high poly model was intended for game usage the interior components have not been modelled. An example will be the rifling of the gun barrel (the process making helical grooves in the barrel of a gun or firearm, which imparts a spin to a projectile around its long axis).
Each component is modelled from a standard primitive and chamber and inset modifiers are used to give a smooth look. Some of the components have been made with the help of splines, but 90% of the models are from editable polygons. The process is not a very complex one if you have a clean workflow and the scene is well organized in groups and layers.
Once all of the components have been created, the next step is to group them for the low poly model topology and map extraction. One important aspect is that depending on the low poly model complexity and maximum poly count, we can group the high poly model to add or exclude details from the game ready asset. For our purpose the ~2000 polygons model will have less details than a PC model that will have between 8000-15000 polygons. The best think is that with a high definition model we have the top asset and from there we can downgrade for mobile, pc, or console assets with ease.
As with the soldier mesh, we create a low poly model on top of the high poly model, but in this case our mesh will not be a one on one retopology. In other words we will create a low poly component from a group of high detail components. To better understand the level of detail that was extracted from the high poly model we can view the low poly model subcomponents with normal map and a wireframe.
All five core systems from the high poly model have been preserved but most of the “detail” subcomponents have been integrated in the normal map. As in the previous presentation, the normal map is a key component in the developing process of a game ready asset and in this presentation we will explain in more detail the purpose and how to create a normal map.
Normal mapping is a technique used for faking the lighting of bumps and dents and add details to a model without using extra polygons. It tells the engine how to display the light hitting the object.
Current hardware can only handle a certain number of polygons still, but normal maps give us more detail without actually stressing the processors as much as trying to render the high poly models that the normal map comes from.
For creating a good normal map you need to take the fallowing steps:
- match the low poly model to the low poly model (retopology)
- everything must have a unique UV space(creating mirroring and flipping is allowed and the engine can just use the facing direction of the UVW chunks)
- have as few seams as possible and hide them in in non-visible arias.
- setup the cage(without a cage all the rays cast in the bake will travel the same distance)
- try to have the cage as close as possible to the high poly model
- tweak and clean the normal map in Photoshop by using the RGB channels to paint and/or repair the map
- a good trick is to render the base normal map at a higher resolution than the ingame map( usually at 2 or even 4k for extracting detail from a 5-10 million polygon model)
Rigging is the term used for creating links, joints, connections, wire parameters or constrains so that you can animate a 3d model. At the same time this terminology isn’t used only for animating characters that have a biped skeleton structure. From a handgun, car, robotic arm, head and so on, everything can be rigged, but depending on the model different techniques will be used.
In our case, I used 3 rigging methods to create the fire, reload and rotation animations for ingame usage. The first step was to modify the position of the pivots for the subcomponents so that they would move, or rotate from a specific center position.
The next step was to create a link constraint between the subcomponents. These acts like a physical connection tree that makes the child subcomponents move/rotate after their parents.
Once this was done, I wired the parameters of the two rotation wheels with the FlaK 88 vertical and horizontal rotation subcompoments. Wire Parameters lets you link any two object parameters in the viewport, so that adjusting one parameter changes the other automatically. This enables you to set up one- and two-way connections between specified object parameter. In our case I wrote a simple expression: Rotation: Euler XYZ: Y Rotation: Float Wire= Euler XYZ: Y Rotation*1/12: Float Wire.
For the horizontal rotation I used the same expression only that I changed the y axis with x one and the ratio was one on one.
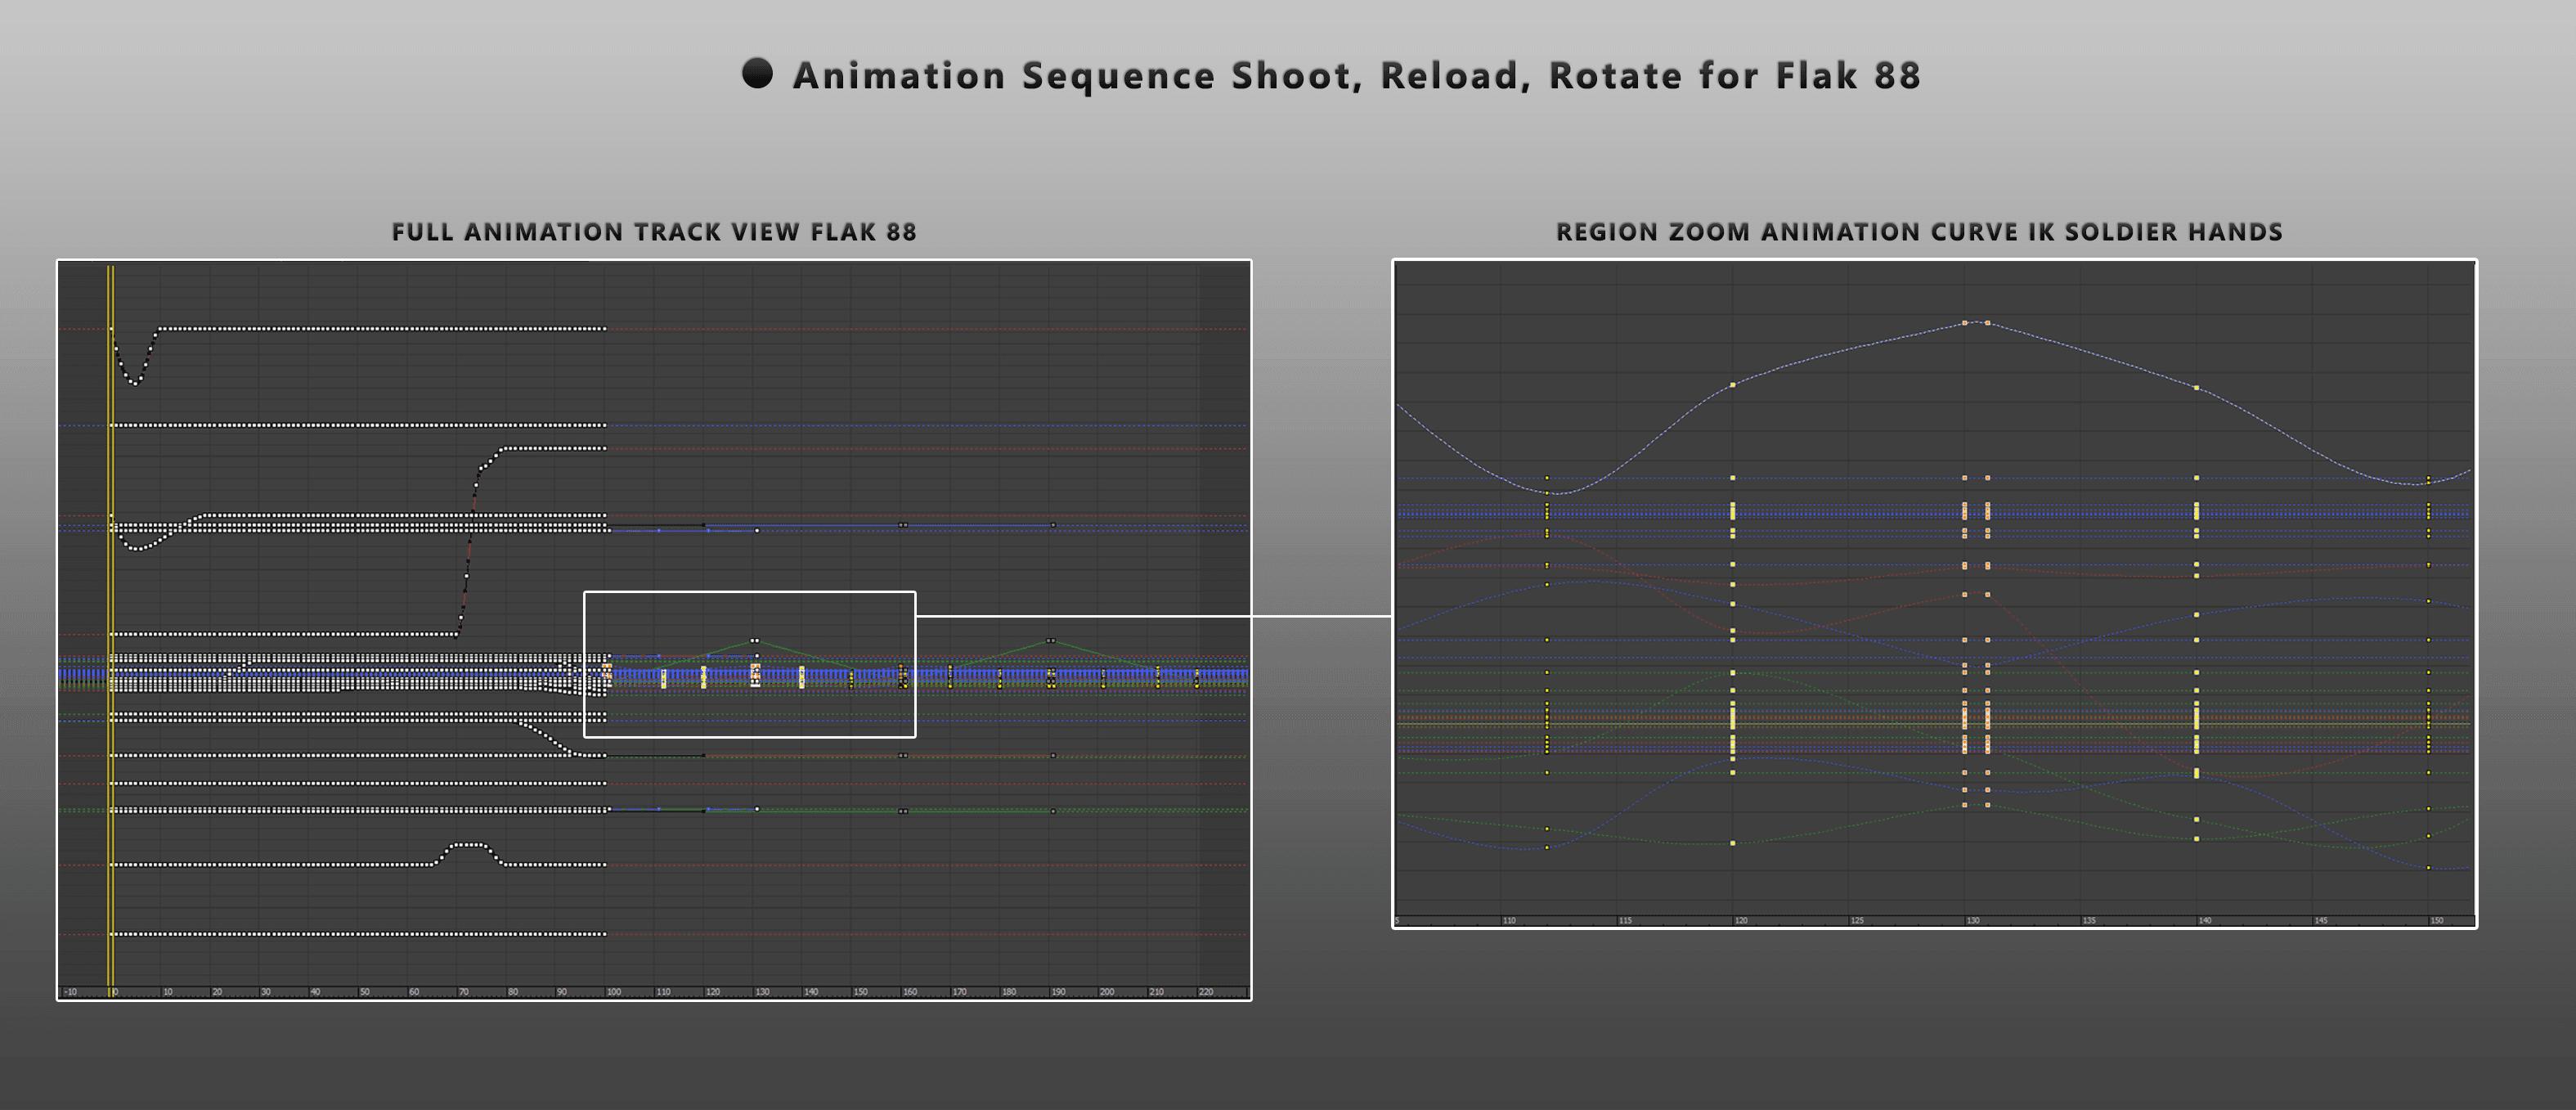
The final step was to connect the soldier hands and animate them when they rotate the wheels. For this I first positioned the hands over the wheels and then used the Inverse Kinematics (IK) to link them to the wheels. Inverse kinematics (IK) uses a goal-directed method, where you position a goal object and 3ds Max calculates the position and orientation of the end of the chain. This is why, IK requires greater thought about how to link the objects and place the pivots.
Once the rigging is complete, animating the Flak 88 is quite a simple process that requires dividing the animation in three subcomponents (shoot, reload, soldier hands movement) and creating a loop. To achieve the shoot and reload animation, I studied actual movie clips from WW2 and then animated each subcomponent on a time line with different spline types (linear, smooth fast, slow or custom made). This splines show the evolution of a transform (move, rotate on XYZ axis) in a time interval and by modifying the curve we can achieve effects like acceleration, deceleration, full stop and so on.
In creating animations there isn’t a hardcoded rule in how many frames, or what kind of splines to use. The best way to test if your animation is good is to compare it with real life footage if you have that resource available. Another way is to play the animation at half speed and/or play it backward.
A good animation is an animation that doesn’t pop out and no matter where u pause it and when you resume, it feels as natural as playing the complete clip.
The main purpose of this presentation was to continue explaining the process behind developing game ready assets for mobile platforms started in the previous blog entry (The Pipeline Behind Modeling and Animating a Game Character in Zelgor). At the same time, core components like normal map creation and rigging have been explained in a higher detail and new components unique for this asset have been introduced.
Another aspect introduced, was the process of using game assets previous build (World War 2 marine) and integrating them in the new pipeline. As we further move along, new components will be presented and old ones will be better explained. At the same time I will try to slowly enter the game engine and see how we use our assets for the final stage in game developing.
Uptate: Please read my last articole too, it's called: Mechanical Rigging - Dreadnought Animation Setup
→ If you want to find out more about the author of the article click play on the below video.


